# Tutorial 1: How to cut an animatic and retrieve the cut scenes?
In this tutorial, we will see step by step:
- how to cut an animatic video file
- how to retrieve all the cut scenes
- how to change the timing of an episode
# Episode preparation: cutting the animatic
Pre requisites for this tutorial are:
- An animatic video file
- An edl (edit decision list)
The animatic file is called WH_100_TitleSequence_Animatic_V008.mp4 (opens new window) and the edl (opens new window) used in this tutorial is shown below:

Let's now open the episodes page and go to the episode timing section. We will now select an episode from the list of episodes. For this tutorial, we select episode WH099:
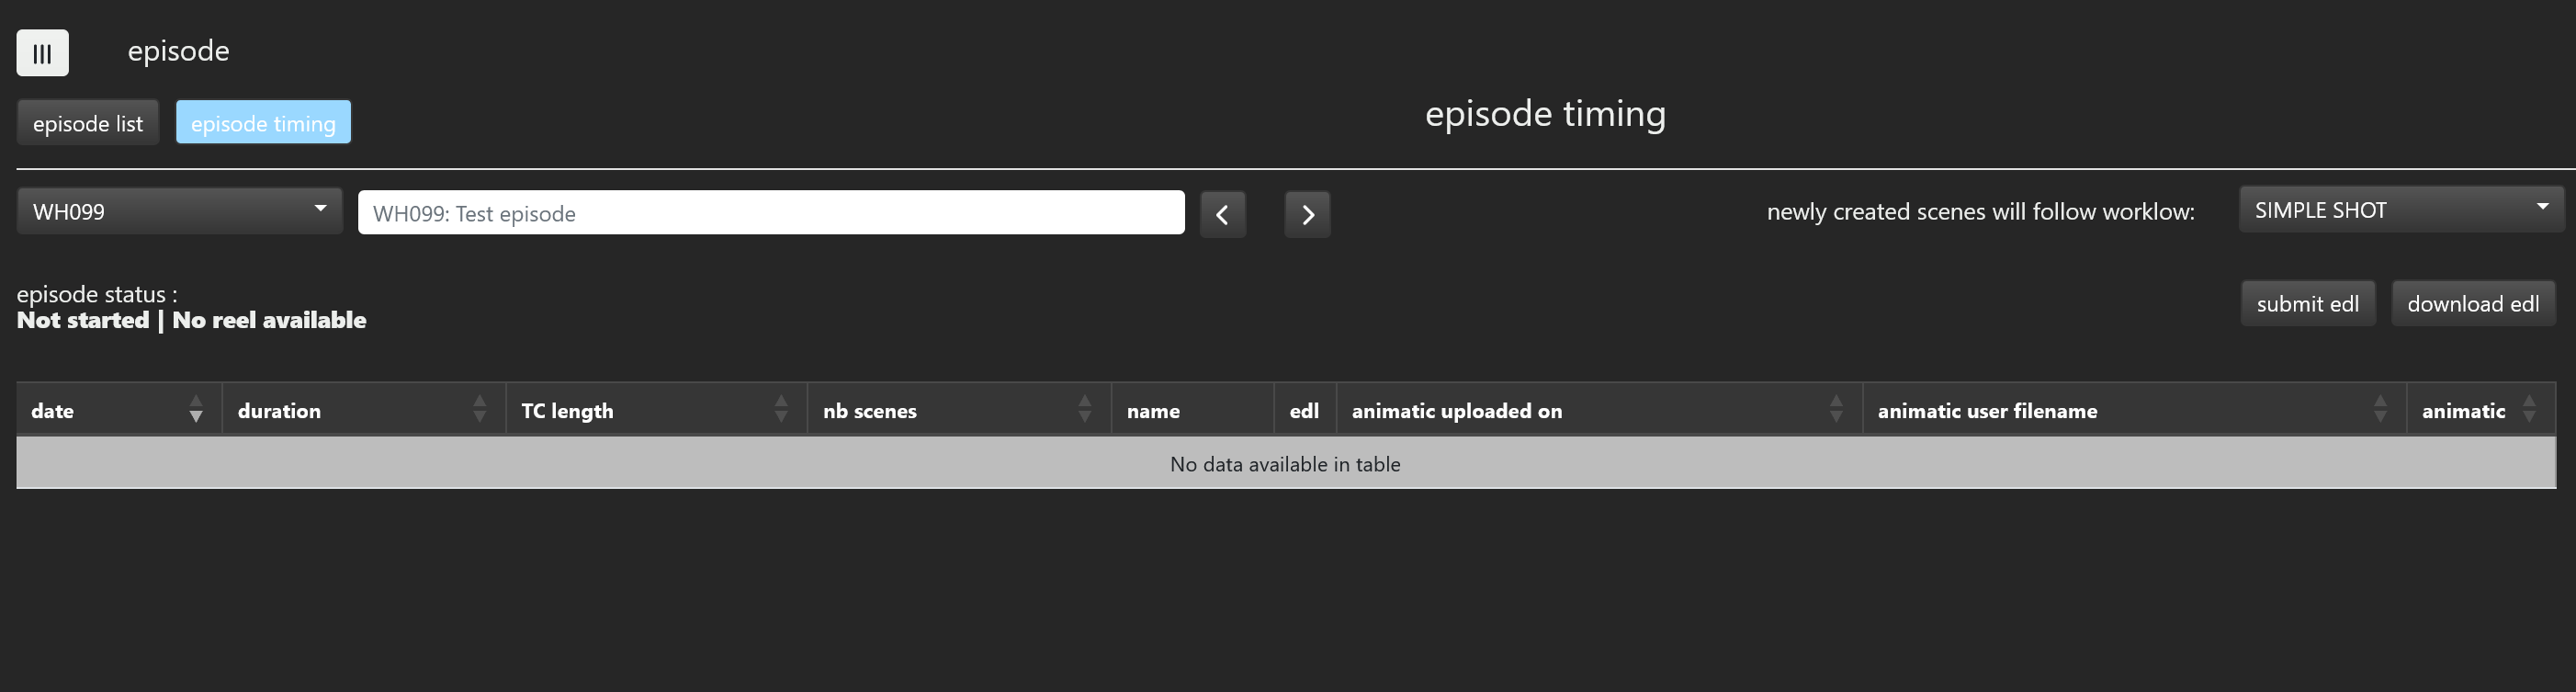
If you decide to choose another episode, make sure you start with an empty episode. An empty episode has its episode status field set to Not started | No reel available. For now, the newly created scenes will have the default workflow called 'SIMPLE SHOT'. You just need to know that you can assign workflow to shots after the episode preparation. You now can upload the edl with the submit edl button.
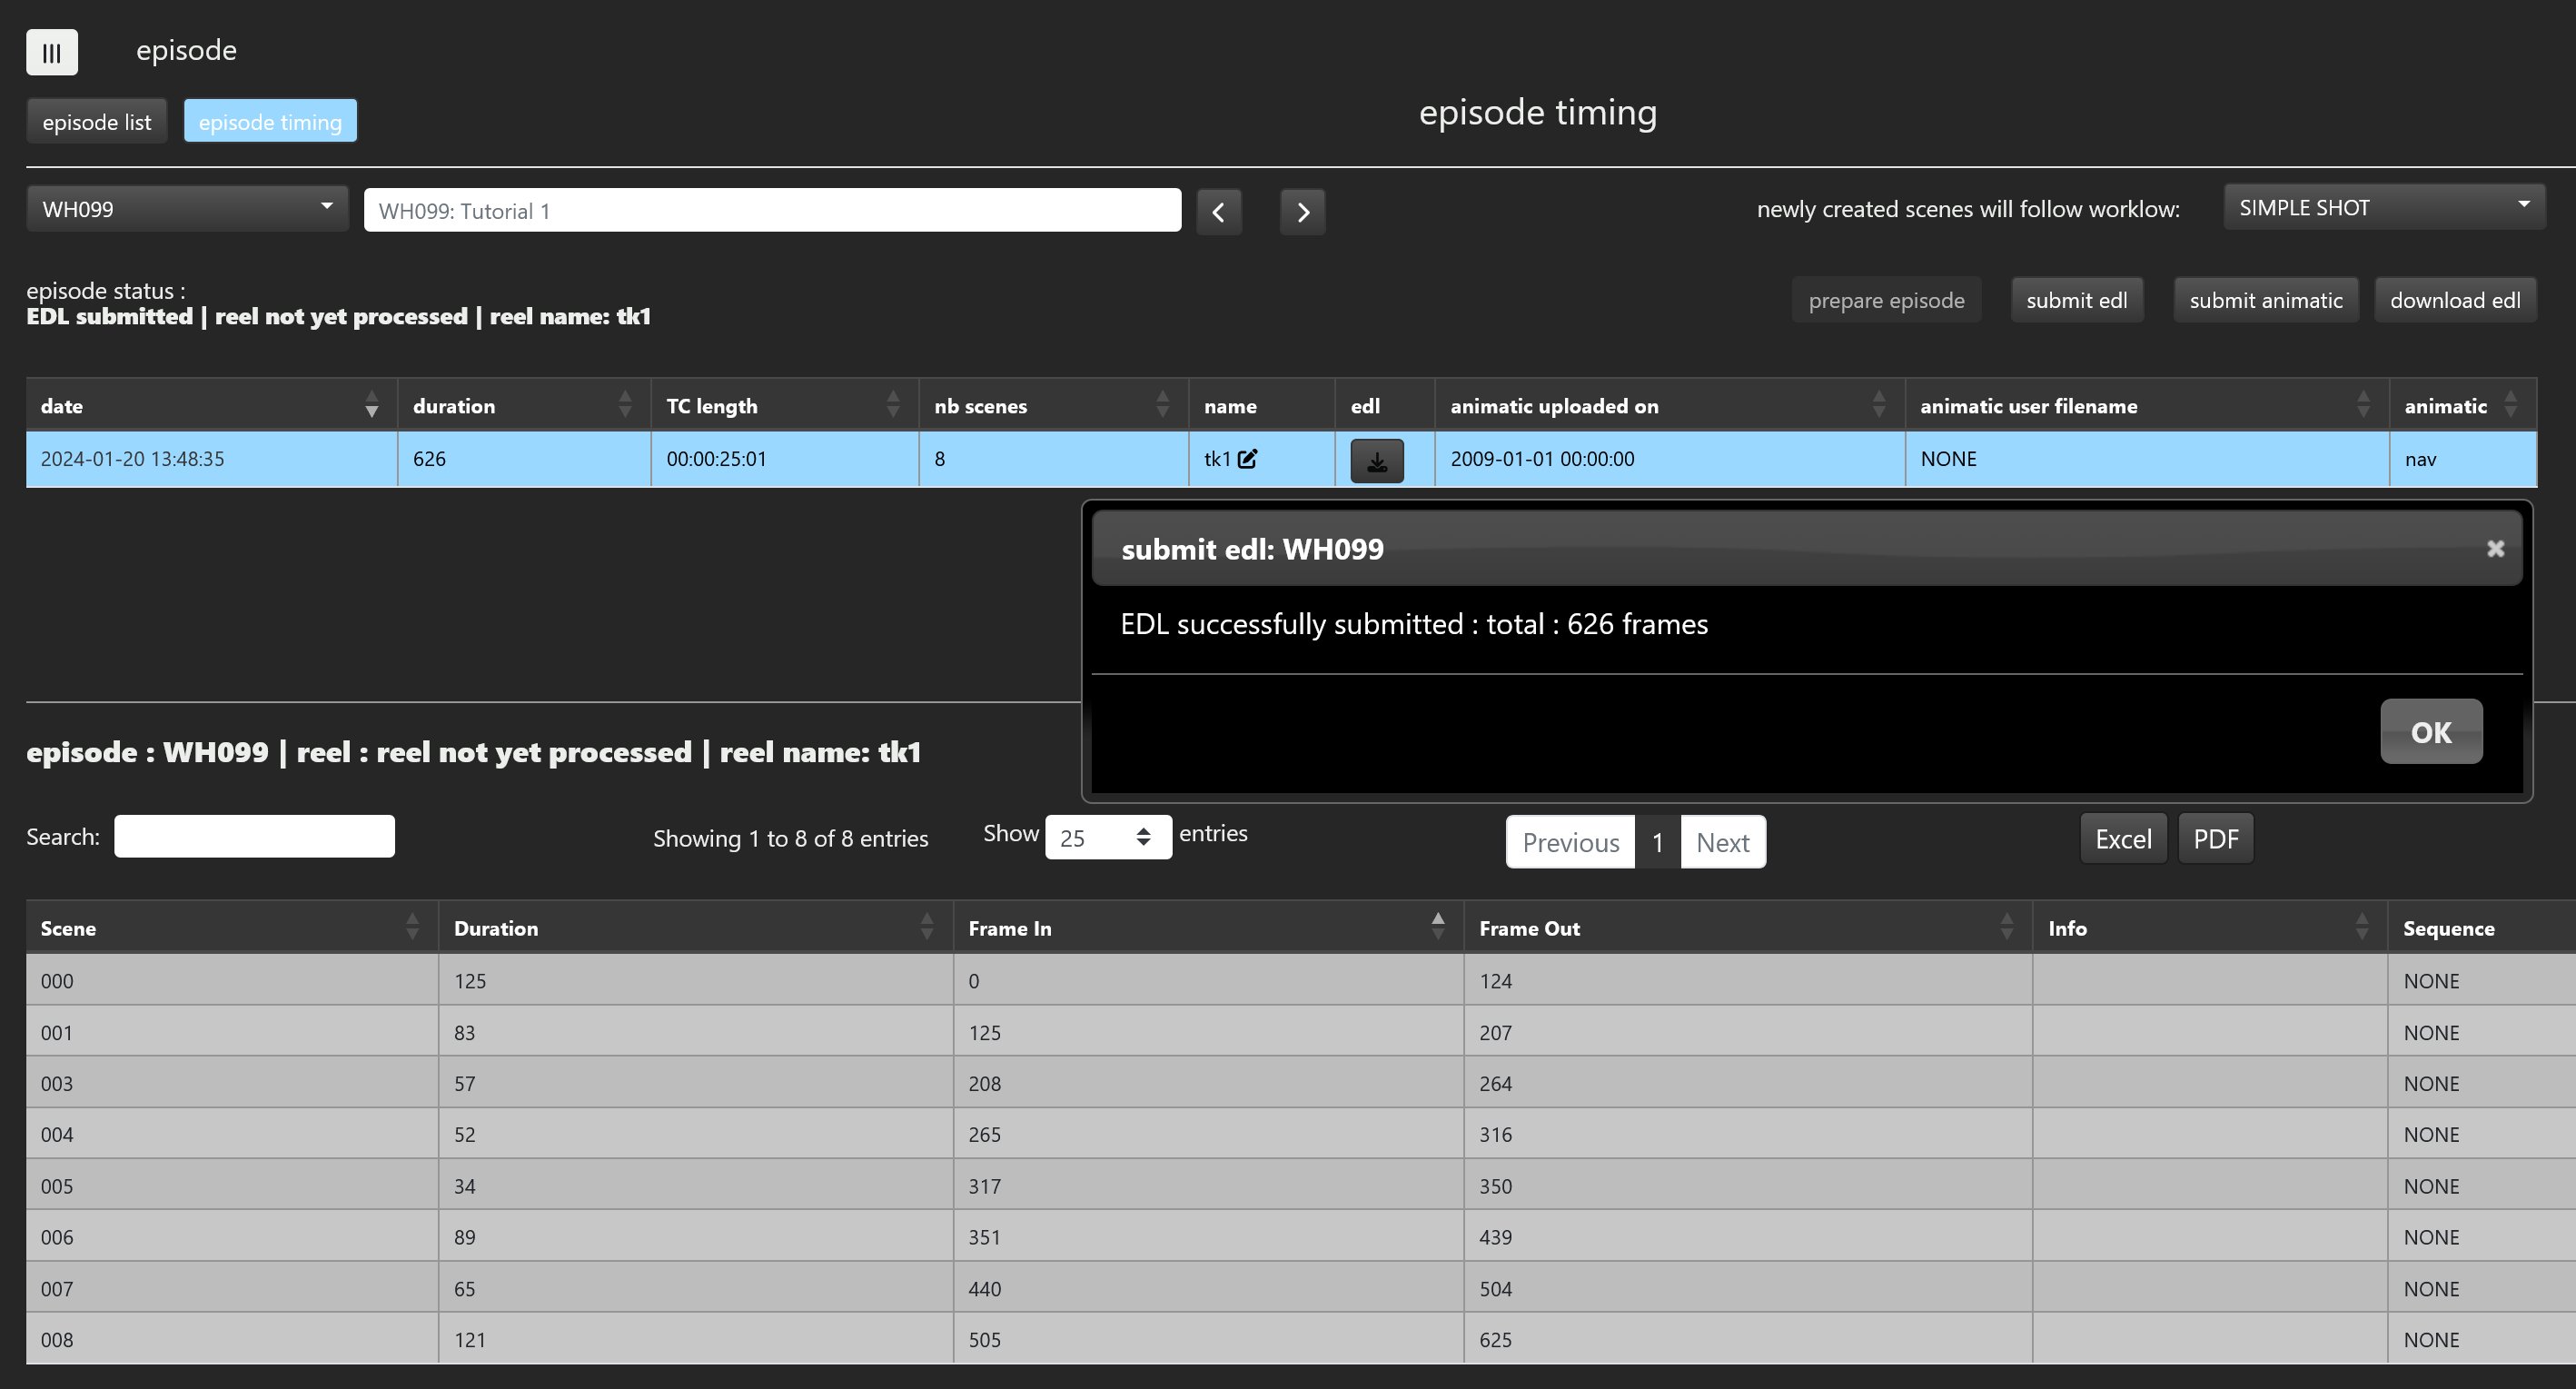
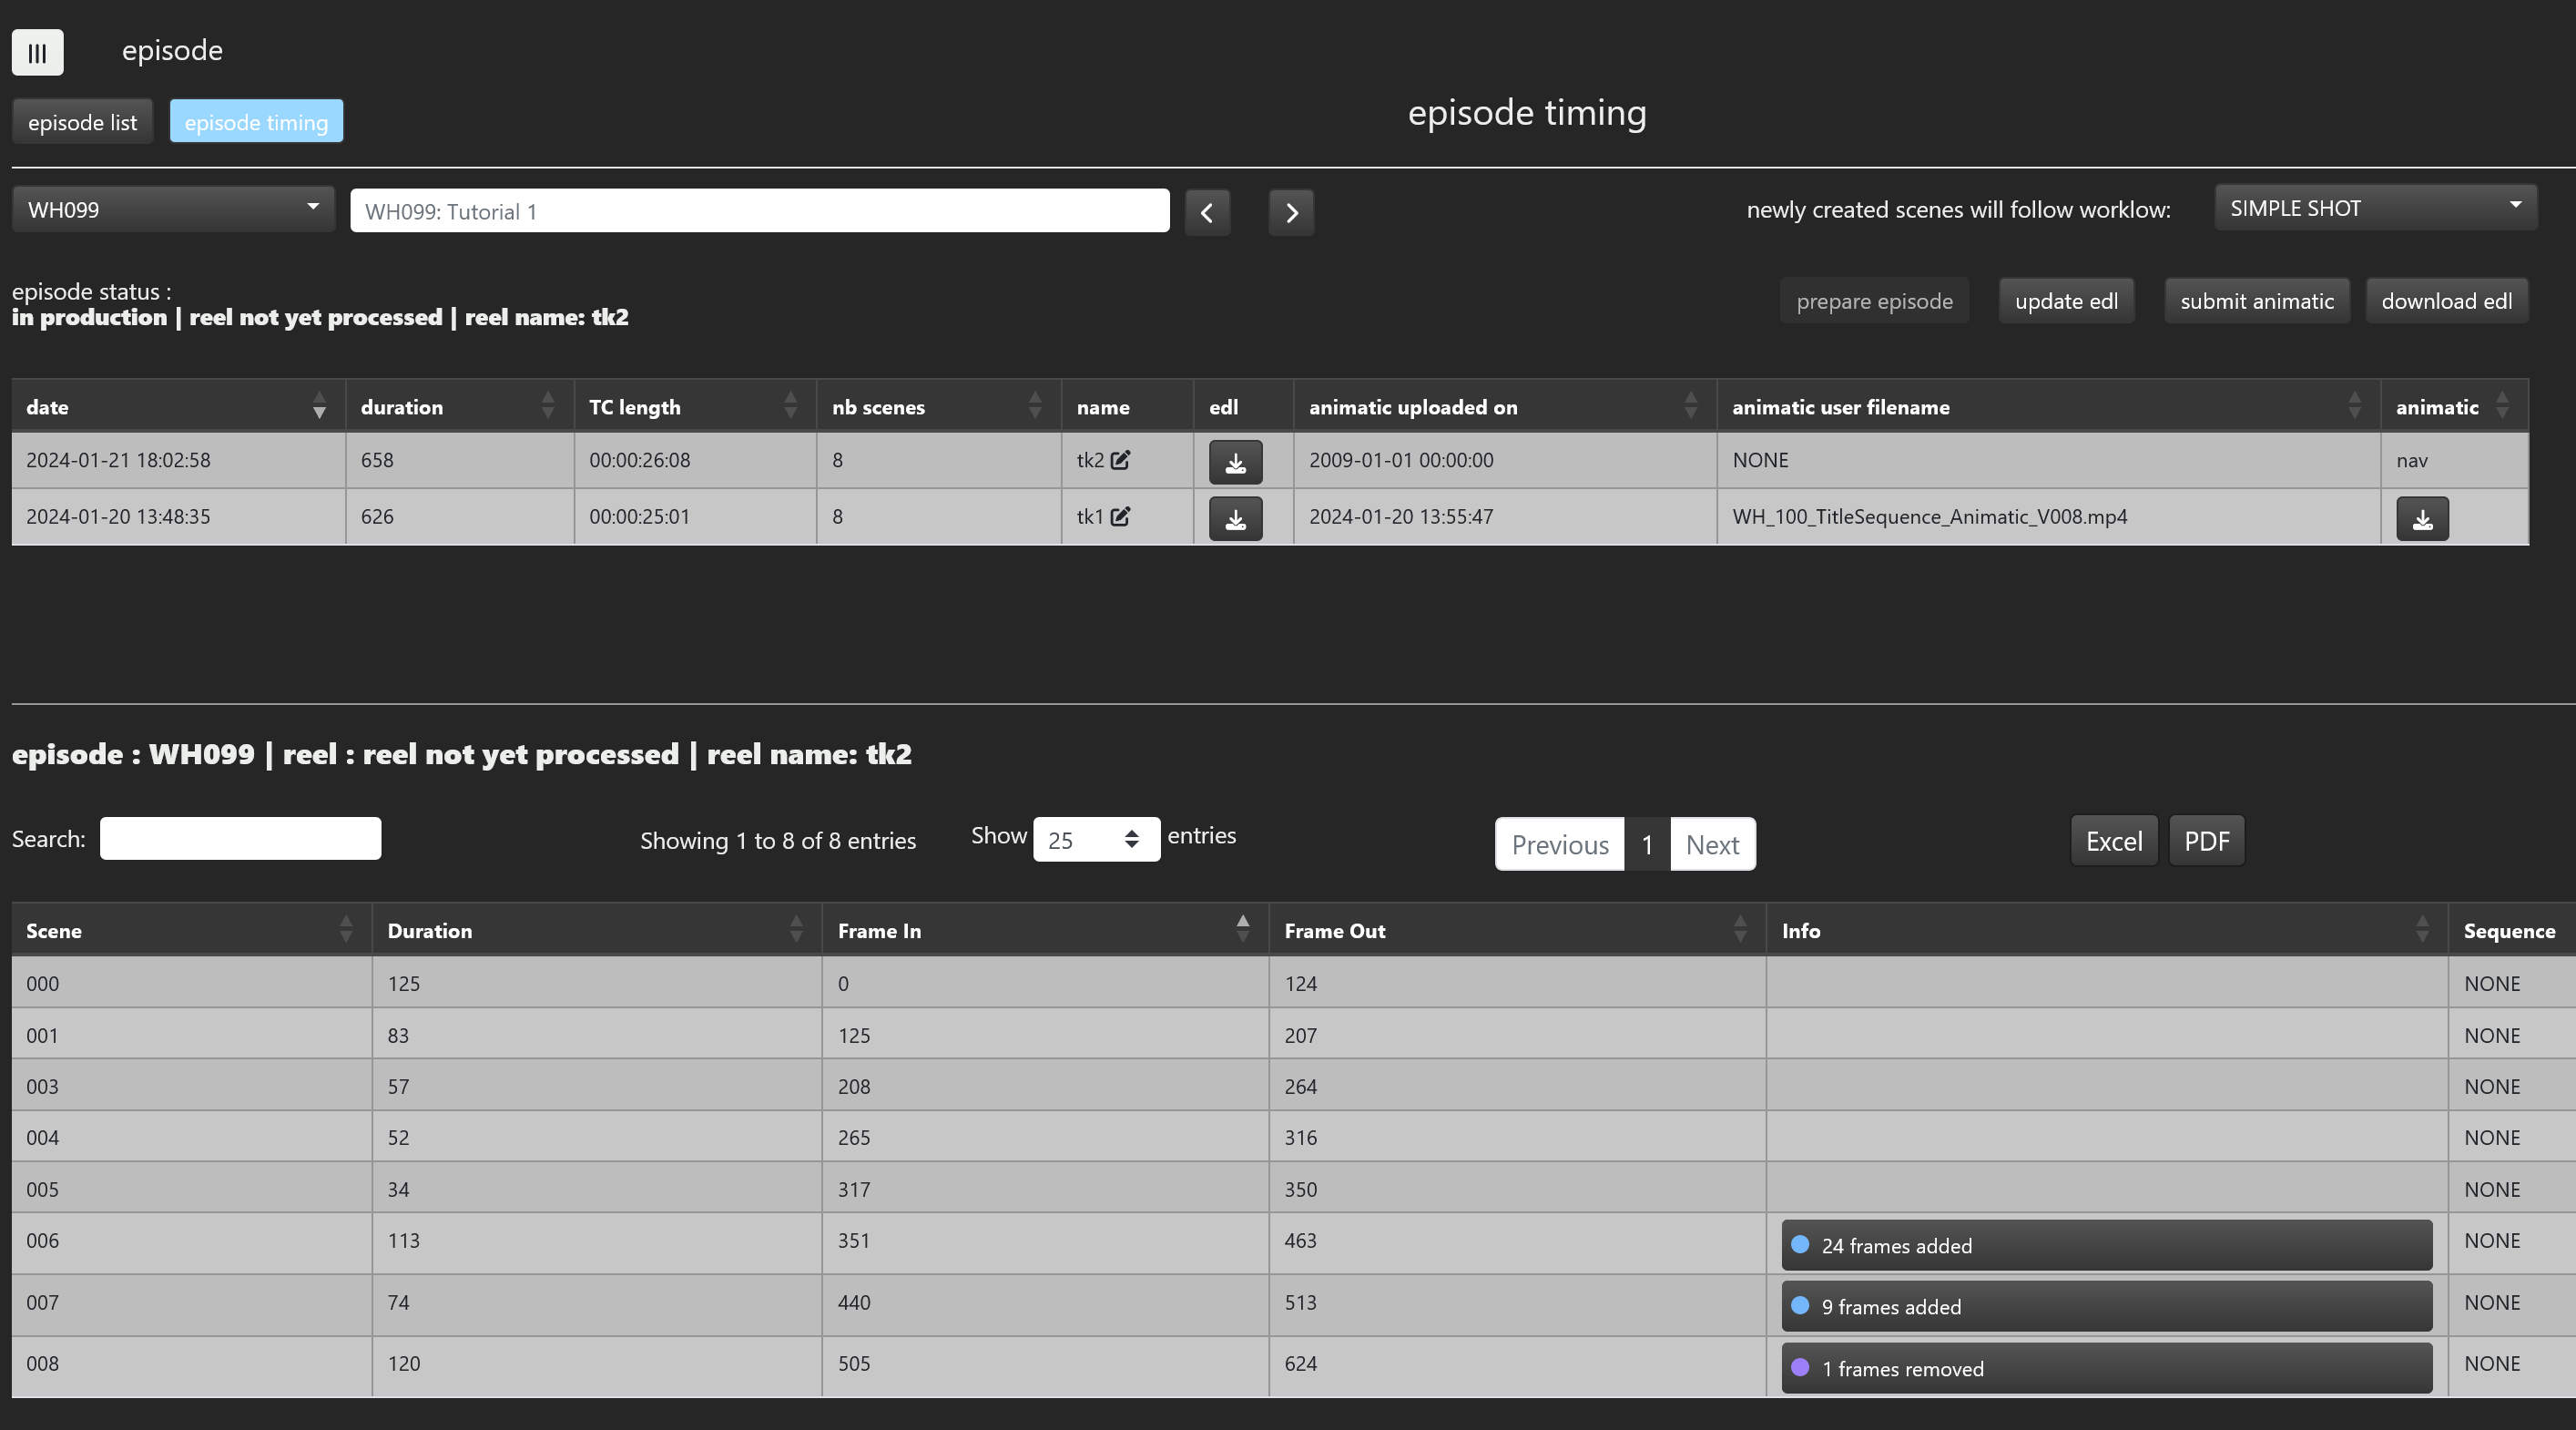
All the scenes specified in the edl have been created under WH099. Let's now upload the animatic WH_100_TitleSequence_Animatic_V008.mp4 (opens new window) with the submit animatic button.
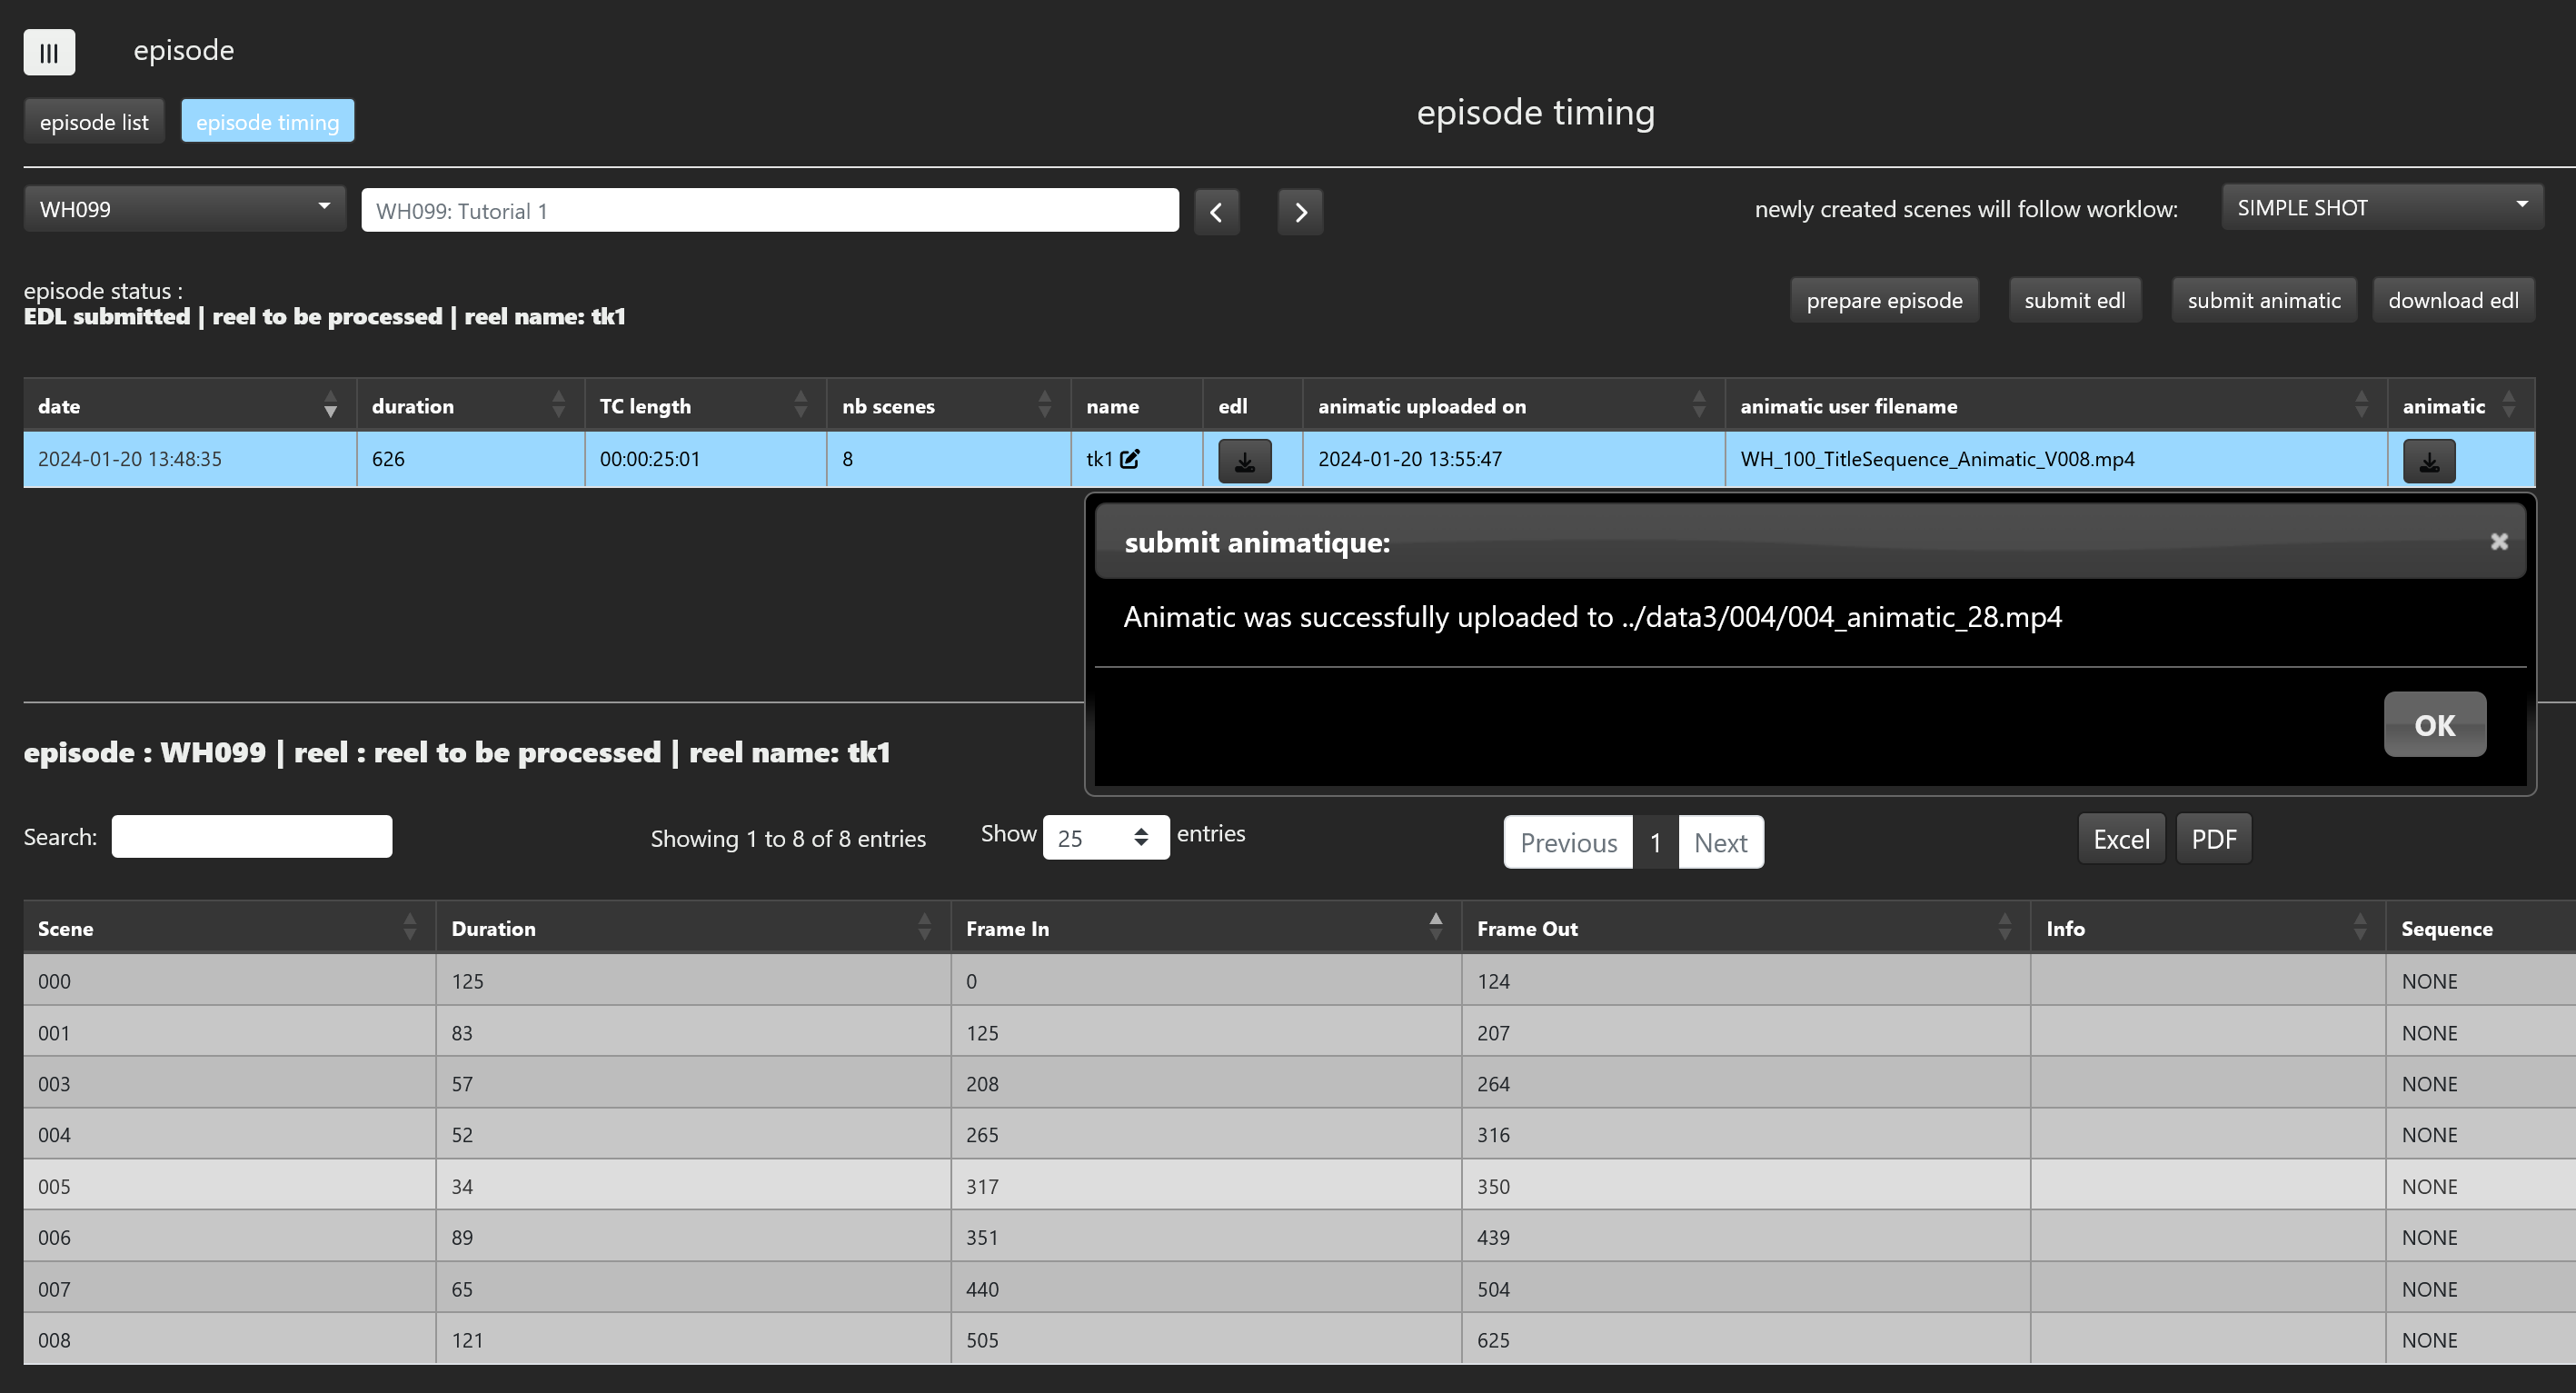
We now can launch the preparation of this episode through the prepare episode button.
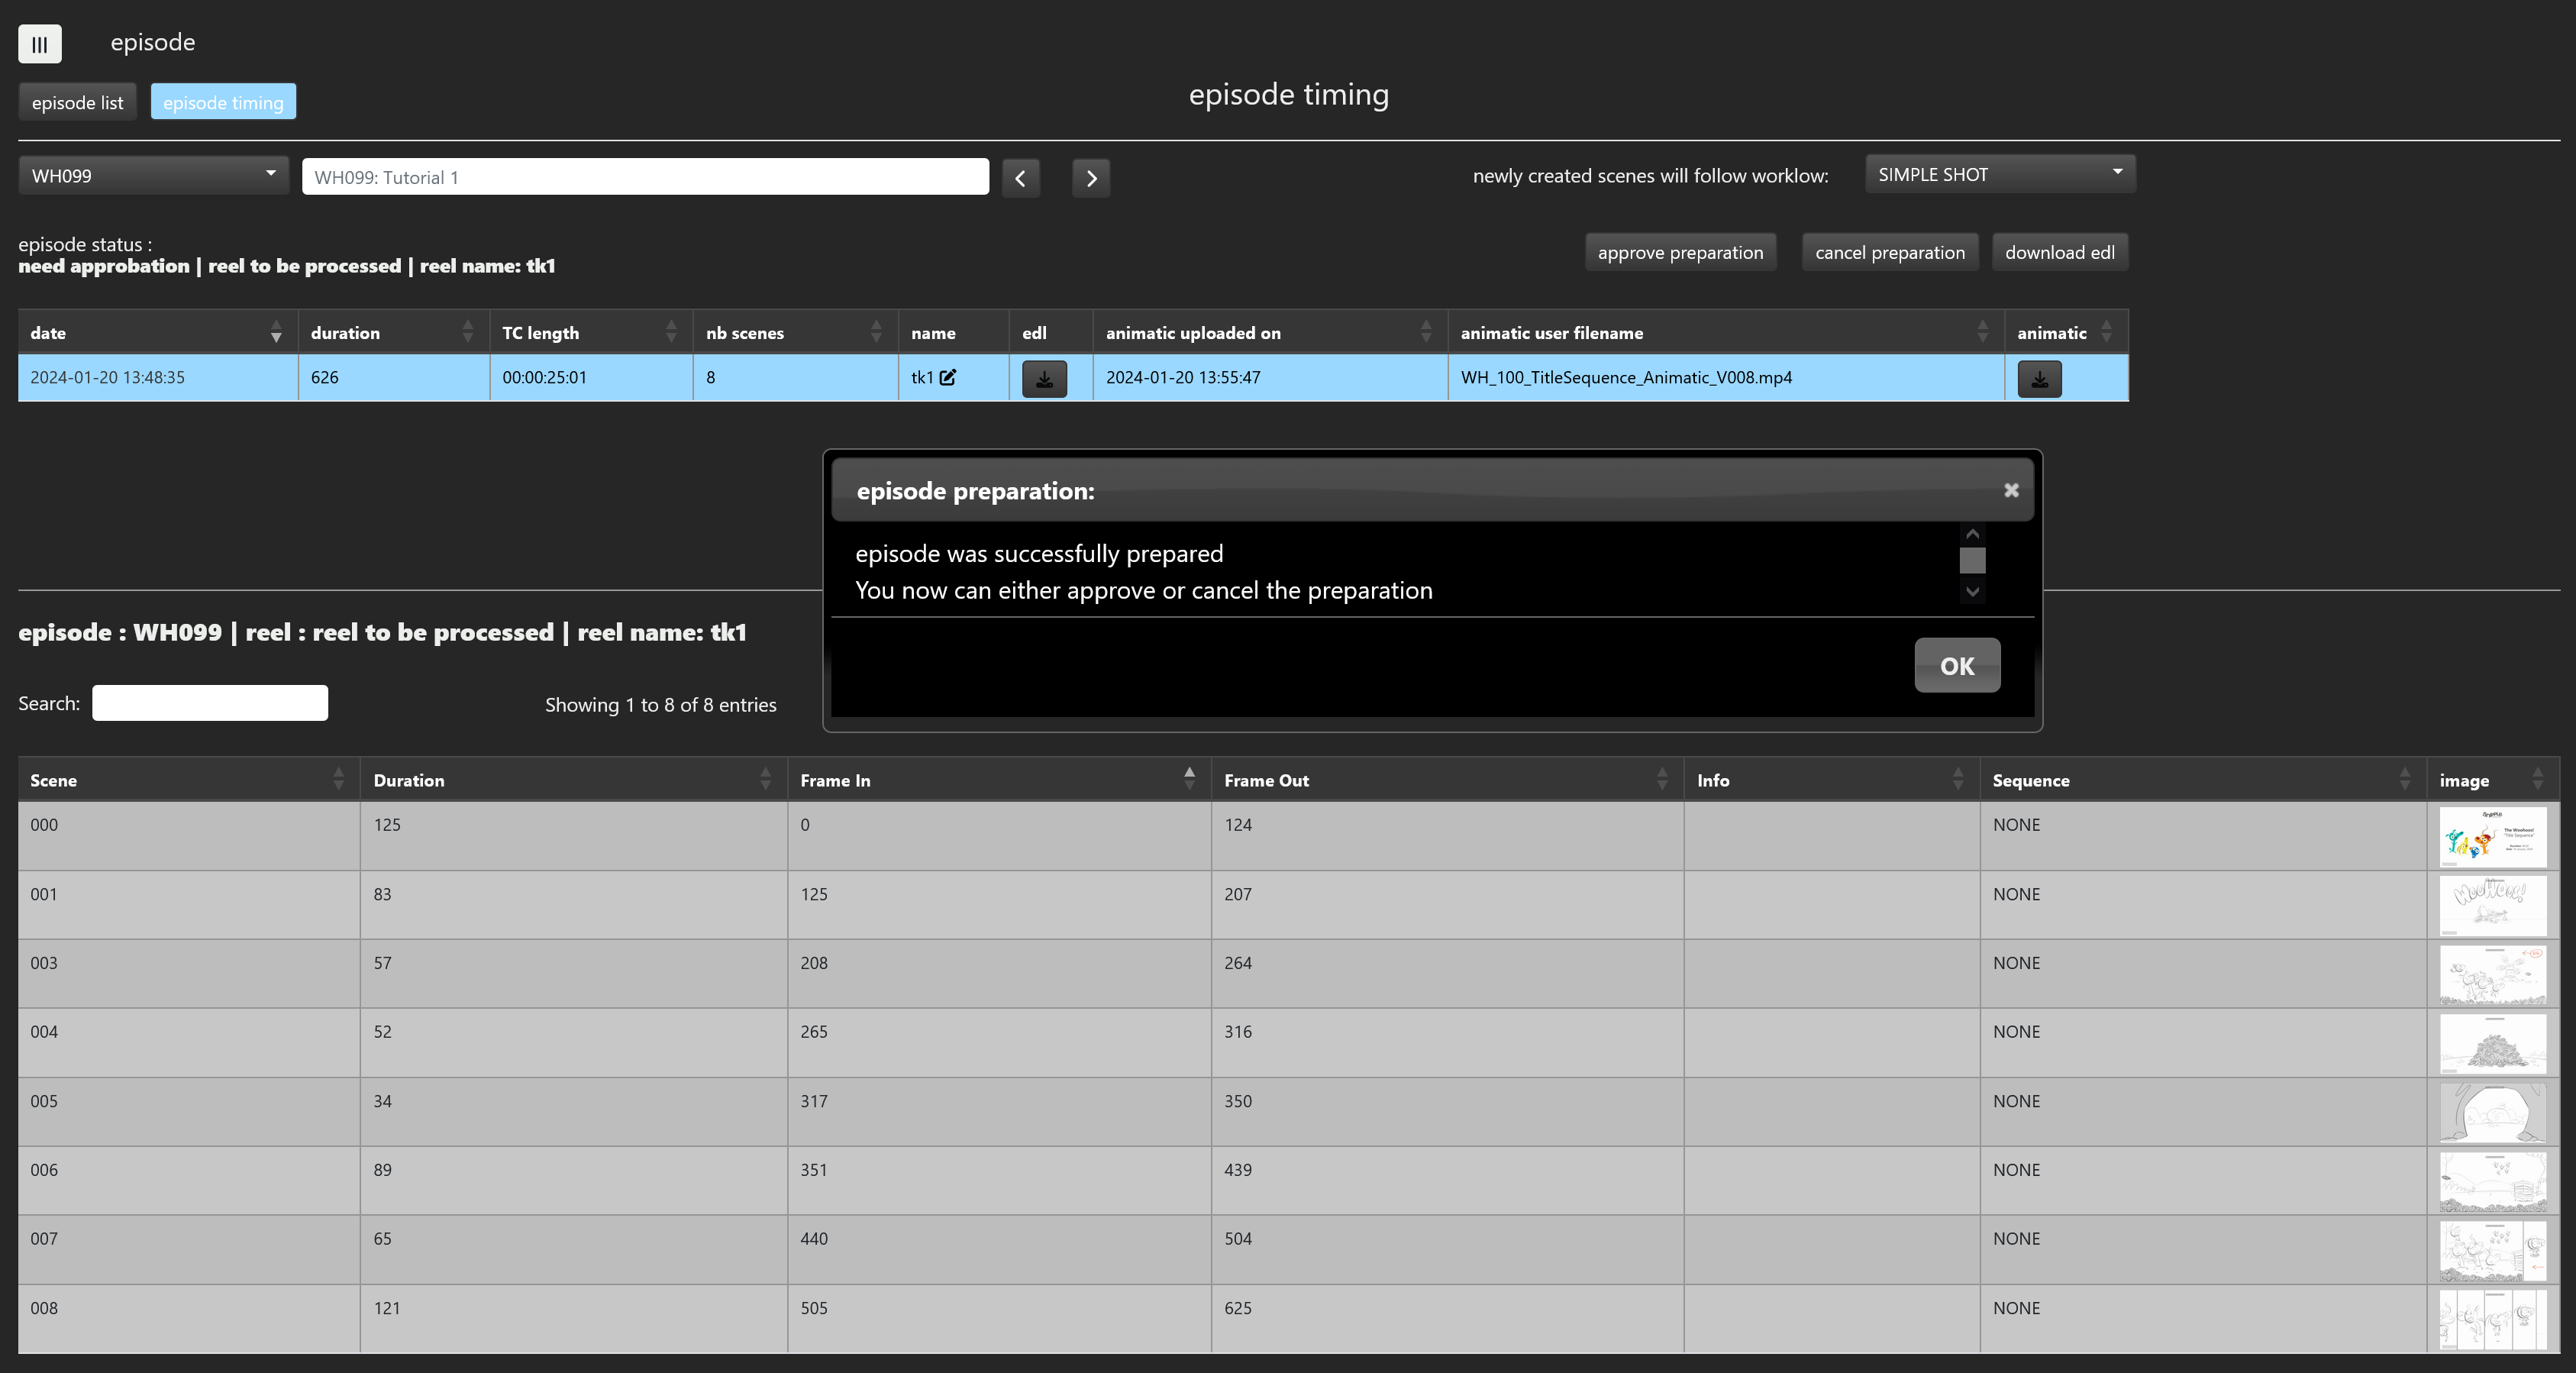
Notice that the image column for all scenes now contains the video cut from the animatic from frame In to frame Out. If you click on the image column, it will bring you to the main viewer where you will be able to check if the cut scene is what you expected. If you agree with the preparation process, you will click on approve preparation, otherwise click on cancel preparation, identify and correct the errors and submit a new edl and eventually a new animatic.
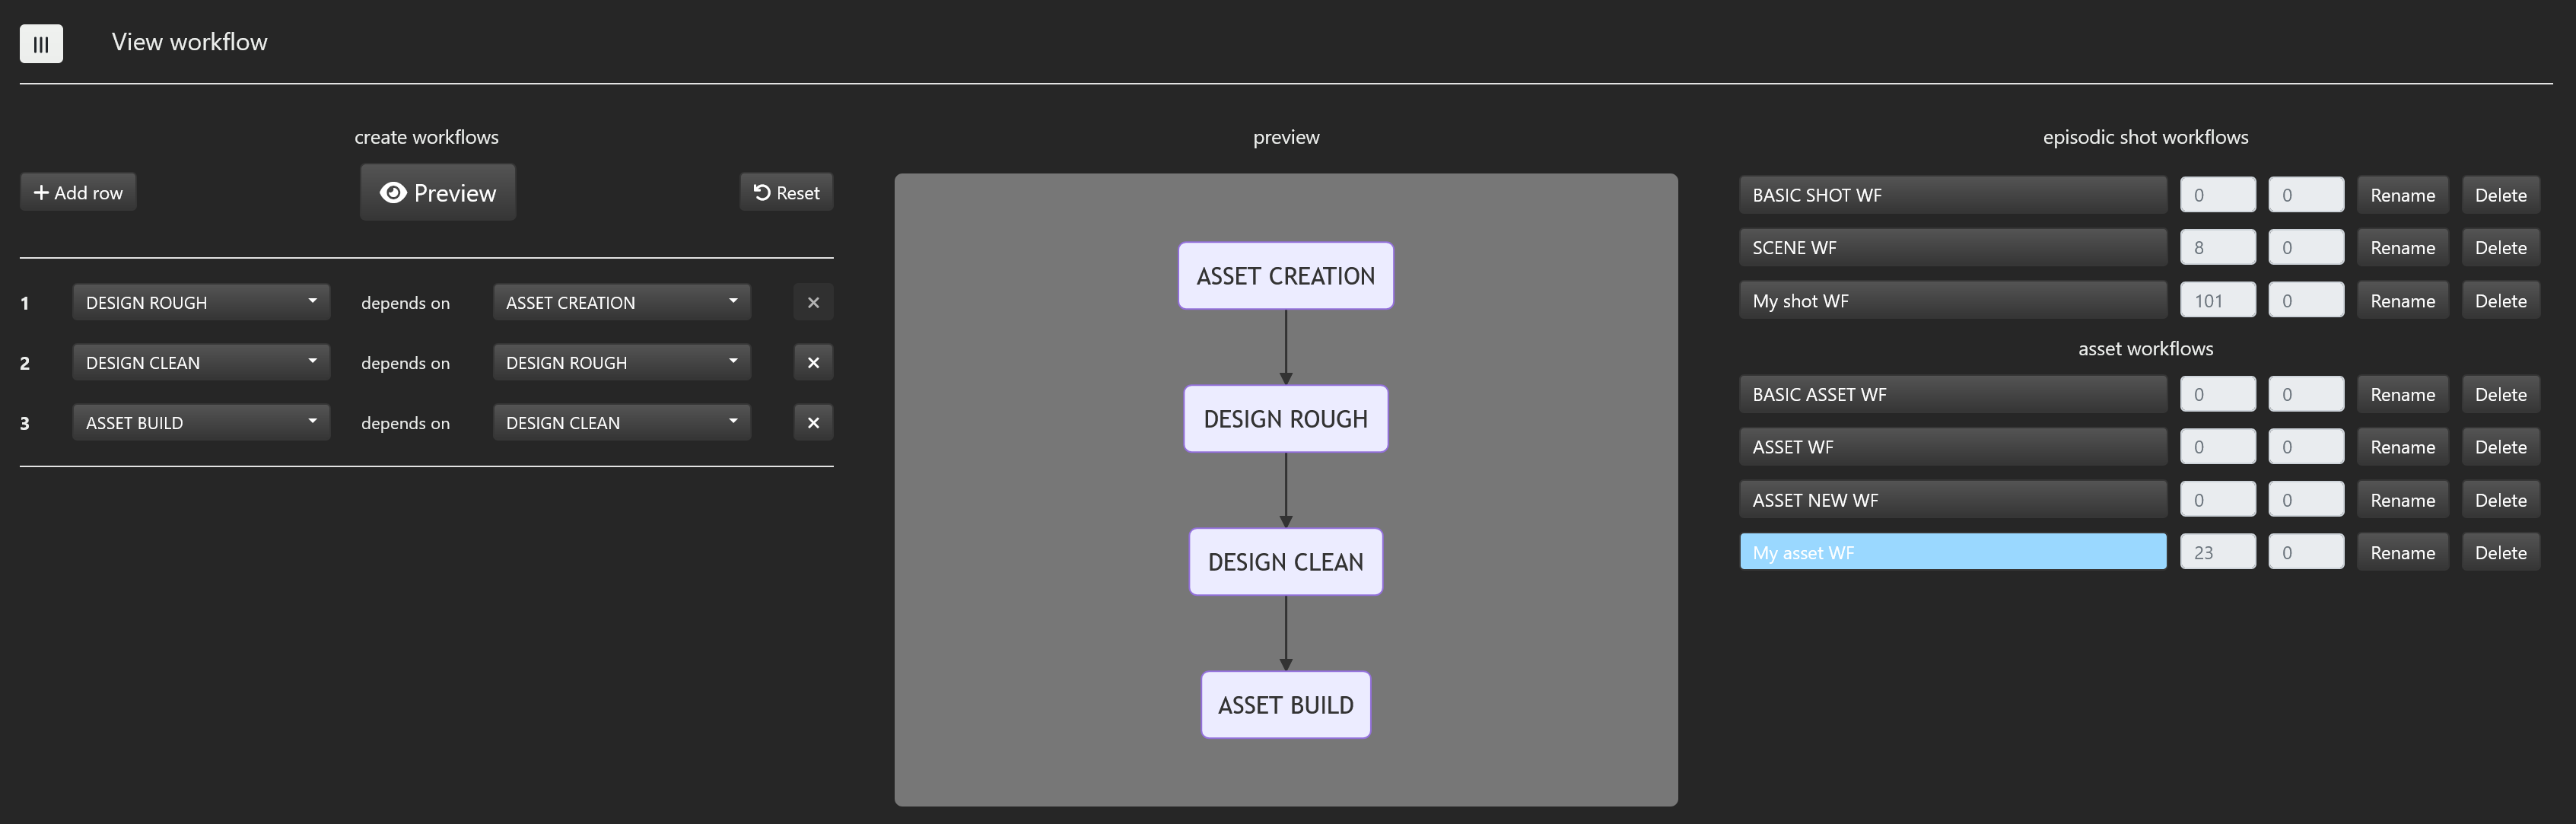
In this tutorial, we approve the preparation. Before shots can be delivered by CG artists and studios we will need to assign the proper workflow to each of those shots. Let's see how we will assign the below workflow 'My shot WF' to the shots we just created.
There are two ways to assign a workflow to a shot:
- either through the the scene workflow page. This is a one by one assignation.
- or through the episode workflow page where several shots can be assigned at once.
In this tutorial, we choose the second method. So let's go to the episode workflow page to assign 'My shot WF' to shots from WH099. On this page, we just need to select WH099 then select all the shots and finally select the workflow to be applied to the selected scenes.
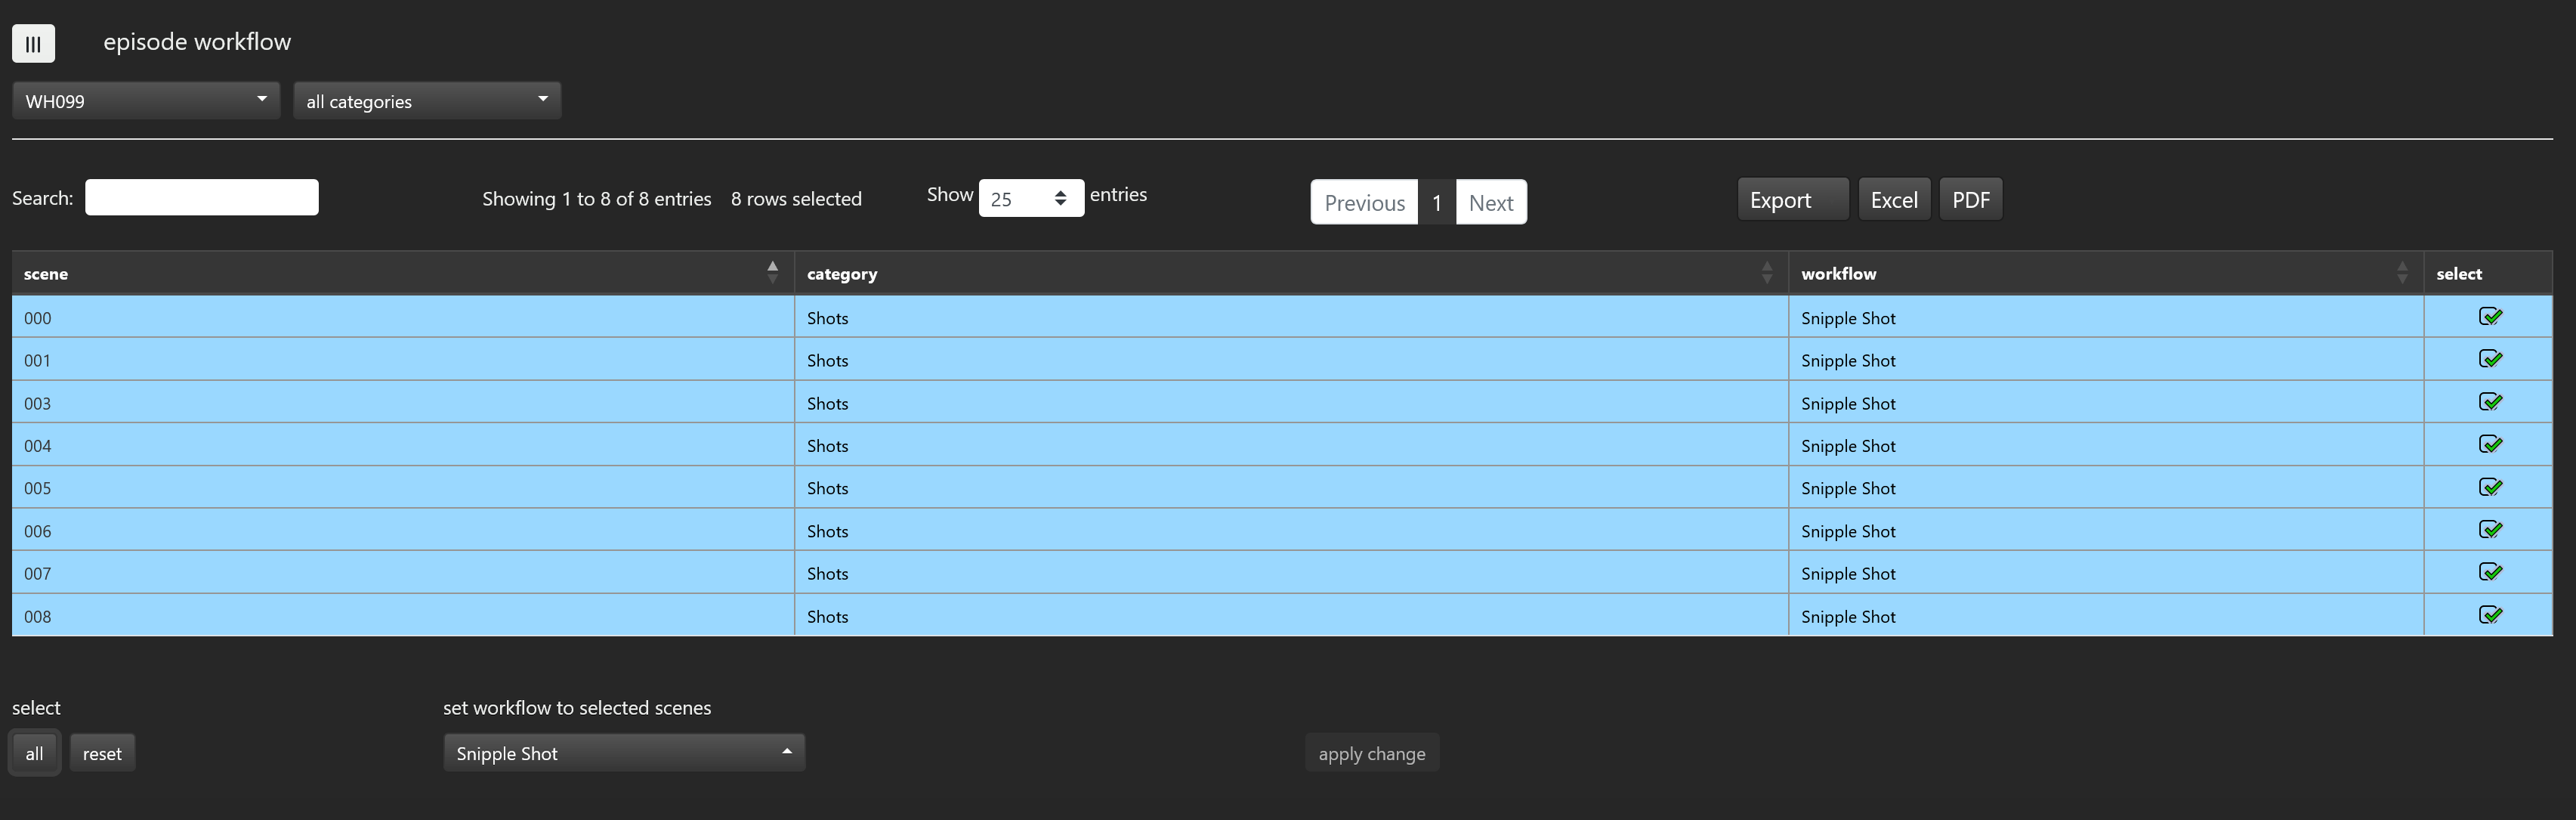
We just completed the preparation operation on episode WH099. As per the workflow 'My shot WF', LAYOUT shots can now be delivered for episode WH099.
# Retrieval of all the animatic cut scenes
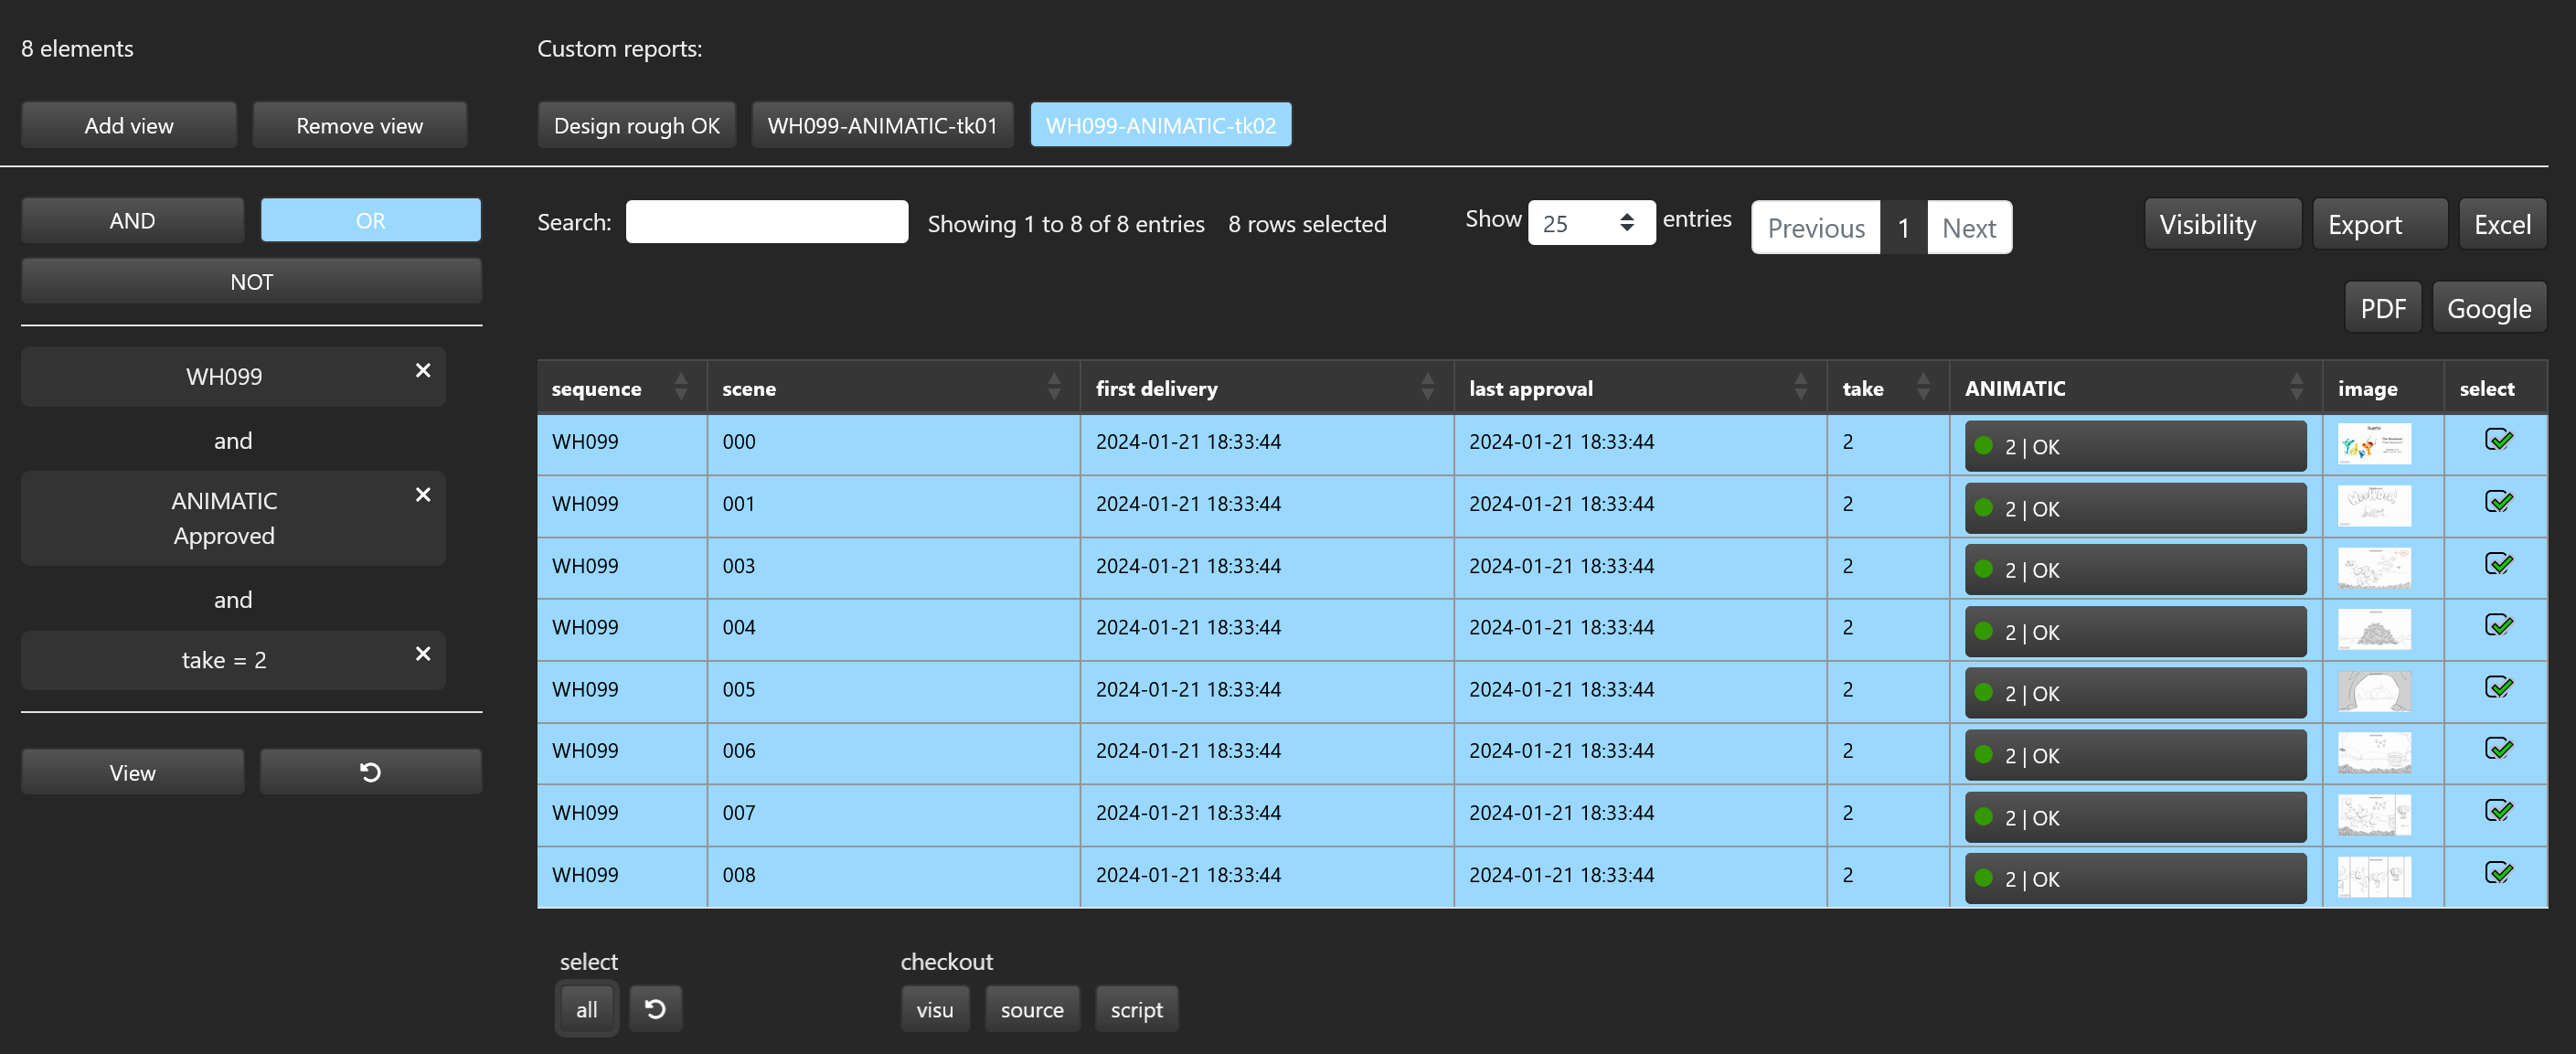
Let us see how we now can retrieve all the scenes from WH099 at the animatic step take 1. To do that, we will go to the custom reports page and build a condition that will display the elements we would like to download. This condition will be :
- display scenes from WH099
- and scenes at the animatic step which have been approved
- and take 1 scenes
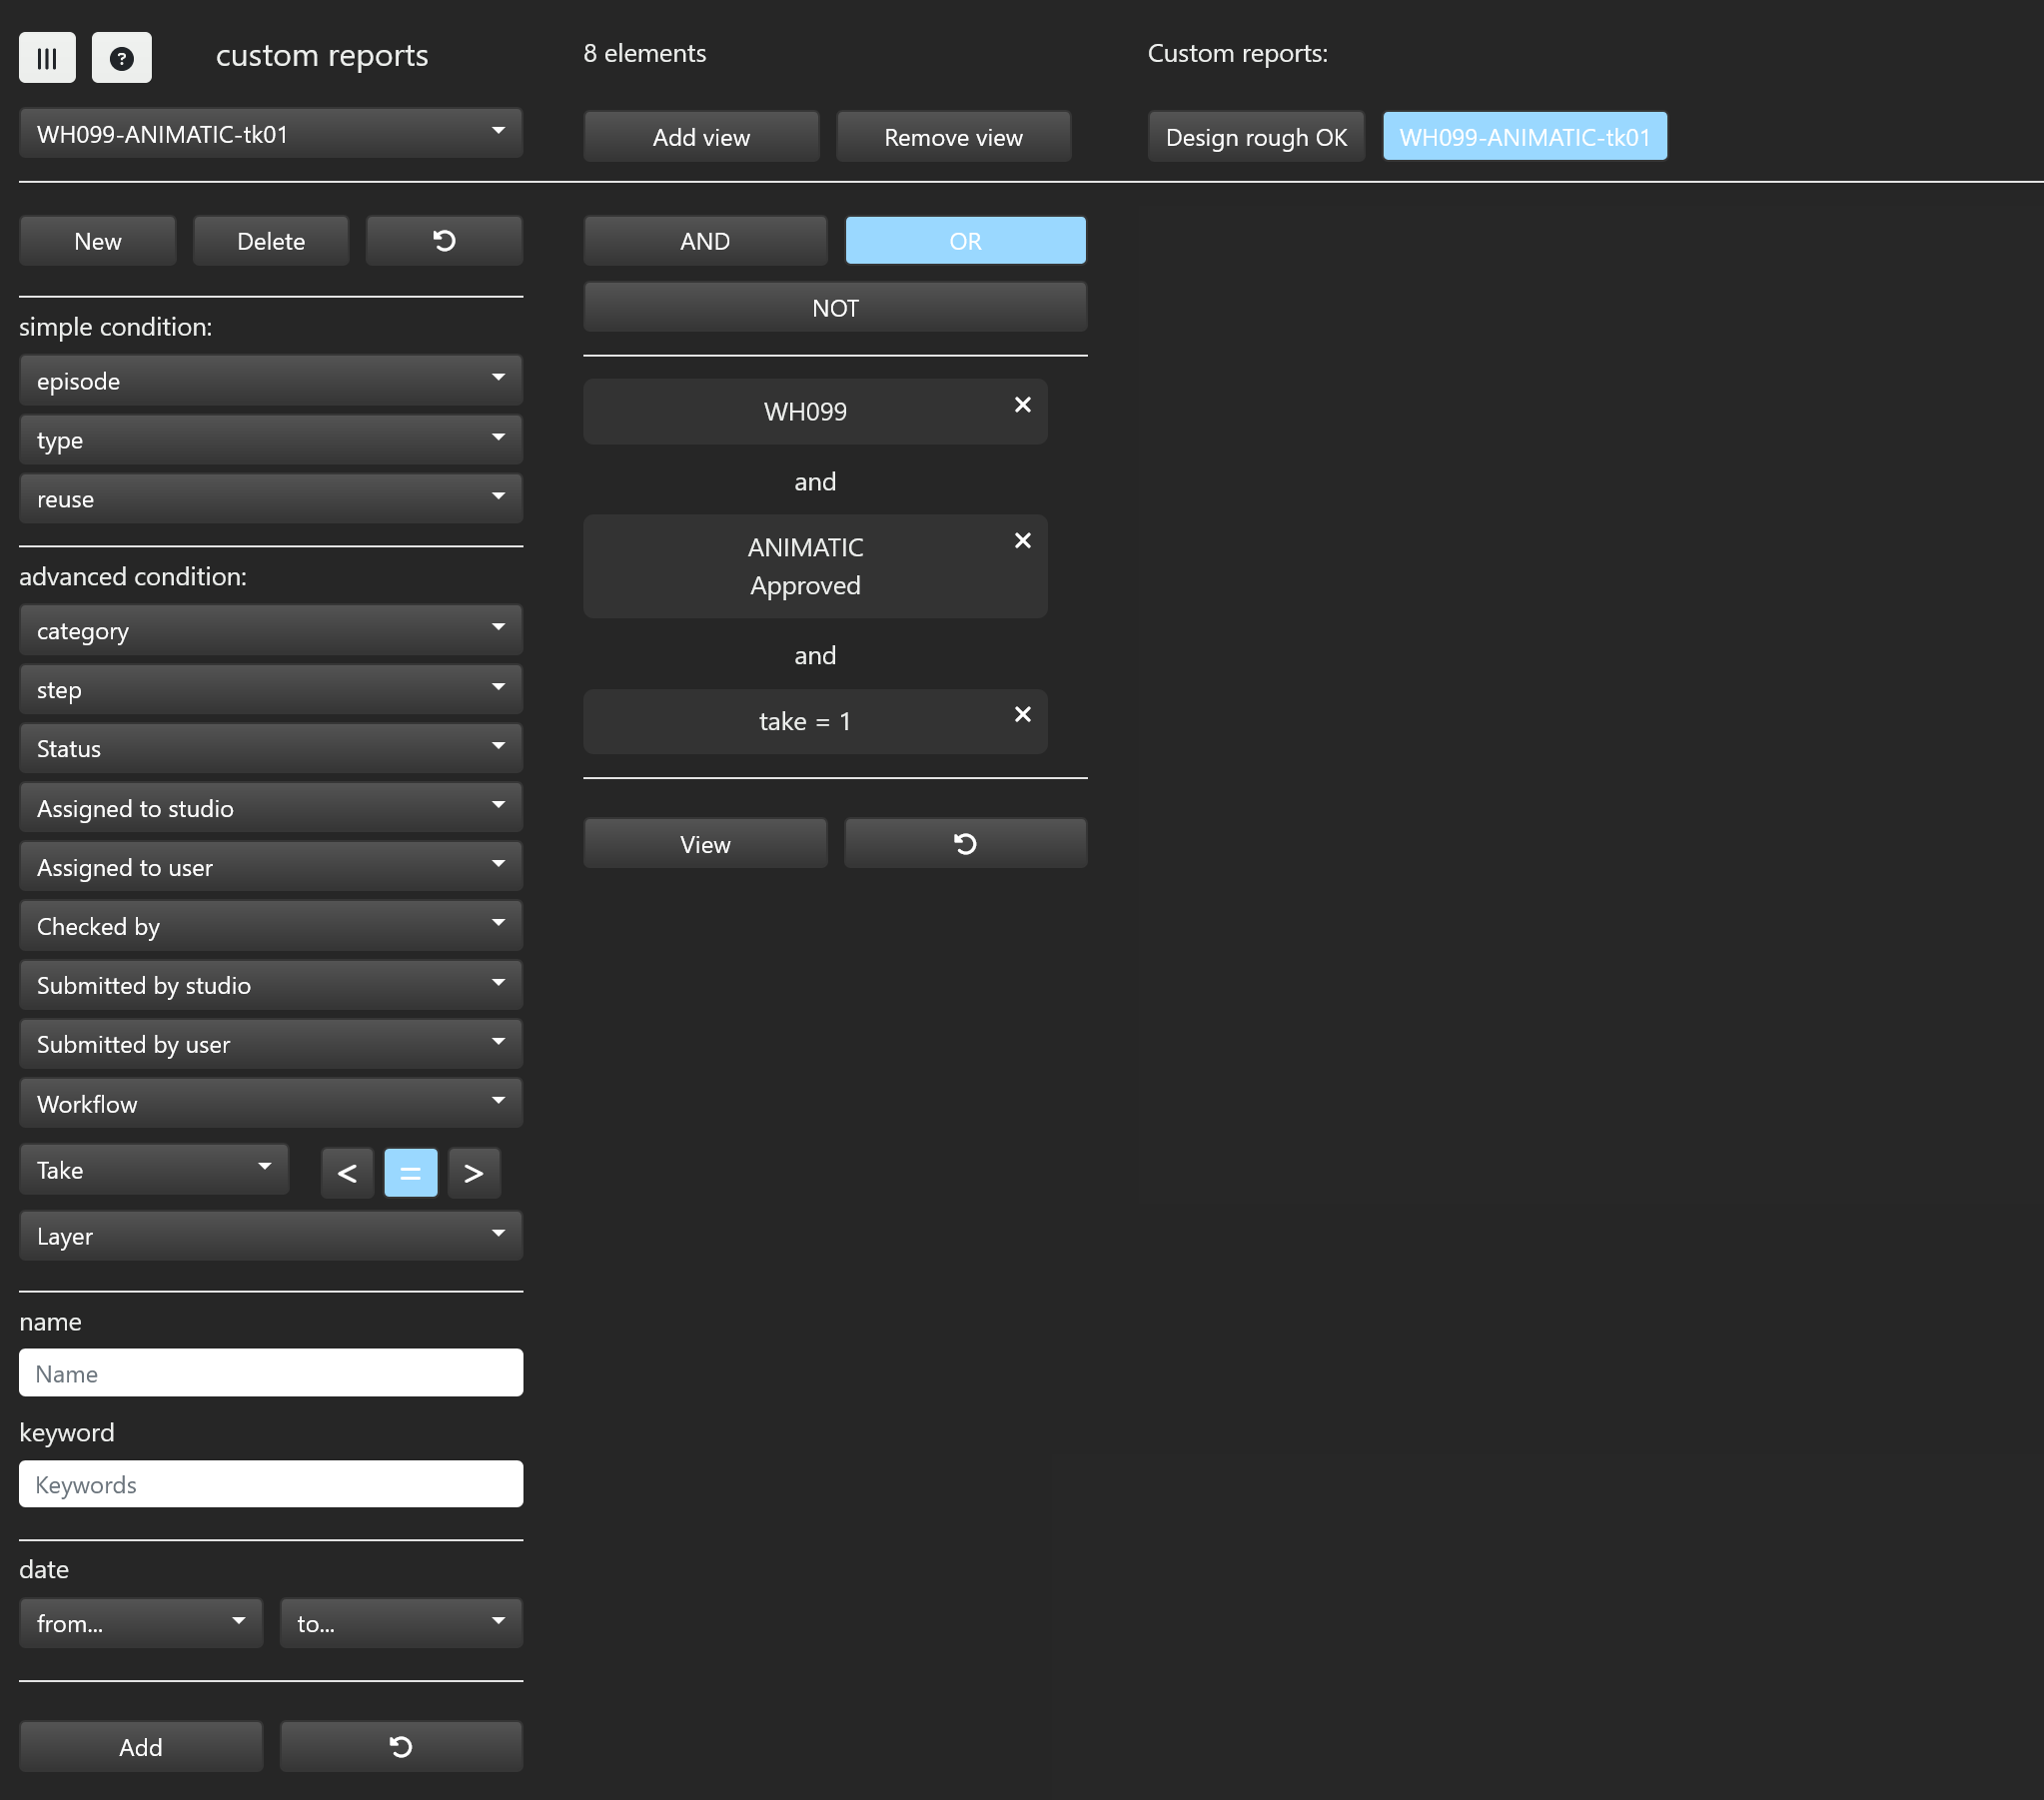
To edit this condition, we did the following operations:
- under simple condition: select episode > WH099
- under advanced condition: step > ANIMATIC
- under advanced condition: status > Approved
- click on Add
- click on AND to specify the AND logical operator
- select take 1 from the take pulldown menu
- click on Add
Clicking on view will now display all scenes from WH099 which have been approved at step ANIMATIC take 1:
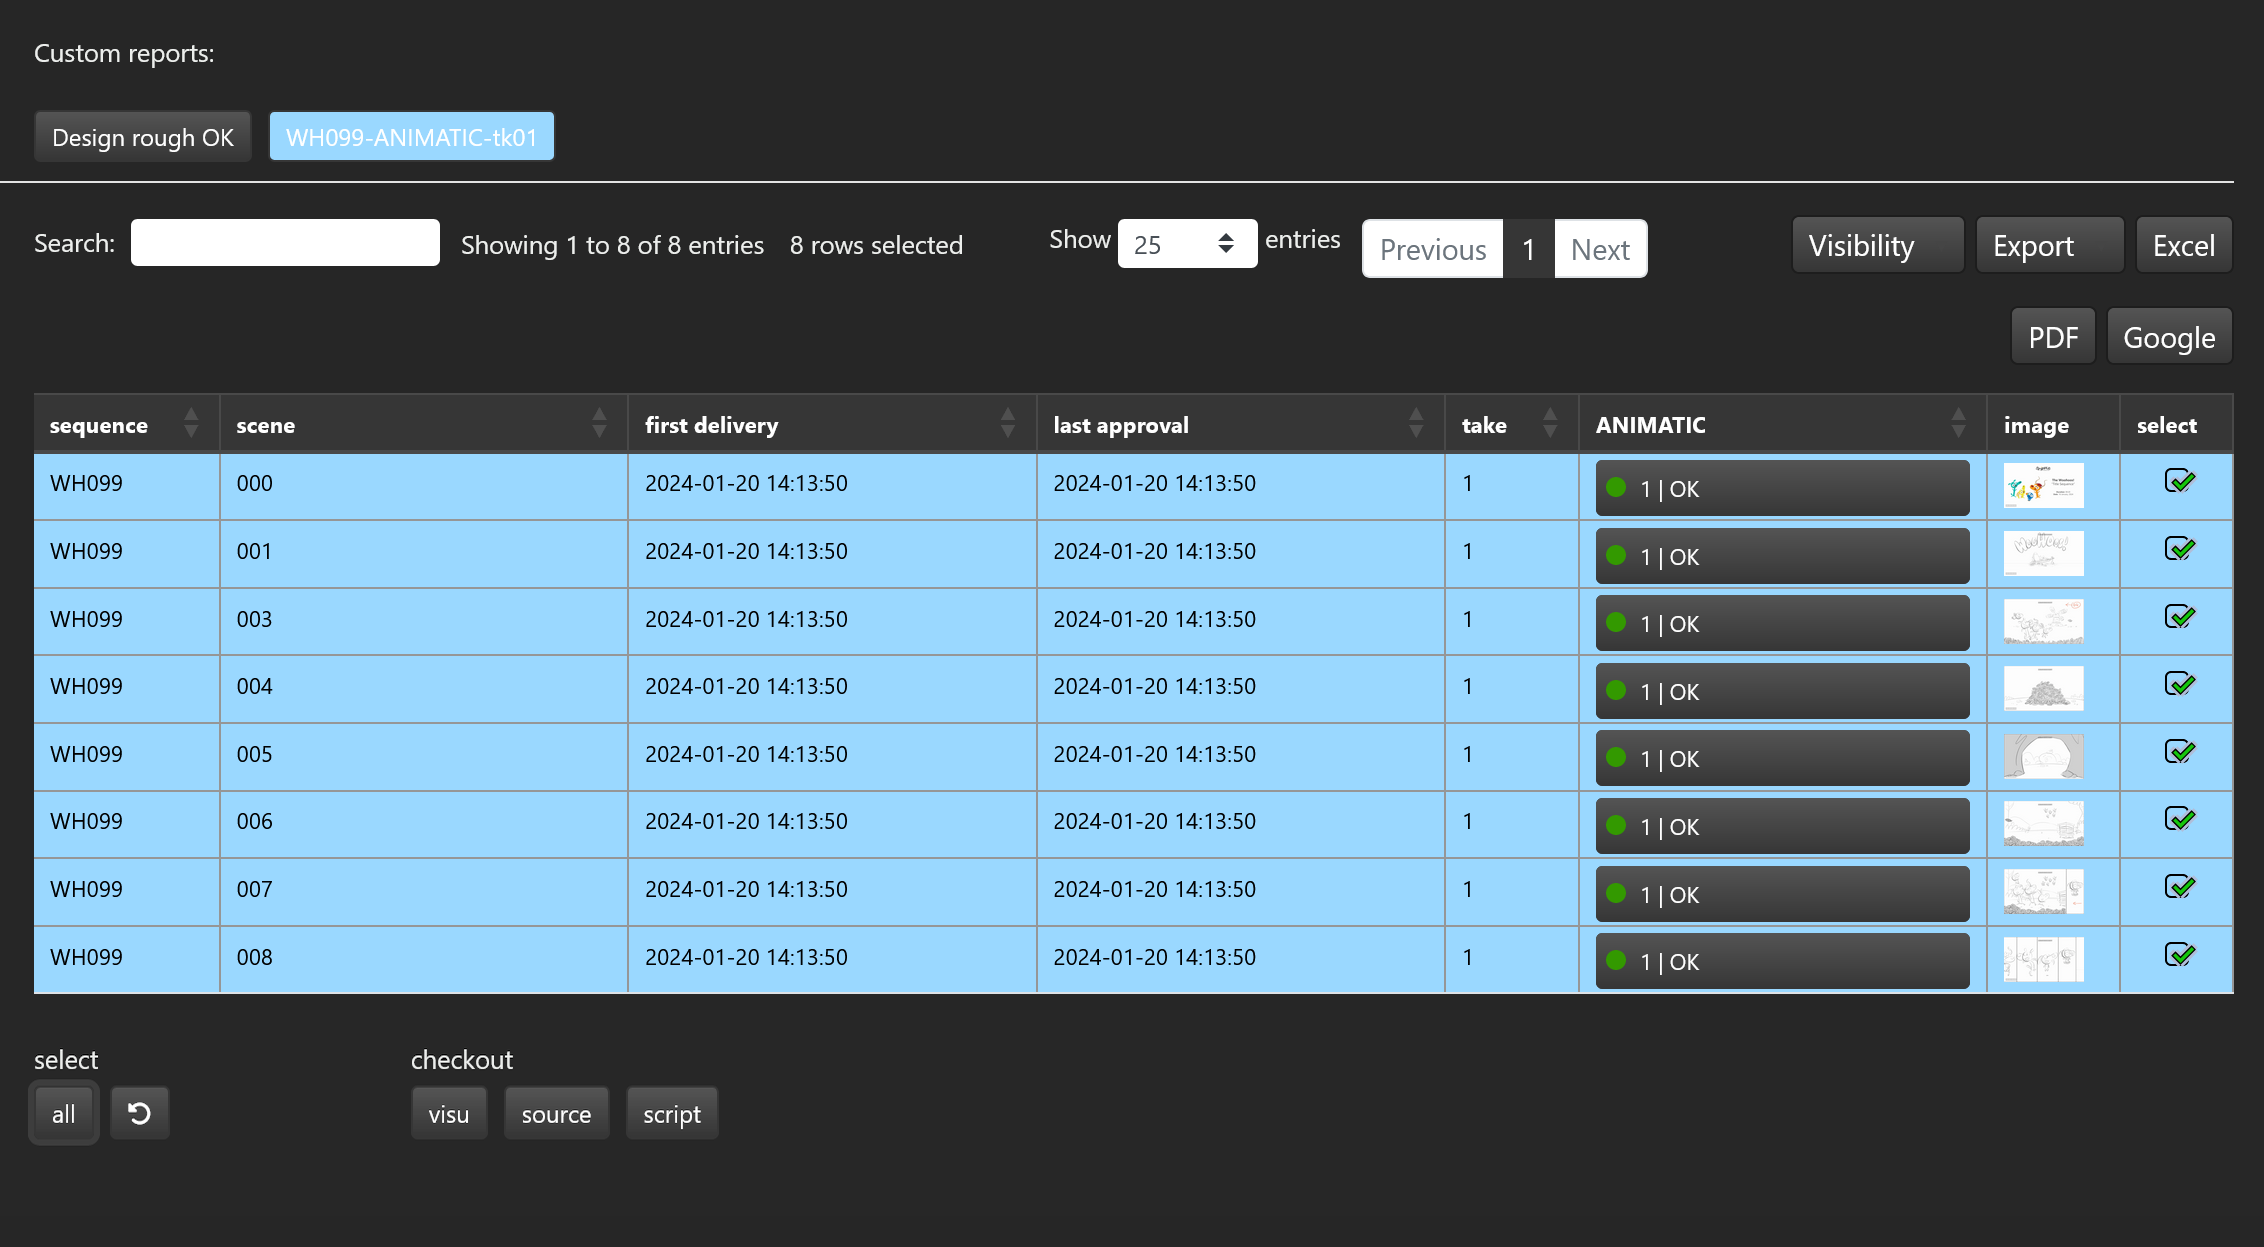
At this stage, if you want to save this condition, just hit the new button and give a name to the preset you want to save. In this tutorial, we named this preset 'WH099-ANIMATIC_tk01'. When we return to the the custom reports page, we just have to select 'WH099-ANIMATIC_tk01' from the list of views to display our condition. Once 'WH099-ANIMATIC_tk01' has been selected, you also can add it to your list of views by clicking on the Add view button. This is what we did on this tutorial.
Now that all the scenes from WH099 approved at the animatic step are displayed, we will:
- select all scenes
- hit checkout > source
All the cut scenes will then be downloaded on your computer.
# Changing the timing of an episode
Suppose now that we want to do a modification on the timing of some scenes of this episode. You may have noticed that scene 006 and 007 finish with a transition effect. However, they do not finish at the end of the effect. We will now increase the duration of those scenes accordingly and upload the following edl:
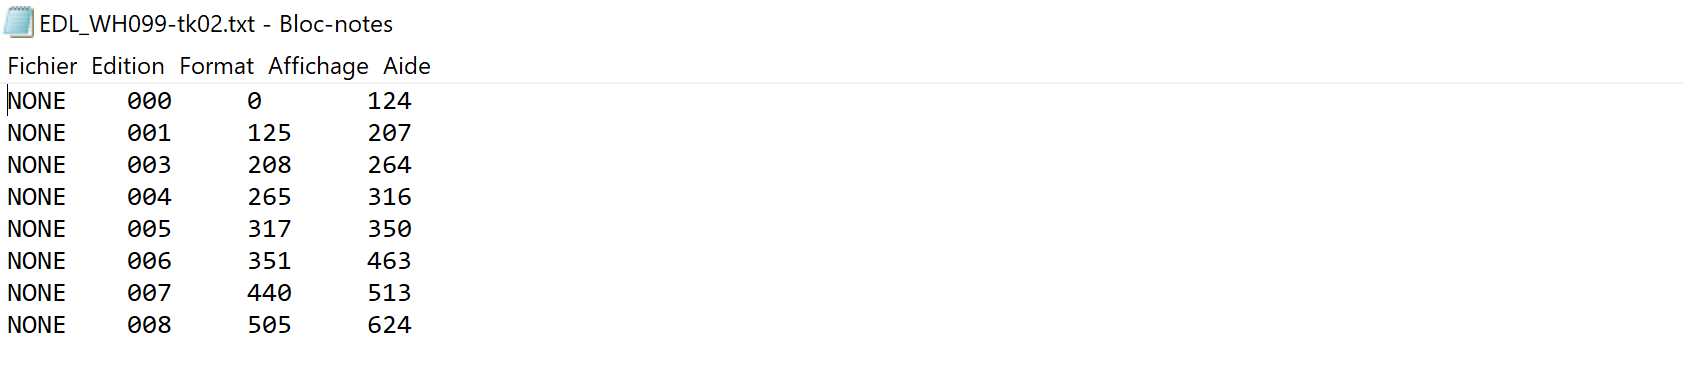
We can see the modifications below:
We will now submit the animatic WH_100_TitleSequence_Animatic_V008.mp4 (opens new window) and launch the preparation of the episode.
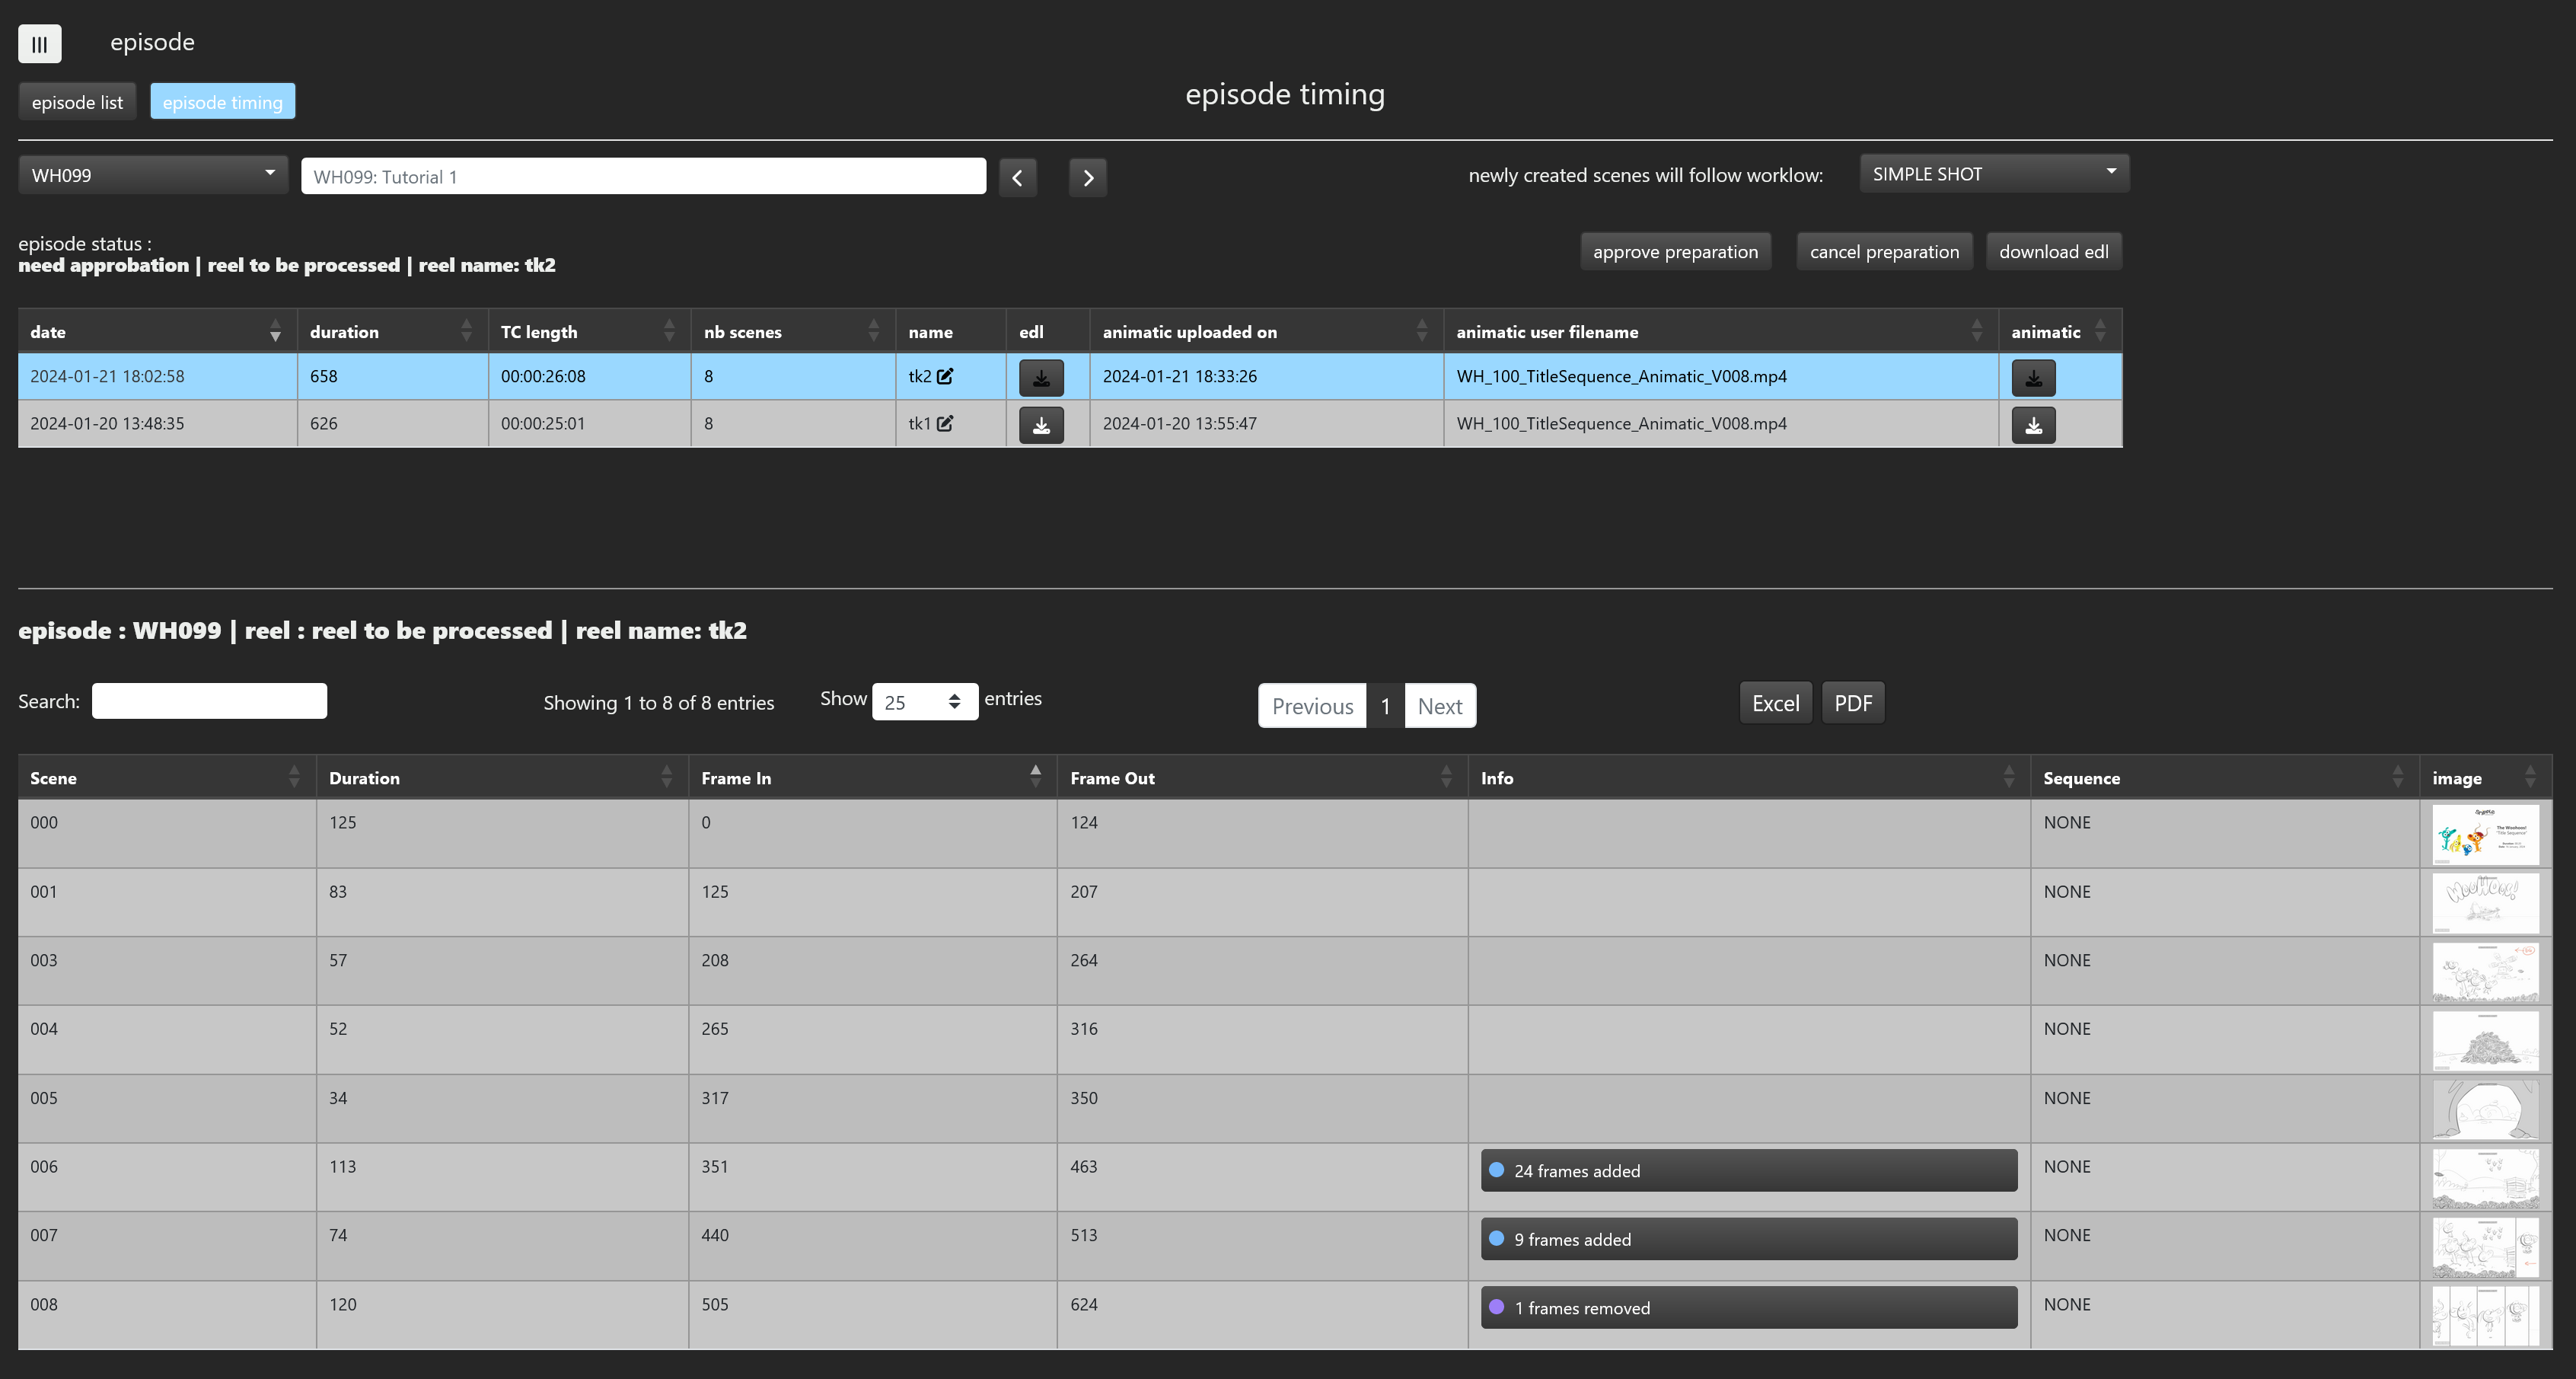
If we click on the image column of scene 006 and 007, We can now check that they finish at the end of the effect. We then can approve the preparation. From now on, scene 006 and 007 will have the new timing as specified in take 2 of WH099 ANIMATIC step.
To conclude this tutorial, a view called 'WH099-ANIMATIC_tk02' has been created in the custom reports page. This view can allow you to donwload all the WH099 scenes at ANIMATIC take 2.
If you click select all then checkout source all those files will be downloaded on your computer.