
# Tasks
This is the cg artist job list. This is where cg artists will go to check if they have elements (assets and episodic shots) to deliver.
The task list button displays all the elements that are waiting to be submitted by you.
Your task list consists of all the elements with the status TODO and that are assigned either to you or to anybody from the studio you work for.
FOCUS
The TODO status defines elements that have been sent in retake either by the director or the supervisor as well as elements that are expected at a step for the first time just because the director approved the previous step in the workflow followed by this element.
The task list is always displayed by default. This page also provides:
- the list of elements in retake also called retake list
- the list of elements waiting to be submitted by studio(s)
- the list of elements that have already been submitted since the start of the project
- the ability to assign an asset or an episodic shot to a studio and/or a user
You can use the retake list button to display the list of elements in retake,
or the todo shot list to display the list of elements waiting to be submitted.
The task history will be used to display all the elements submitted so far and
the task assignment button to assign assets or episodic shots to a studio and/or a cg artist.
# Task list
This is the cg artist's job list, this is where you will upload file(s) for all the elements from this list.
It displays the number of elements that are ready to be submitted by you along with some information such as the step and the take at which a delivery is expected, as well as the comment that was made on the previous take if the element was sent in retake.
On this page, you can select an element then upload all the expected file(s) for this element at the specified step. The files you upload should follow the media rules defined by the producer for this step.
On the following example, 3 elements are waiting to be uploaded by the user called "SPI assistant":
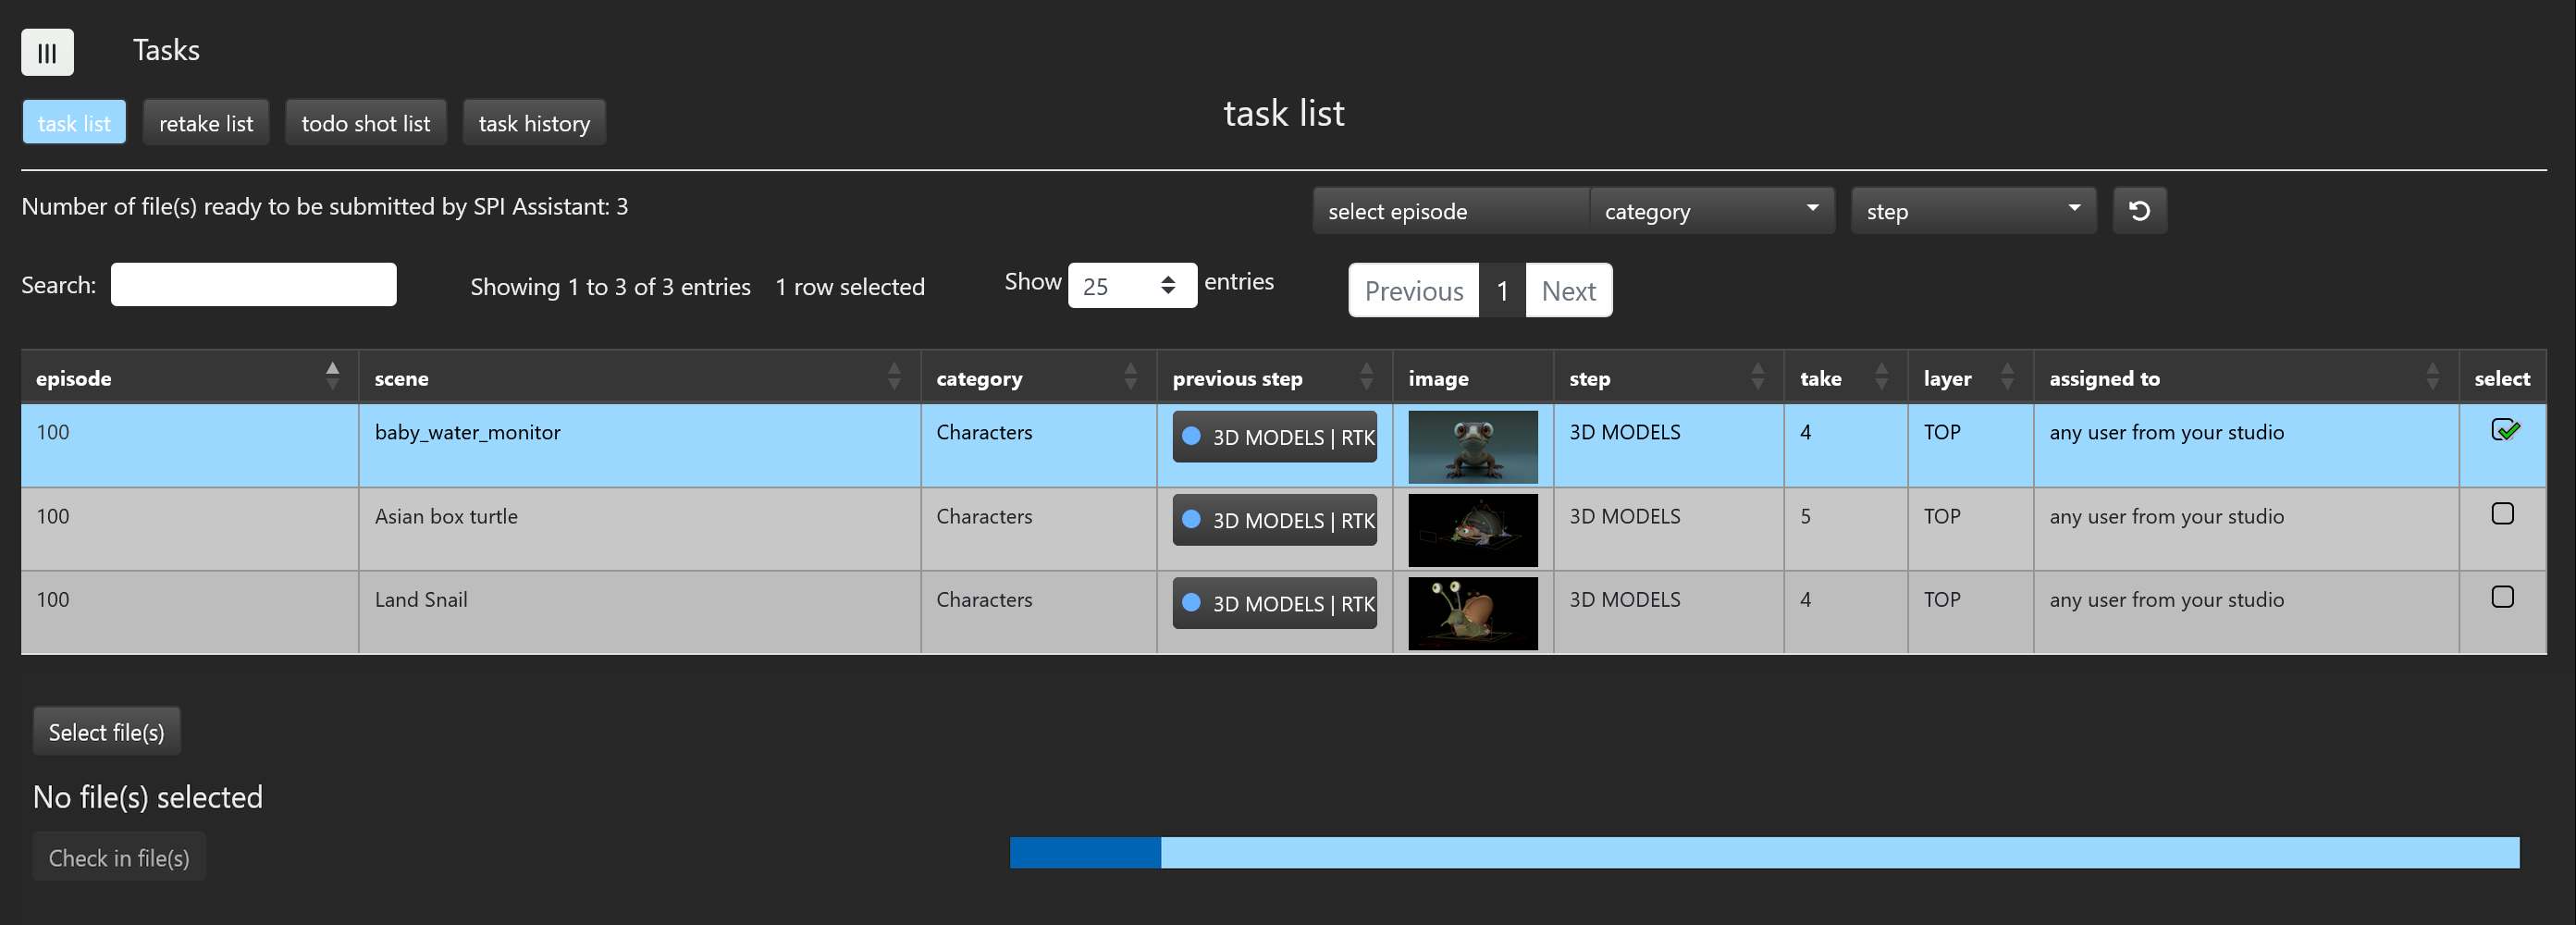
For each element, the image that is displayed corresponds to the previous take or step this element went through. If you click on this image, it will bring you to the viewer page on this previous take or step.
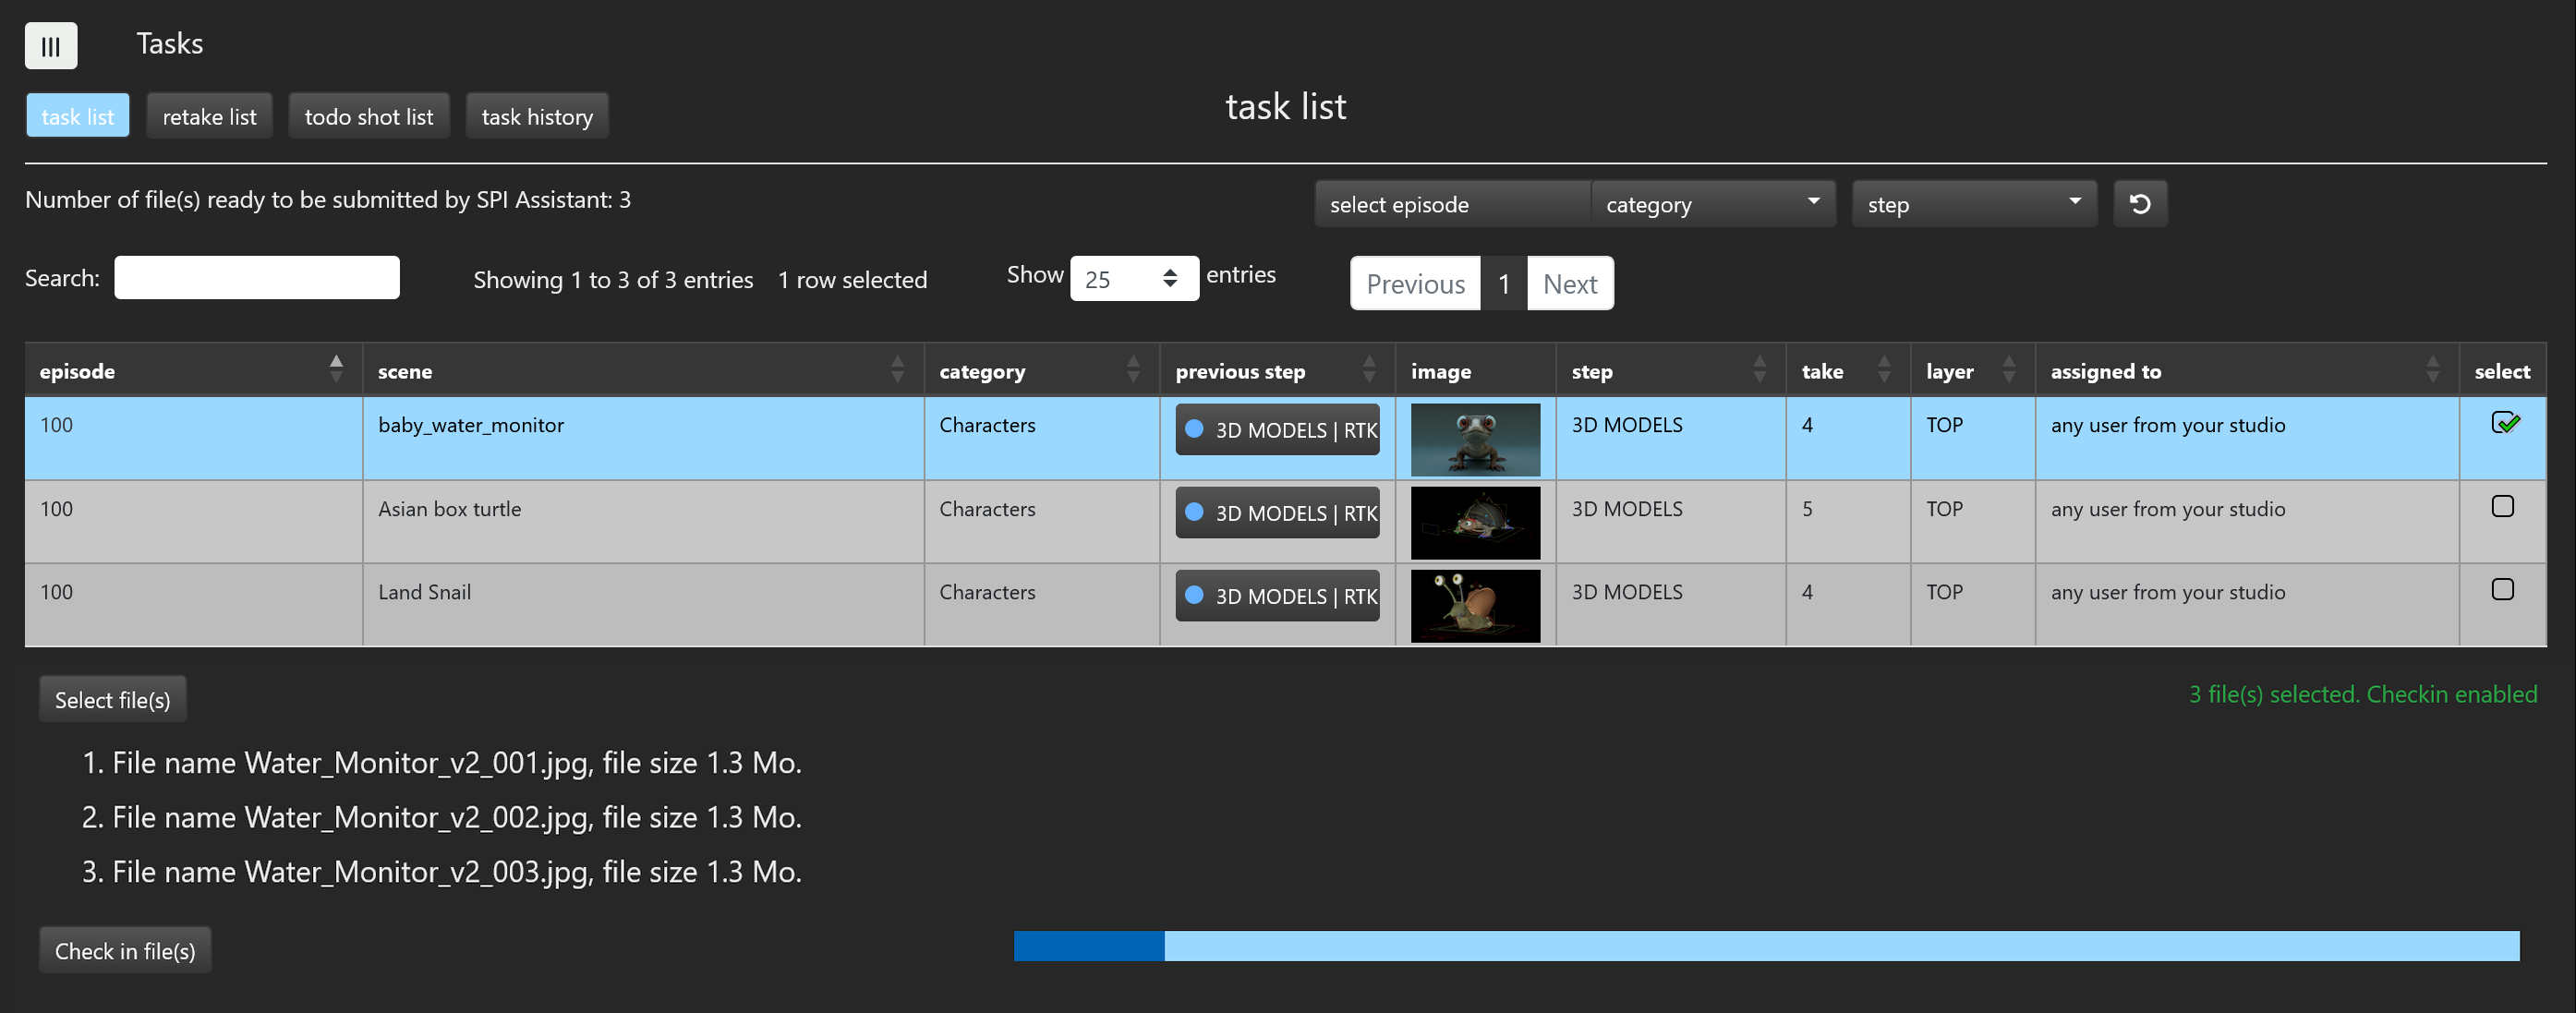
Once you have selected the element you want to submit, the select file(s) button will allow you to select the file(s)
you want to upload for this element.
The file(s) you selected will then appear below the list of elements to submit and the
Check in file(s) will upload those files for the selected element at the given step.
FOCUS
At this stage, it is very important to check if the file(s) you just uploaded comply with the media rules
that the producer defined for this step. If you delivered images whereas the producer expects videos at this step, your submission will fail.
The task history button will let you know if your submission succeeded or not.
If your submission appears in green under the task history page, your submission succeeded otherwise your submission failed and a message will indicate the reason for this error.
Upon success, the element will be moved from your task list to either the director's or the supervisor's review list depending on the approval scheme for this element and it will be up to them to review your deliveries.
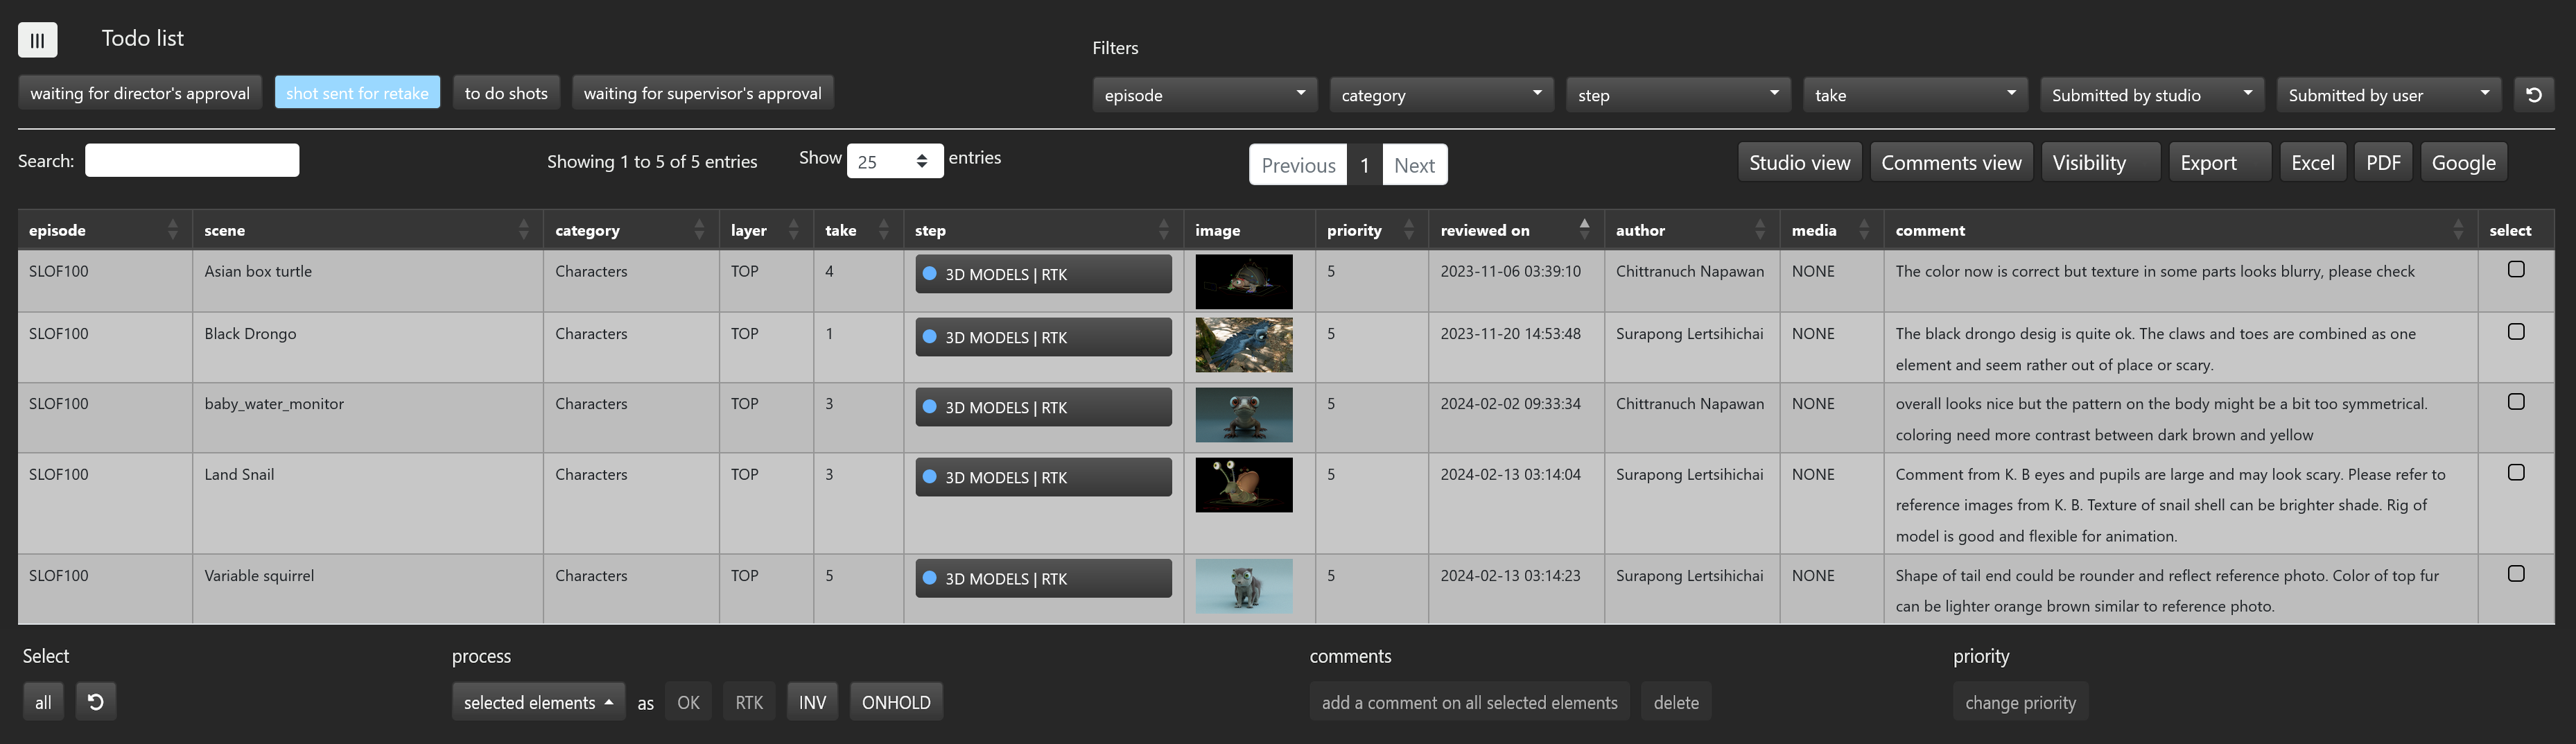
# Retake list
The retake list button displays the list of all shots currently in retake along with their retake comment(s):
WARNING
There maybe be more elements in the retake list than in your task list: This is simply because some elements in that retake list may be assigned to another person or studio.
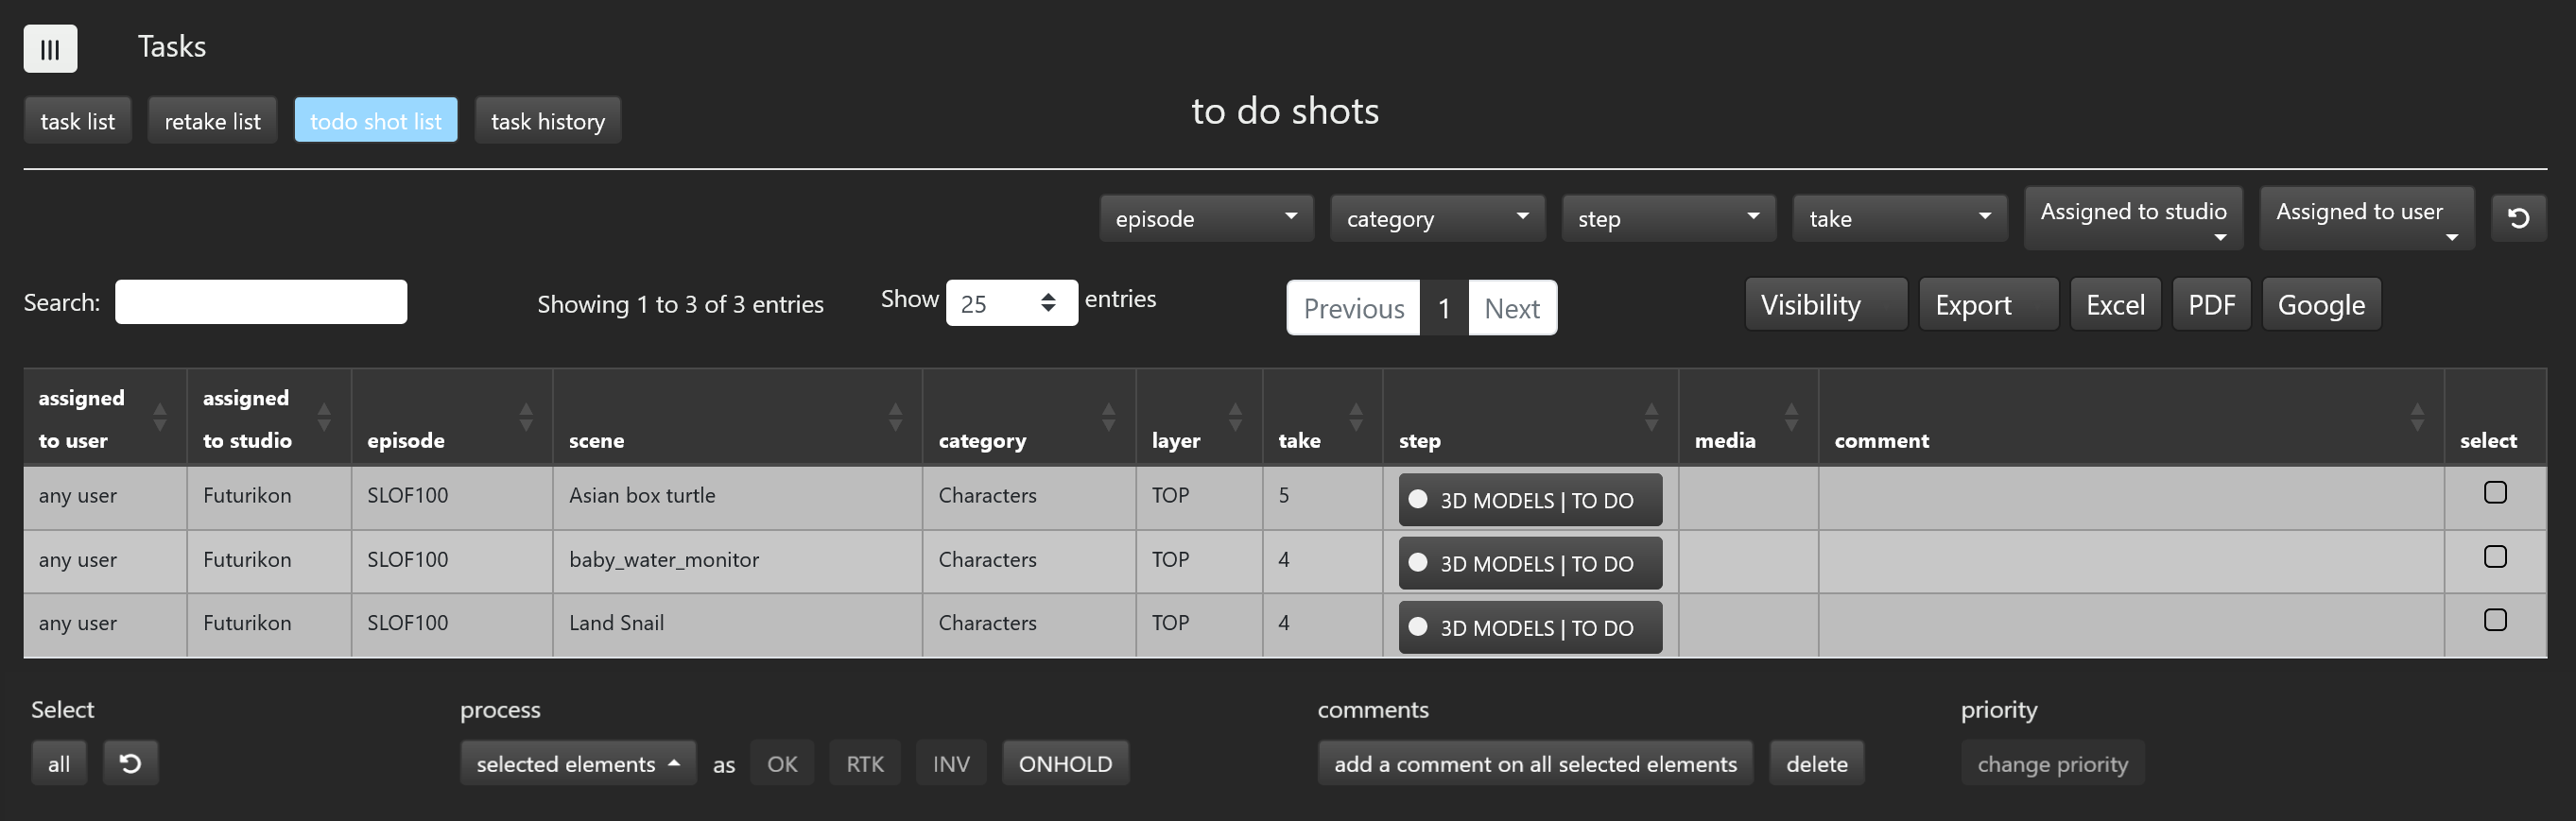
# Todo shot list
The todo shots list button displays the list of all shots currently waiting to be submitted along with the user and the studio
they are assigned to:
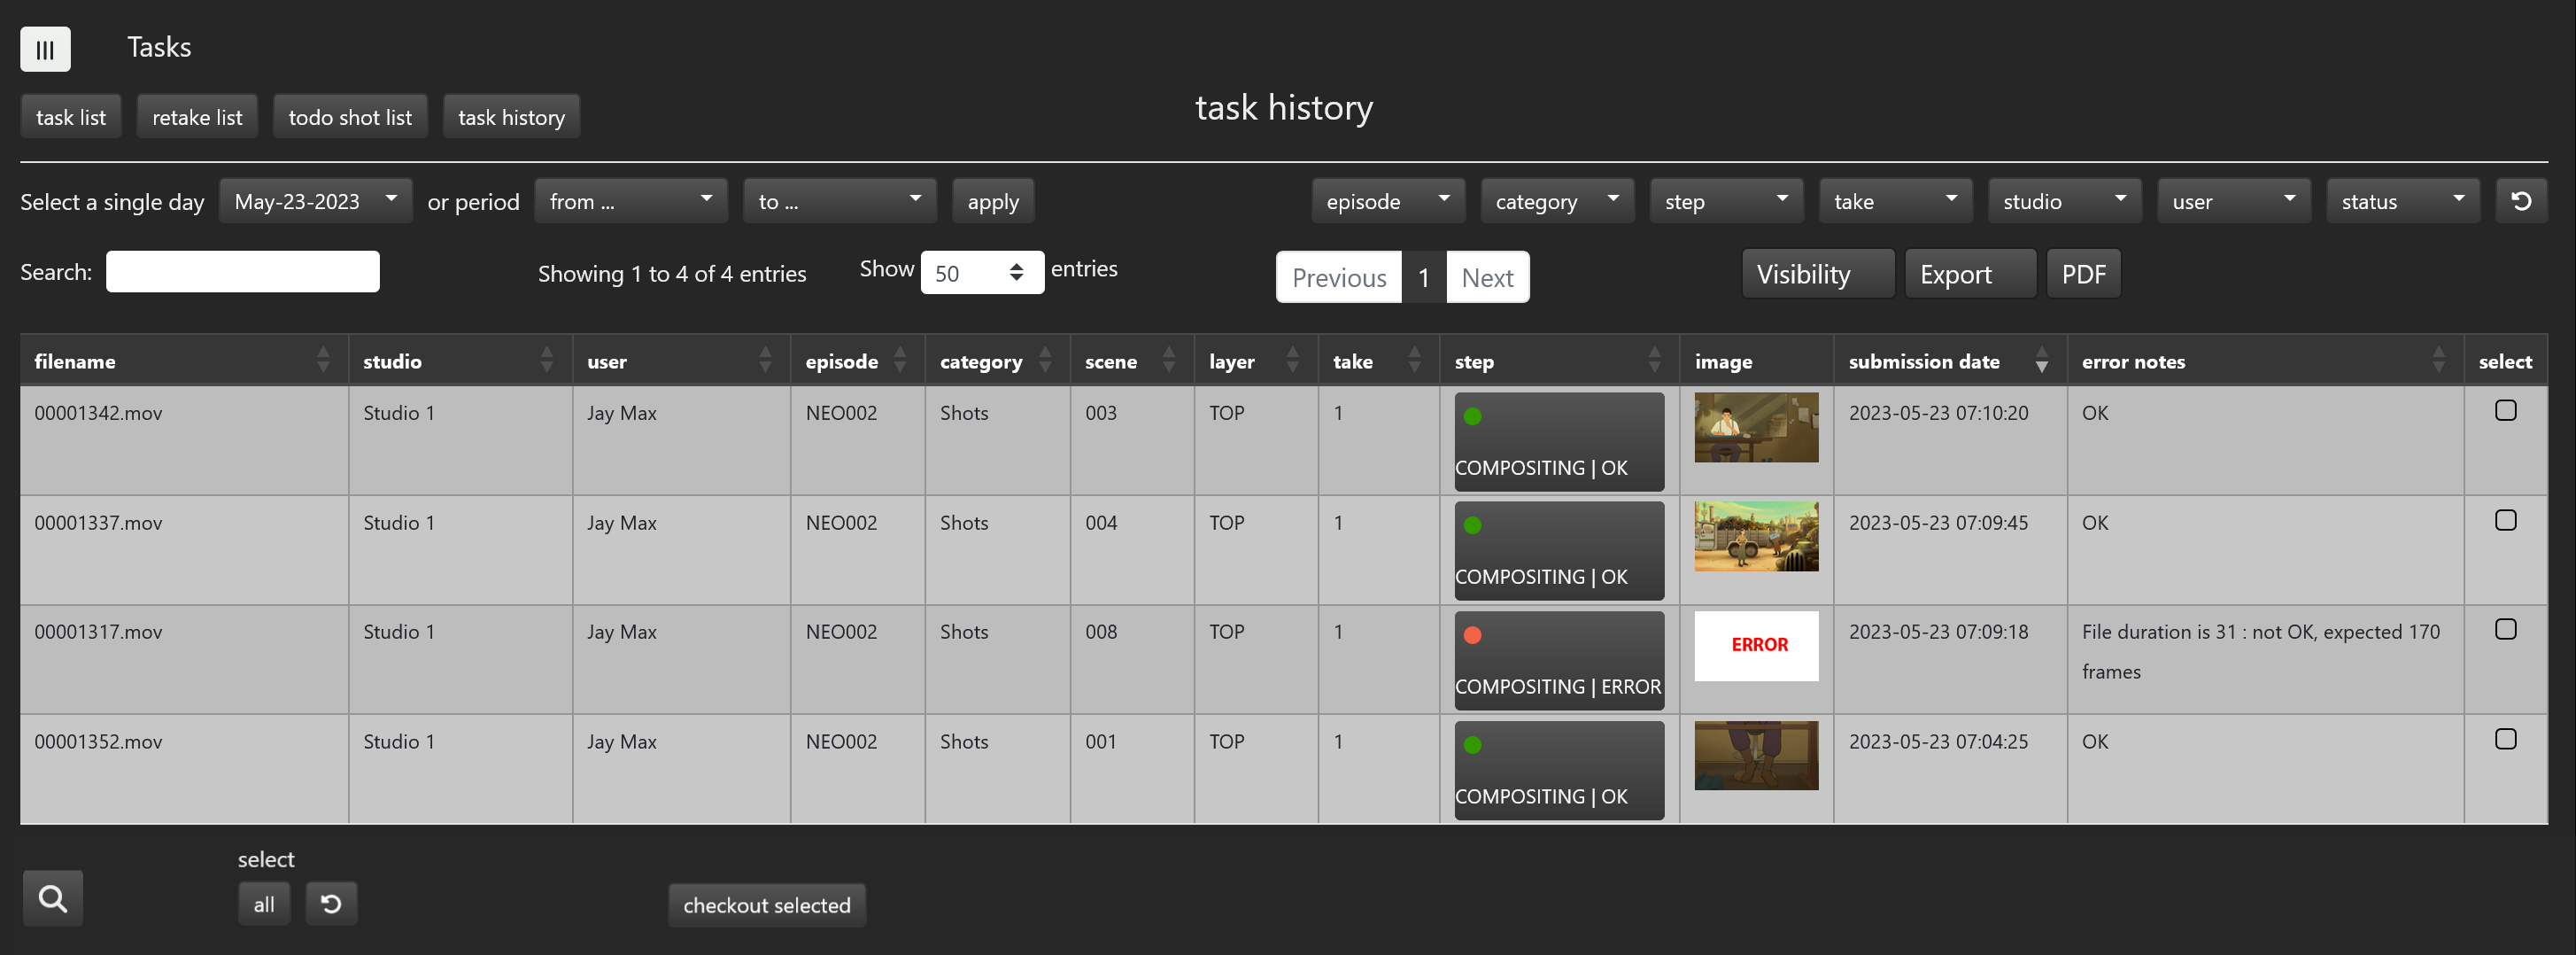
# Task history
This section lists all the shots that have been submitted since the beginning of your project. This is also where you check if an element you just submitted has been accepted.
If the element you submitted complies with the media rules defined by the producer it will appear in green otherwise it will appear in red with the error notes indicating the reason why this element was rejected. Media rules are defined for each step under the administration section.
In the following example, scene 08 at step COMPOSITING was rejected because it did not have the proper duration.
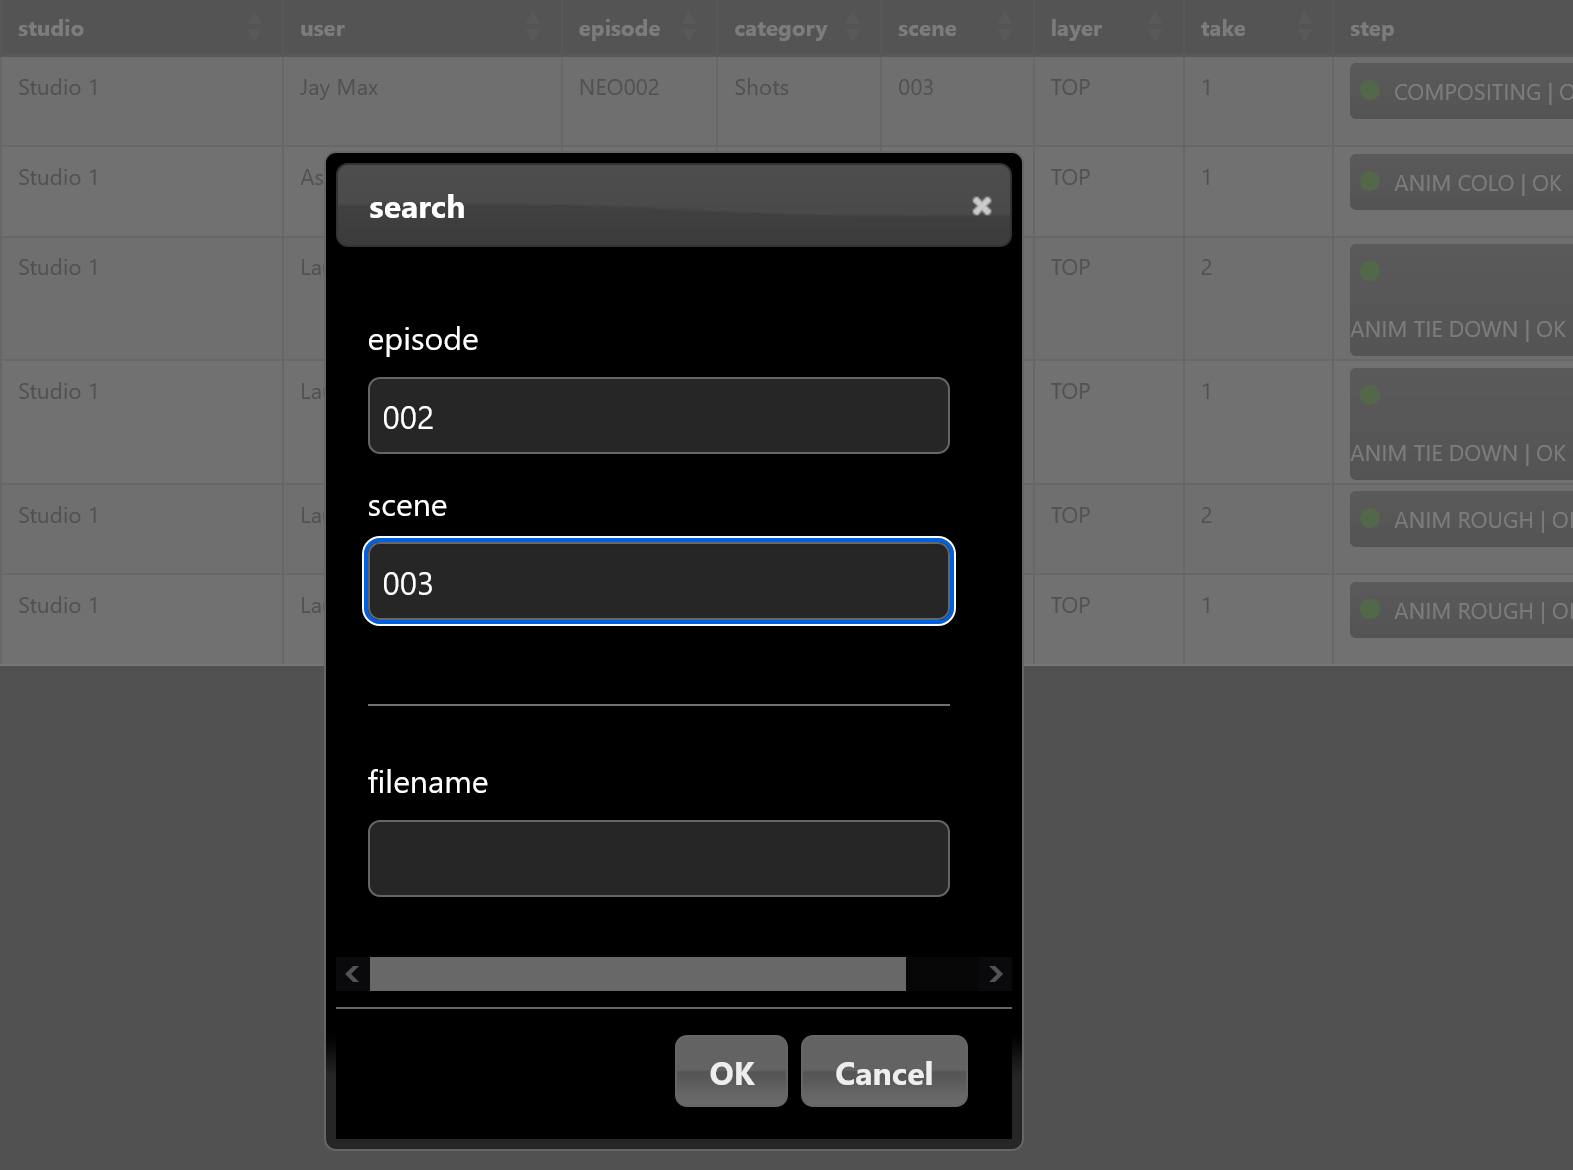
If you want to see all the submissions for a particular scene, you can use the magnifying glass button on the bottom left.
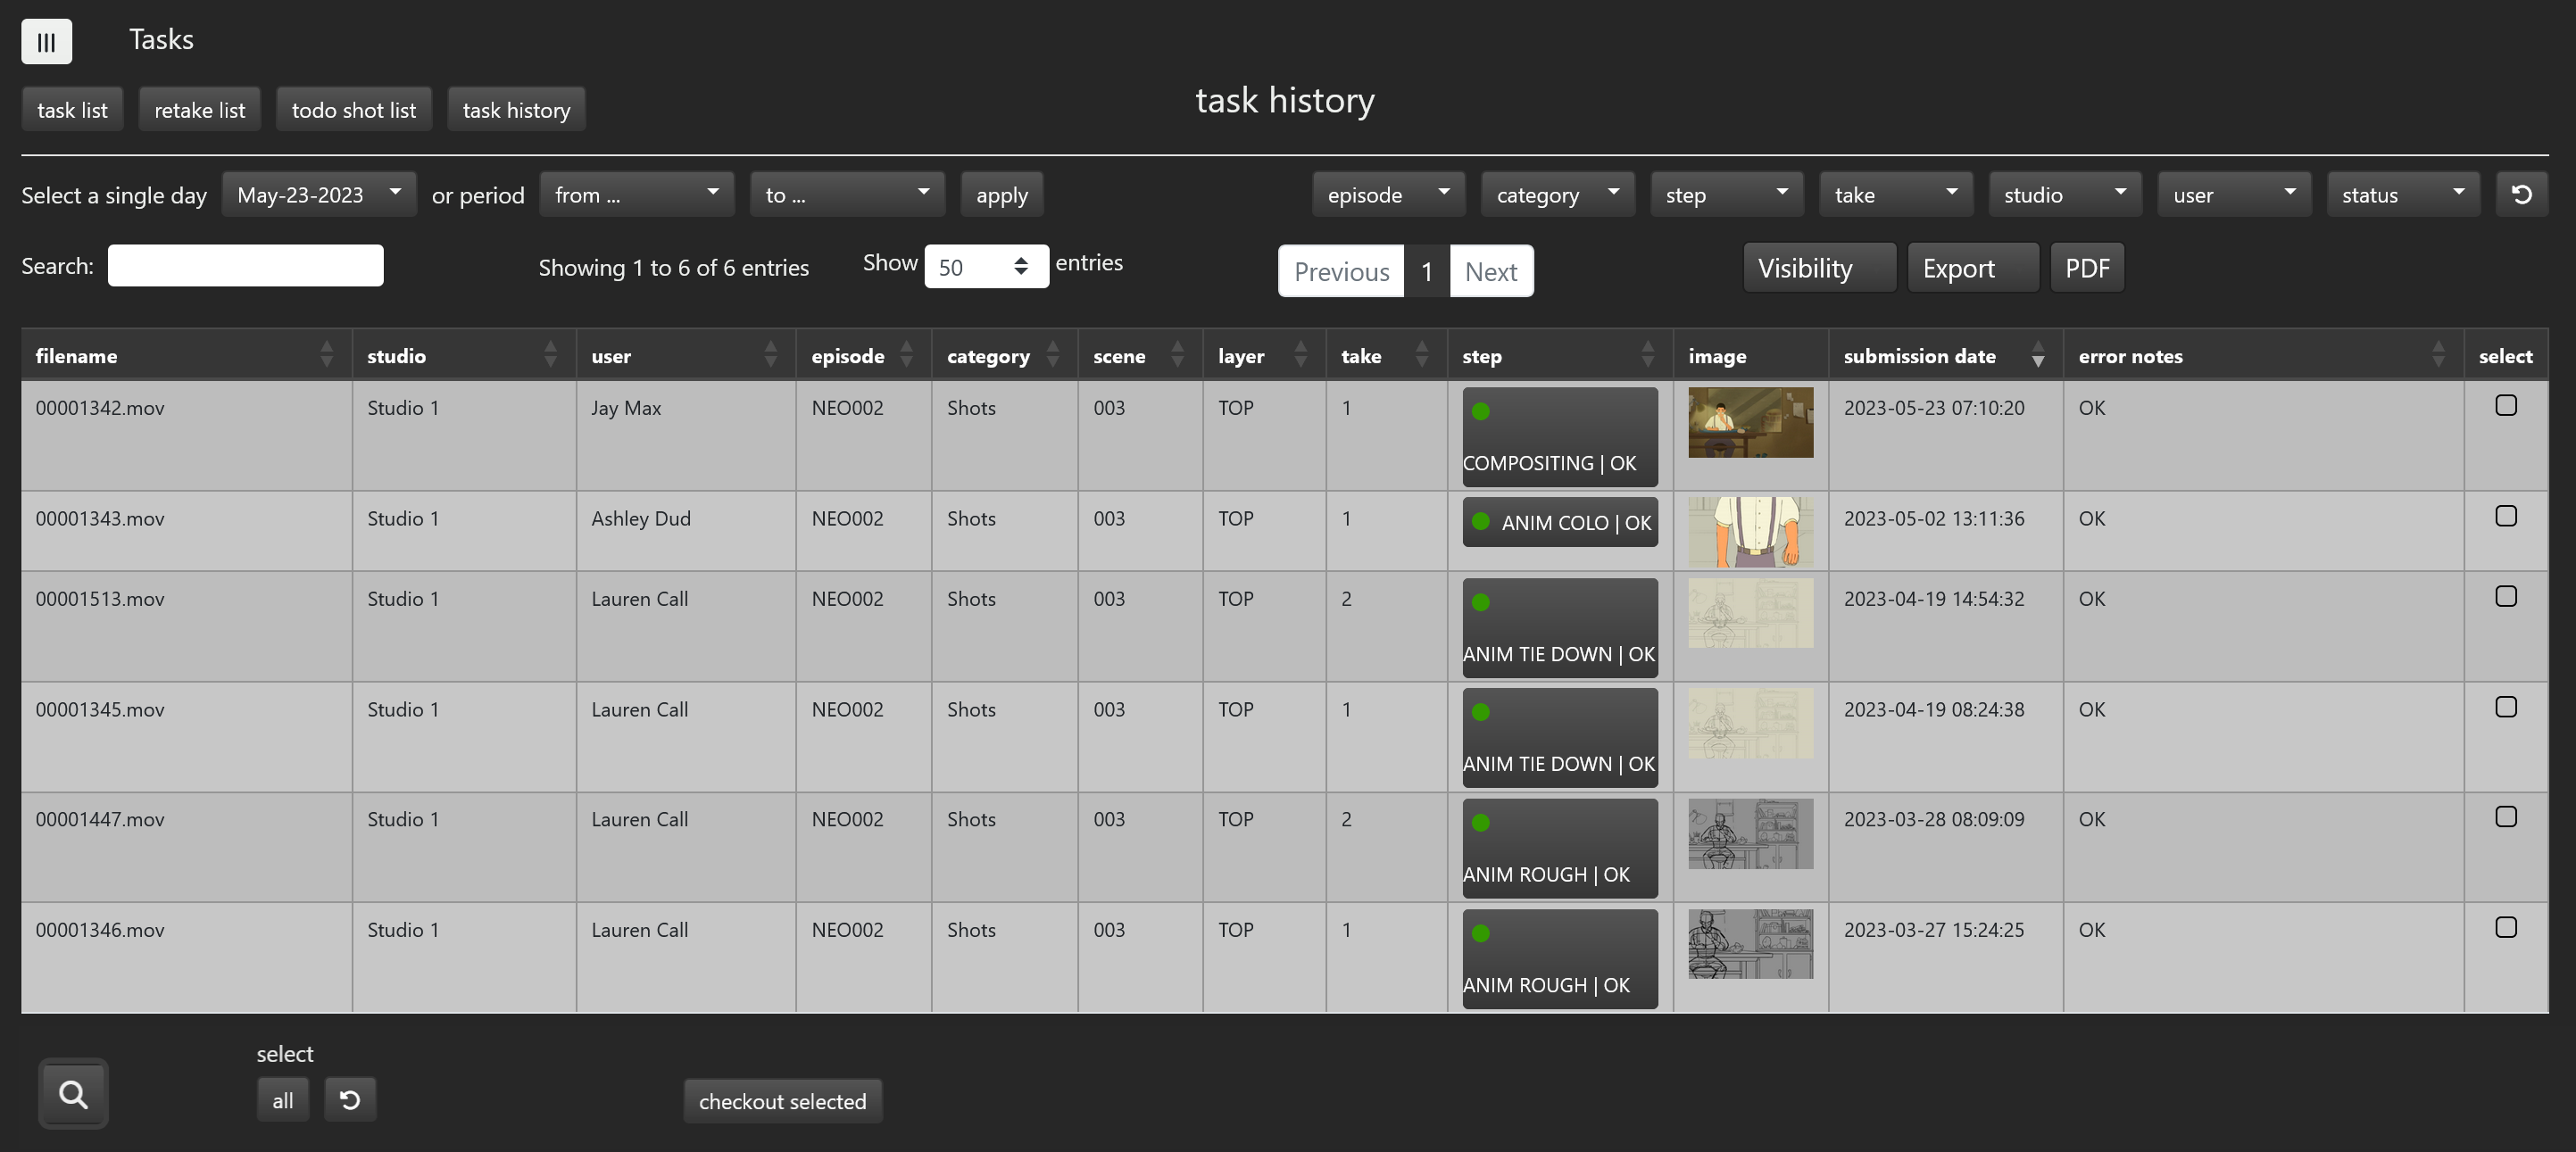
In the following example, we are looking for all submissions for scene 003 episode 002.
This will display all the deliveries that have been made so far on scene 003 from episode 002
The checkout selected button allows you to download the deliveries that were uploaded for the selected rows.
The from... and to... buttons
will let you specify an interval of days between two dates and displays all the elements submitted in this interval.
# Task assignment
This page allows you to assign assets or episodic shots to a studio or a cg artist.
Once you have selected an episode and a step, you will be able to select any elements from this episode going through this step and assign them a studio or a user.
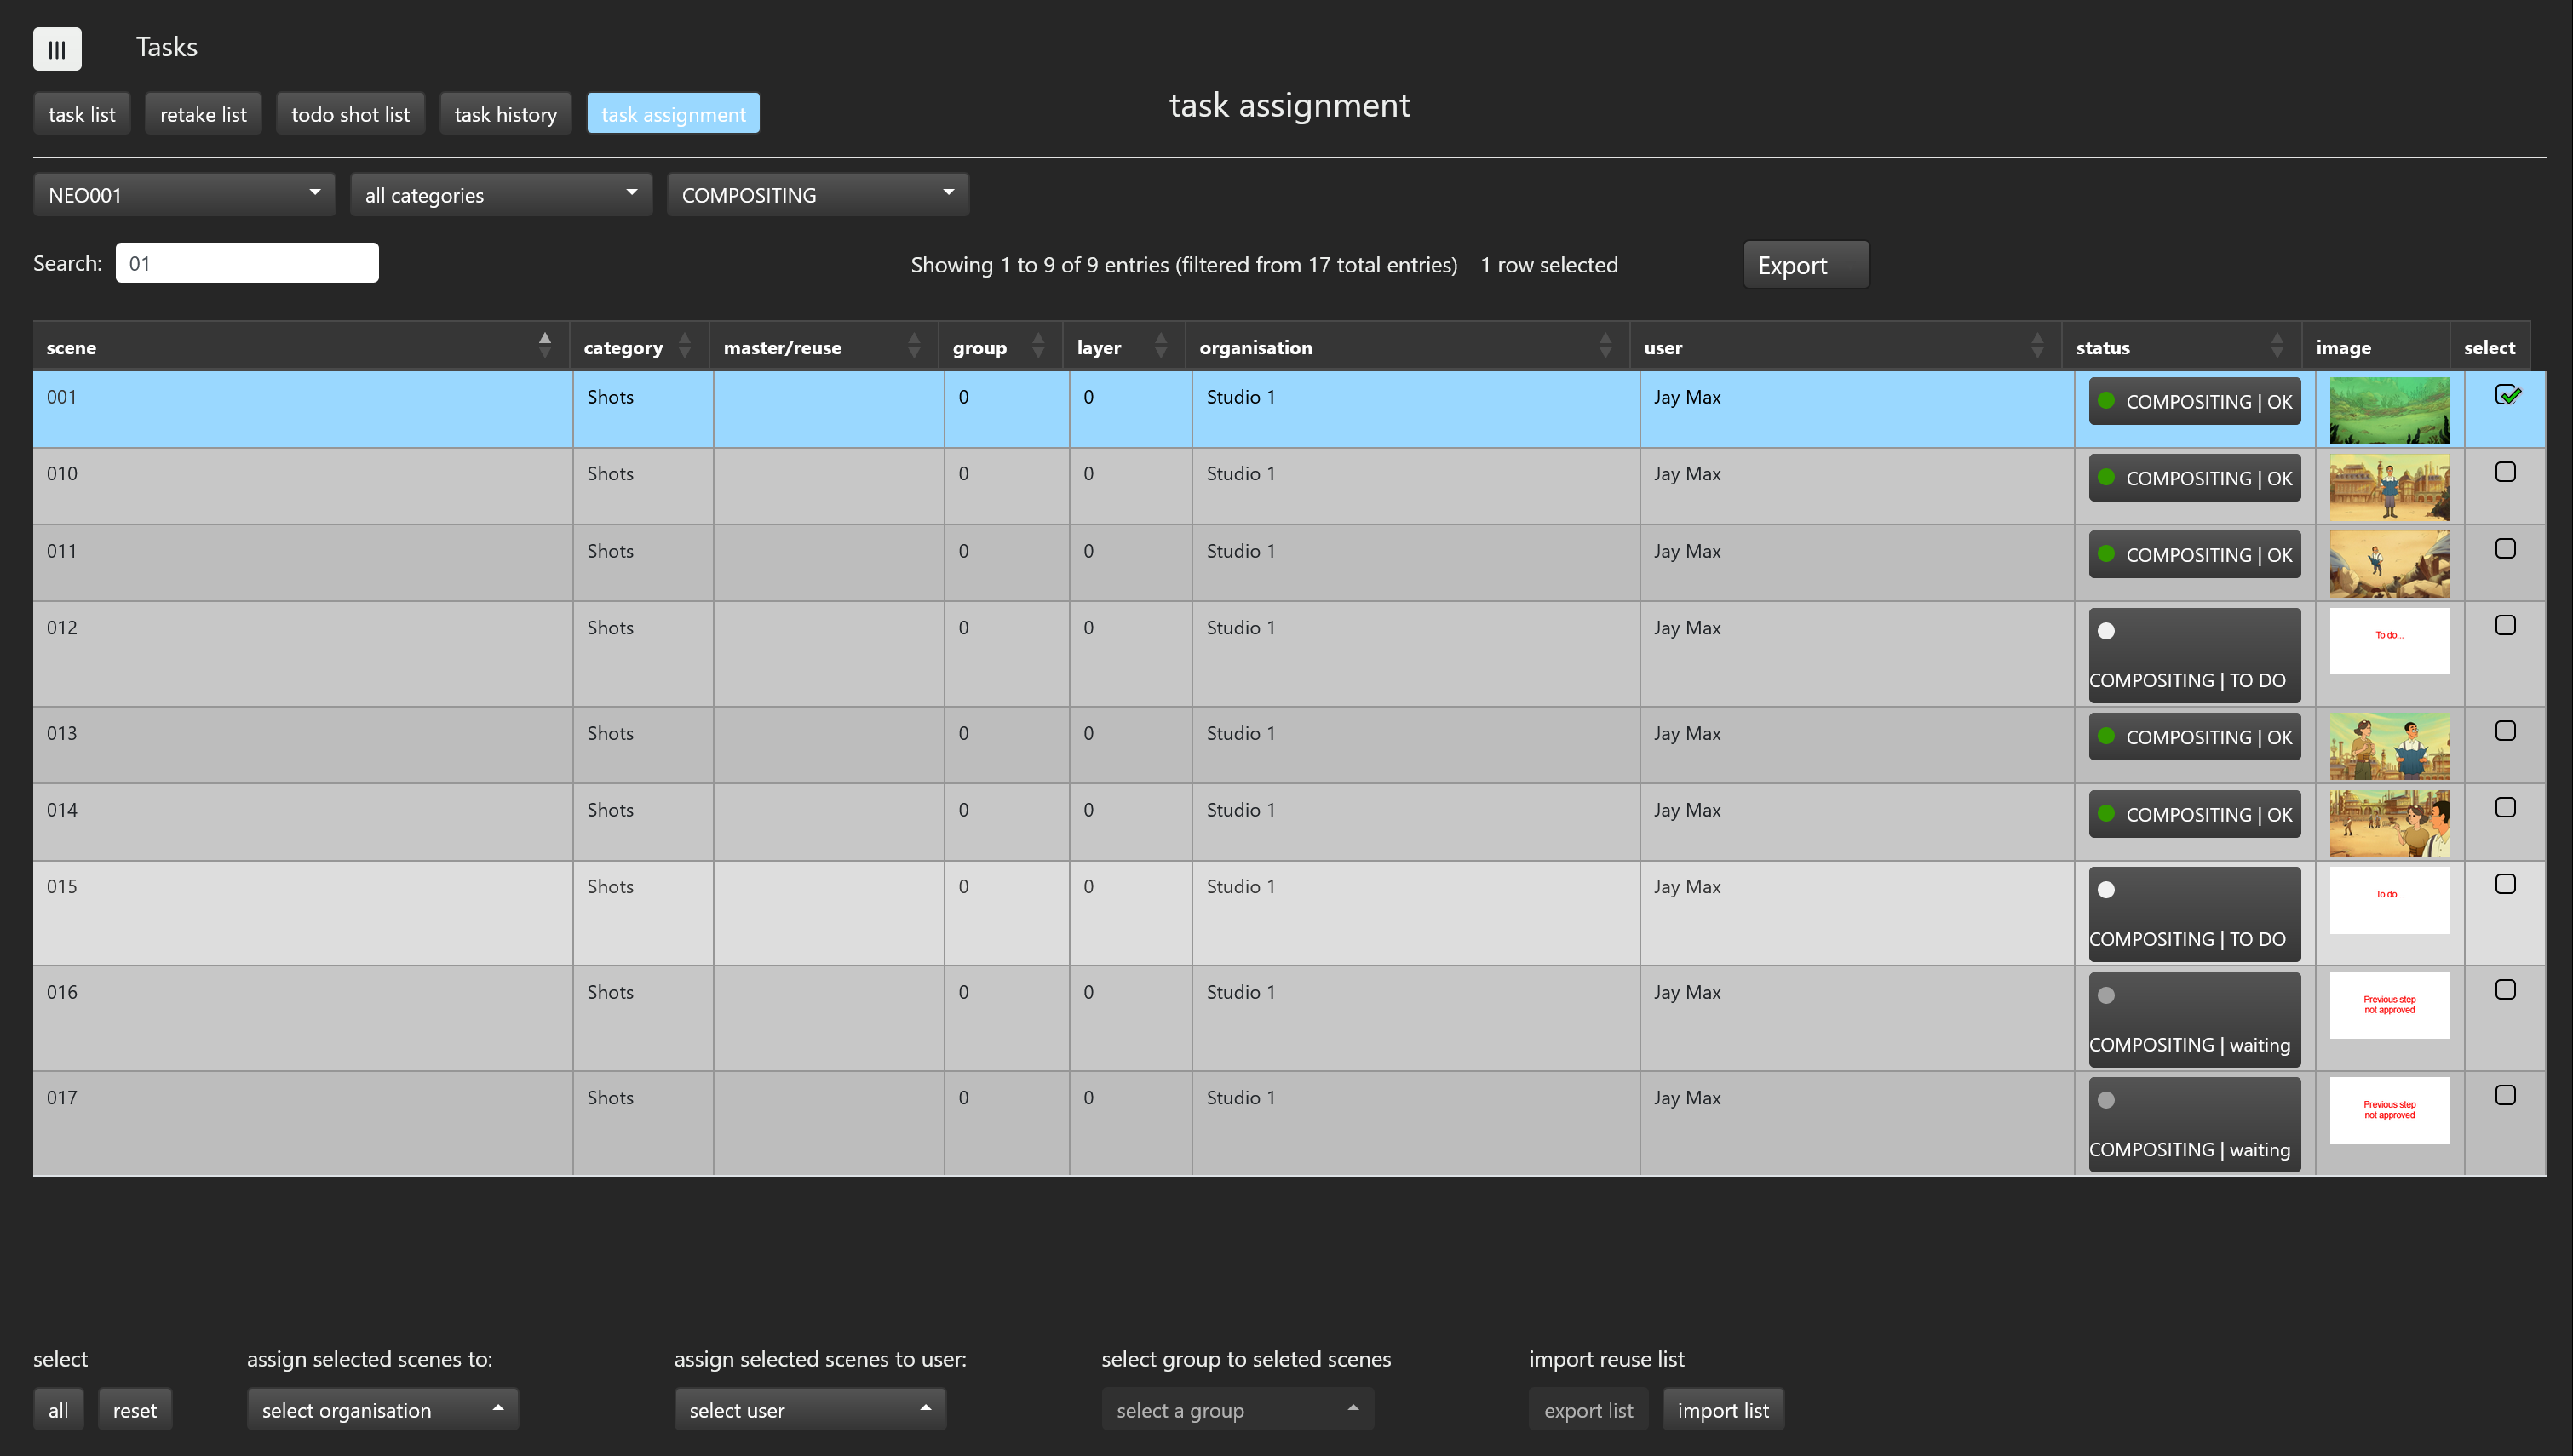
If for a selected set comprised of an element, an episode and a step you choose an organisation, all members from this organisation will be able to deliver the asset or the episodic shot from this episode at this step. If you choose a user, only this user will be able to make this delivery.