# Workflows
This is where you can view, create, edit workflows and assign workflow to assets and episodic shots.
A workflow consists in a succession of steps an asset or an episodic shot will go through from its early creation to its final stage. Once a step has been completed and approved, we can then move on to the next step(s) until we reach the final stage. In a very simple example, an episodic shot will start with the animatic step, then move on to the layout step followed by the animation step and then finish with the compositing step. Workflow is a key notion in SPI since it basically tells how an asset or an episodic shot will be built.
Directed acyclic graphs (DAG) are used to model workflows in SPI. A DAG consists of a set of vertices or nodes and a set of oriented edges with each edge directed from one node to another, such that following those directions will never form a closed loop. The modelling of workflows trough DAG is especially suited to represent the building of shots and assets in the field of animation and allows SPI to cope with most audiovisual production pipelines. Below is a simple example of a workflow modelled trough a DAG.
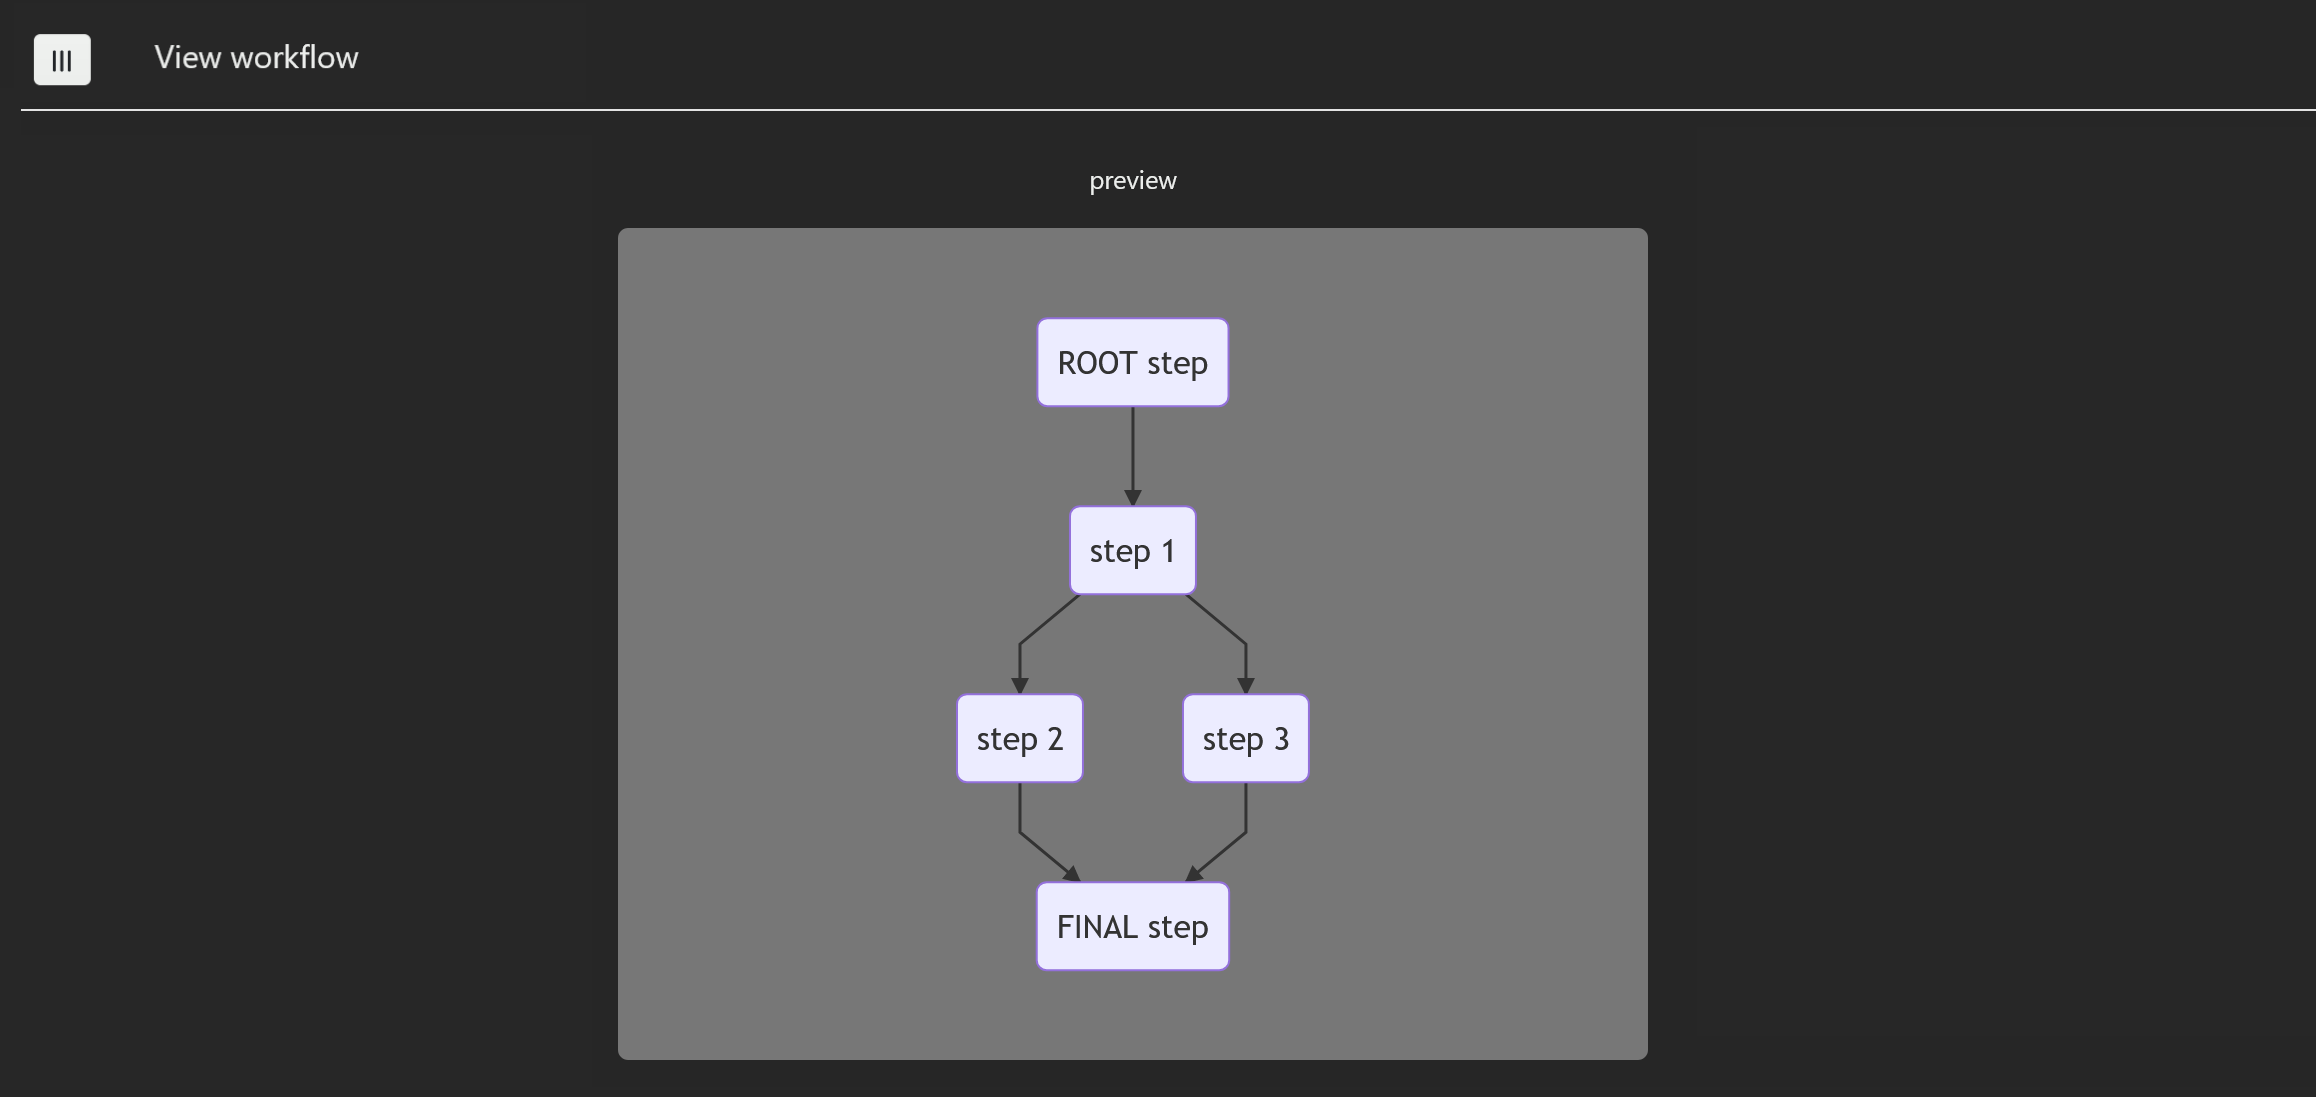
Let's see how we can proceed to build a so called DAG that will represent our fabrication process.
# Workflow creation
If you have not created any workflows yet, you will see that two workflows are displayed by default:
- a basic episodic shot workflow ( BASIC SHOT WF)
- a basic asset workflow ( BASIF ASSET WF)
Those two workflows cannot be edited nor deleted.

The workflow page is divided in three vertical columns:
- The left part of the page concerns workflow editing,
- the middle part displays a preview of the workflow
- the right part lists all the episodic shots workflows and the asset workflows.
WARNING
We make the following assumptions:
- Episodic workflows always start with the ANIMATIC step: ANIMATIC step is the ROOT step.
- Asset workflows always start with the ASSET CREATION step: ASSET CREATION step is the ROOT step.
Now, let's see how we are going to create an asset workflow which will cope with the following 3d character pipeline:
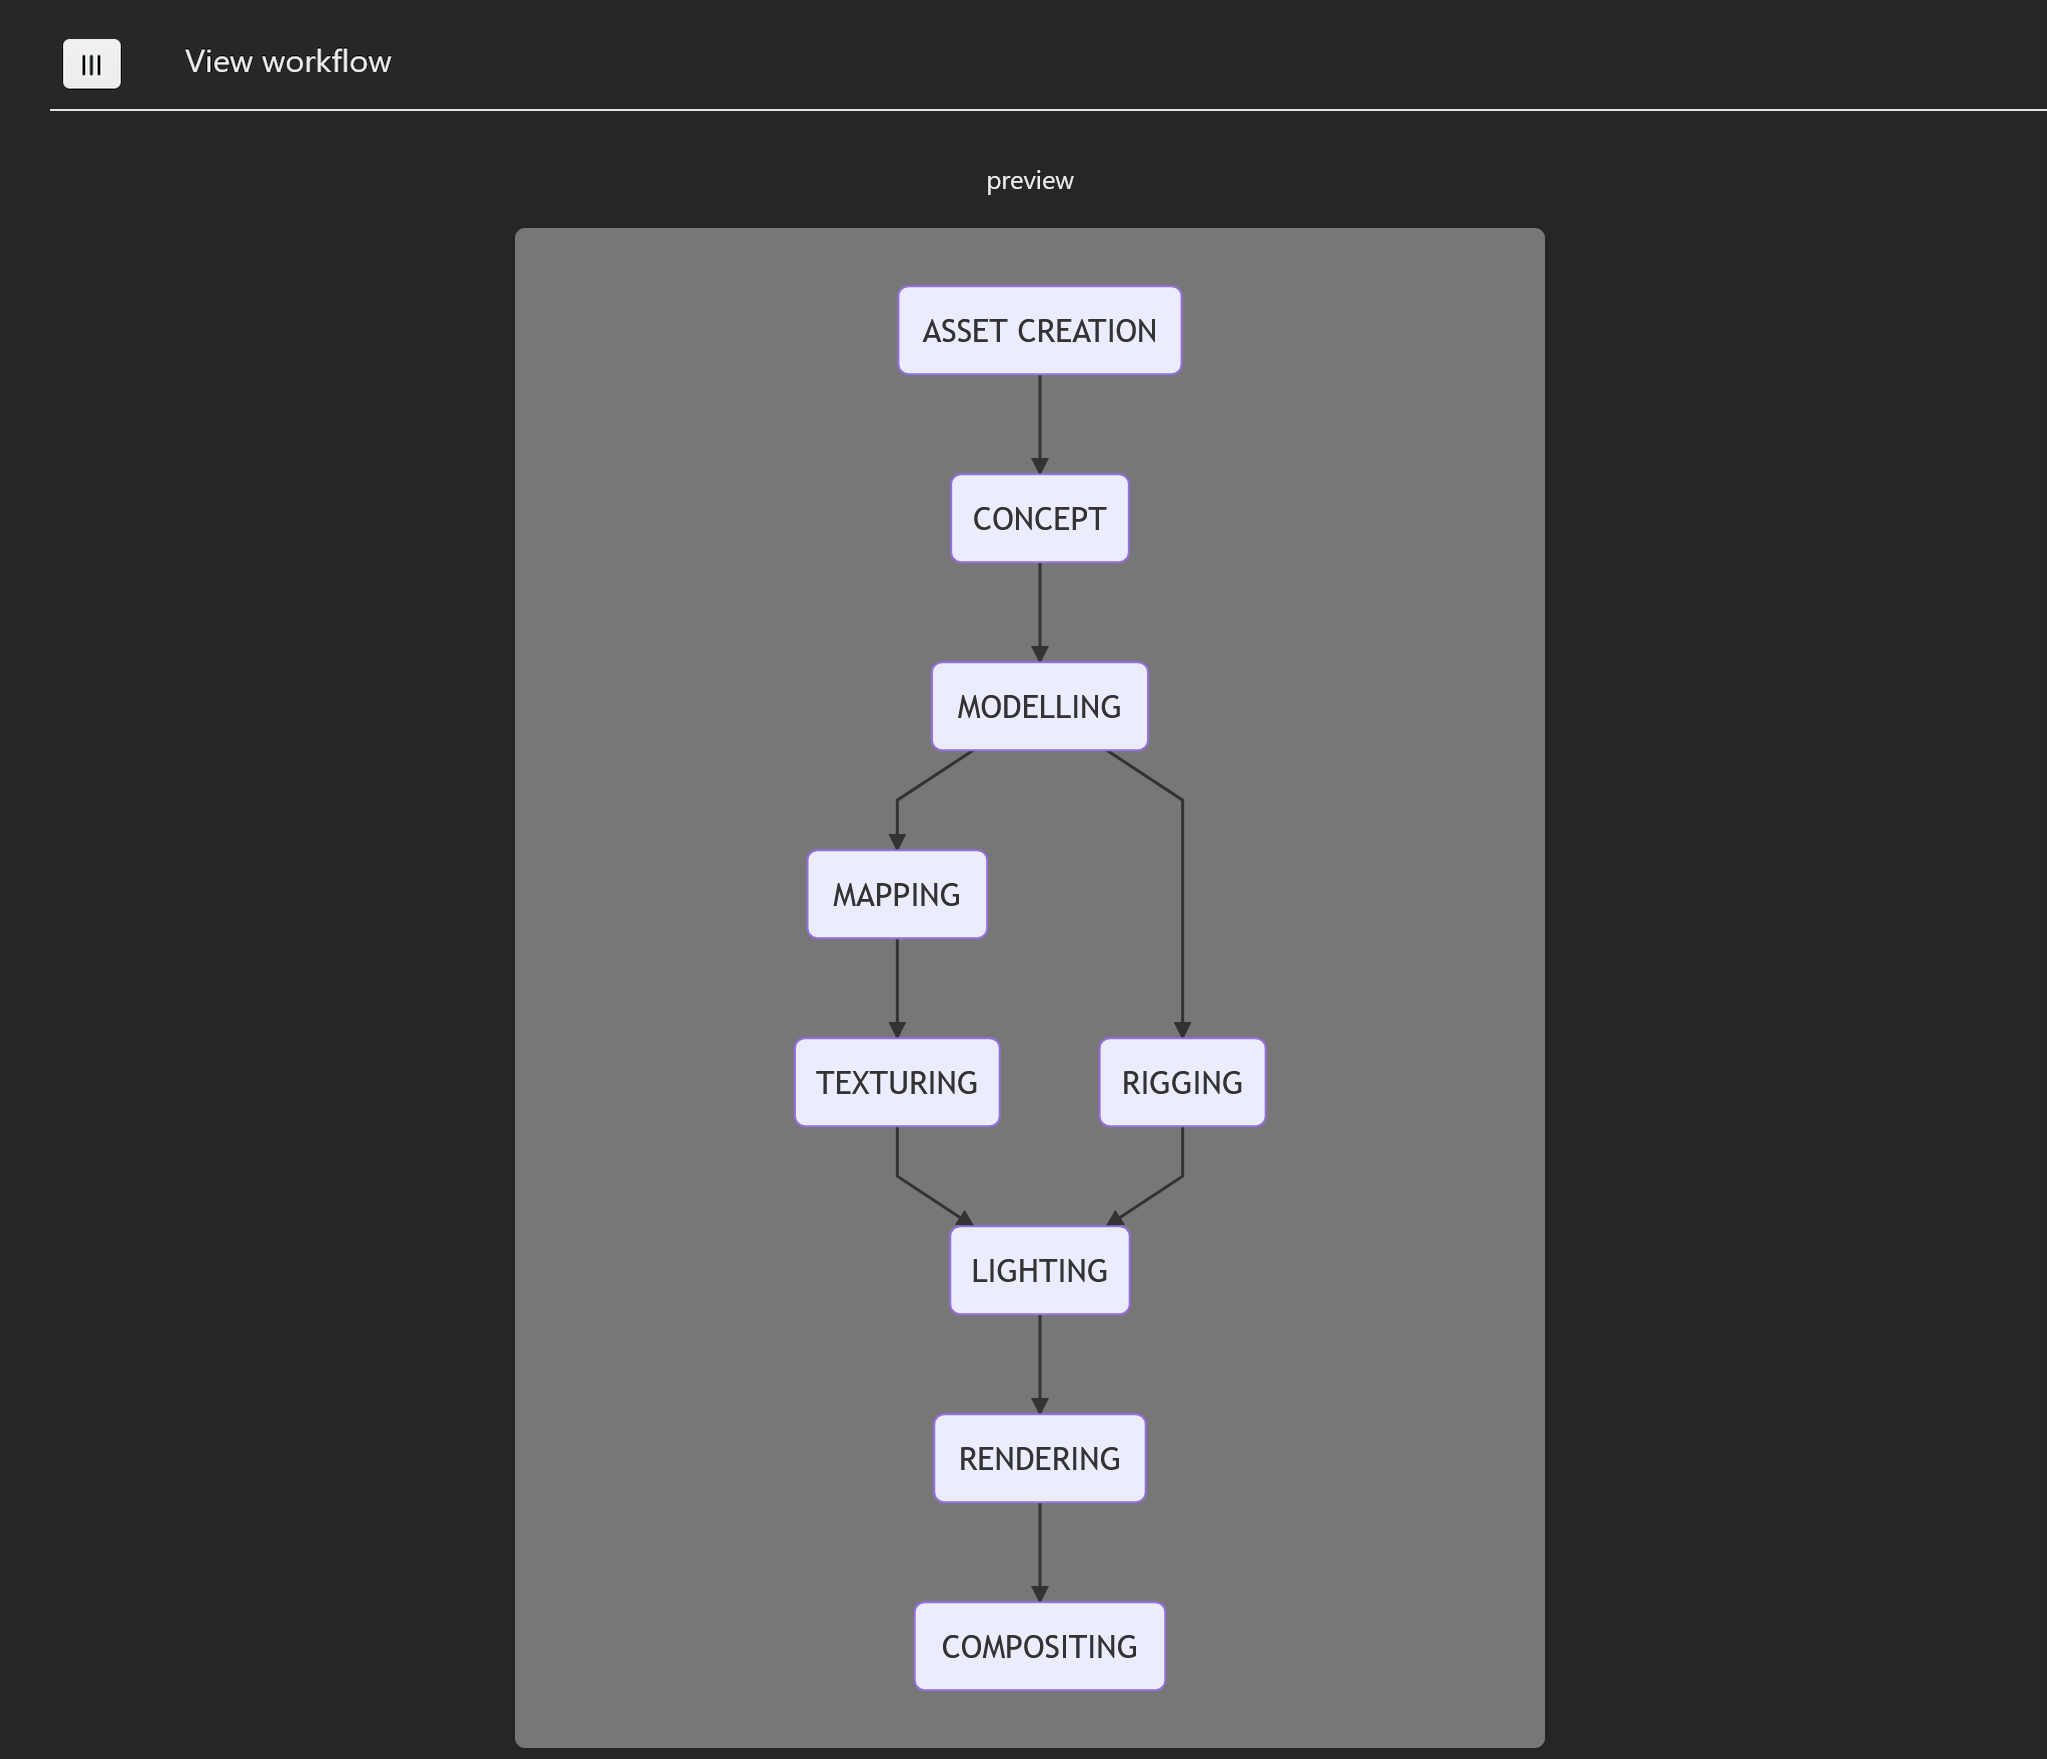
To do that, let's click on the reset button to start with a basic workflow then create the first dependency by selecting the appropriate steps on the first row
of the workflow editing view. In our case we want CONCEPT depends on ASSET CREATION. The preview button will display the work in progress:
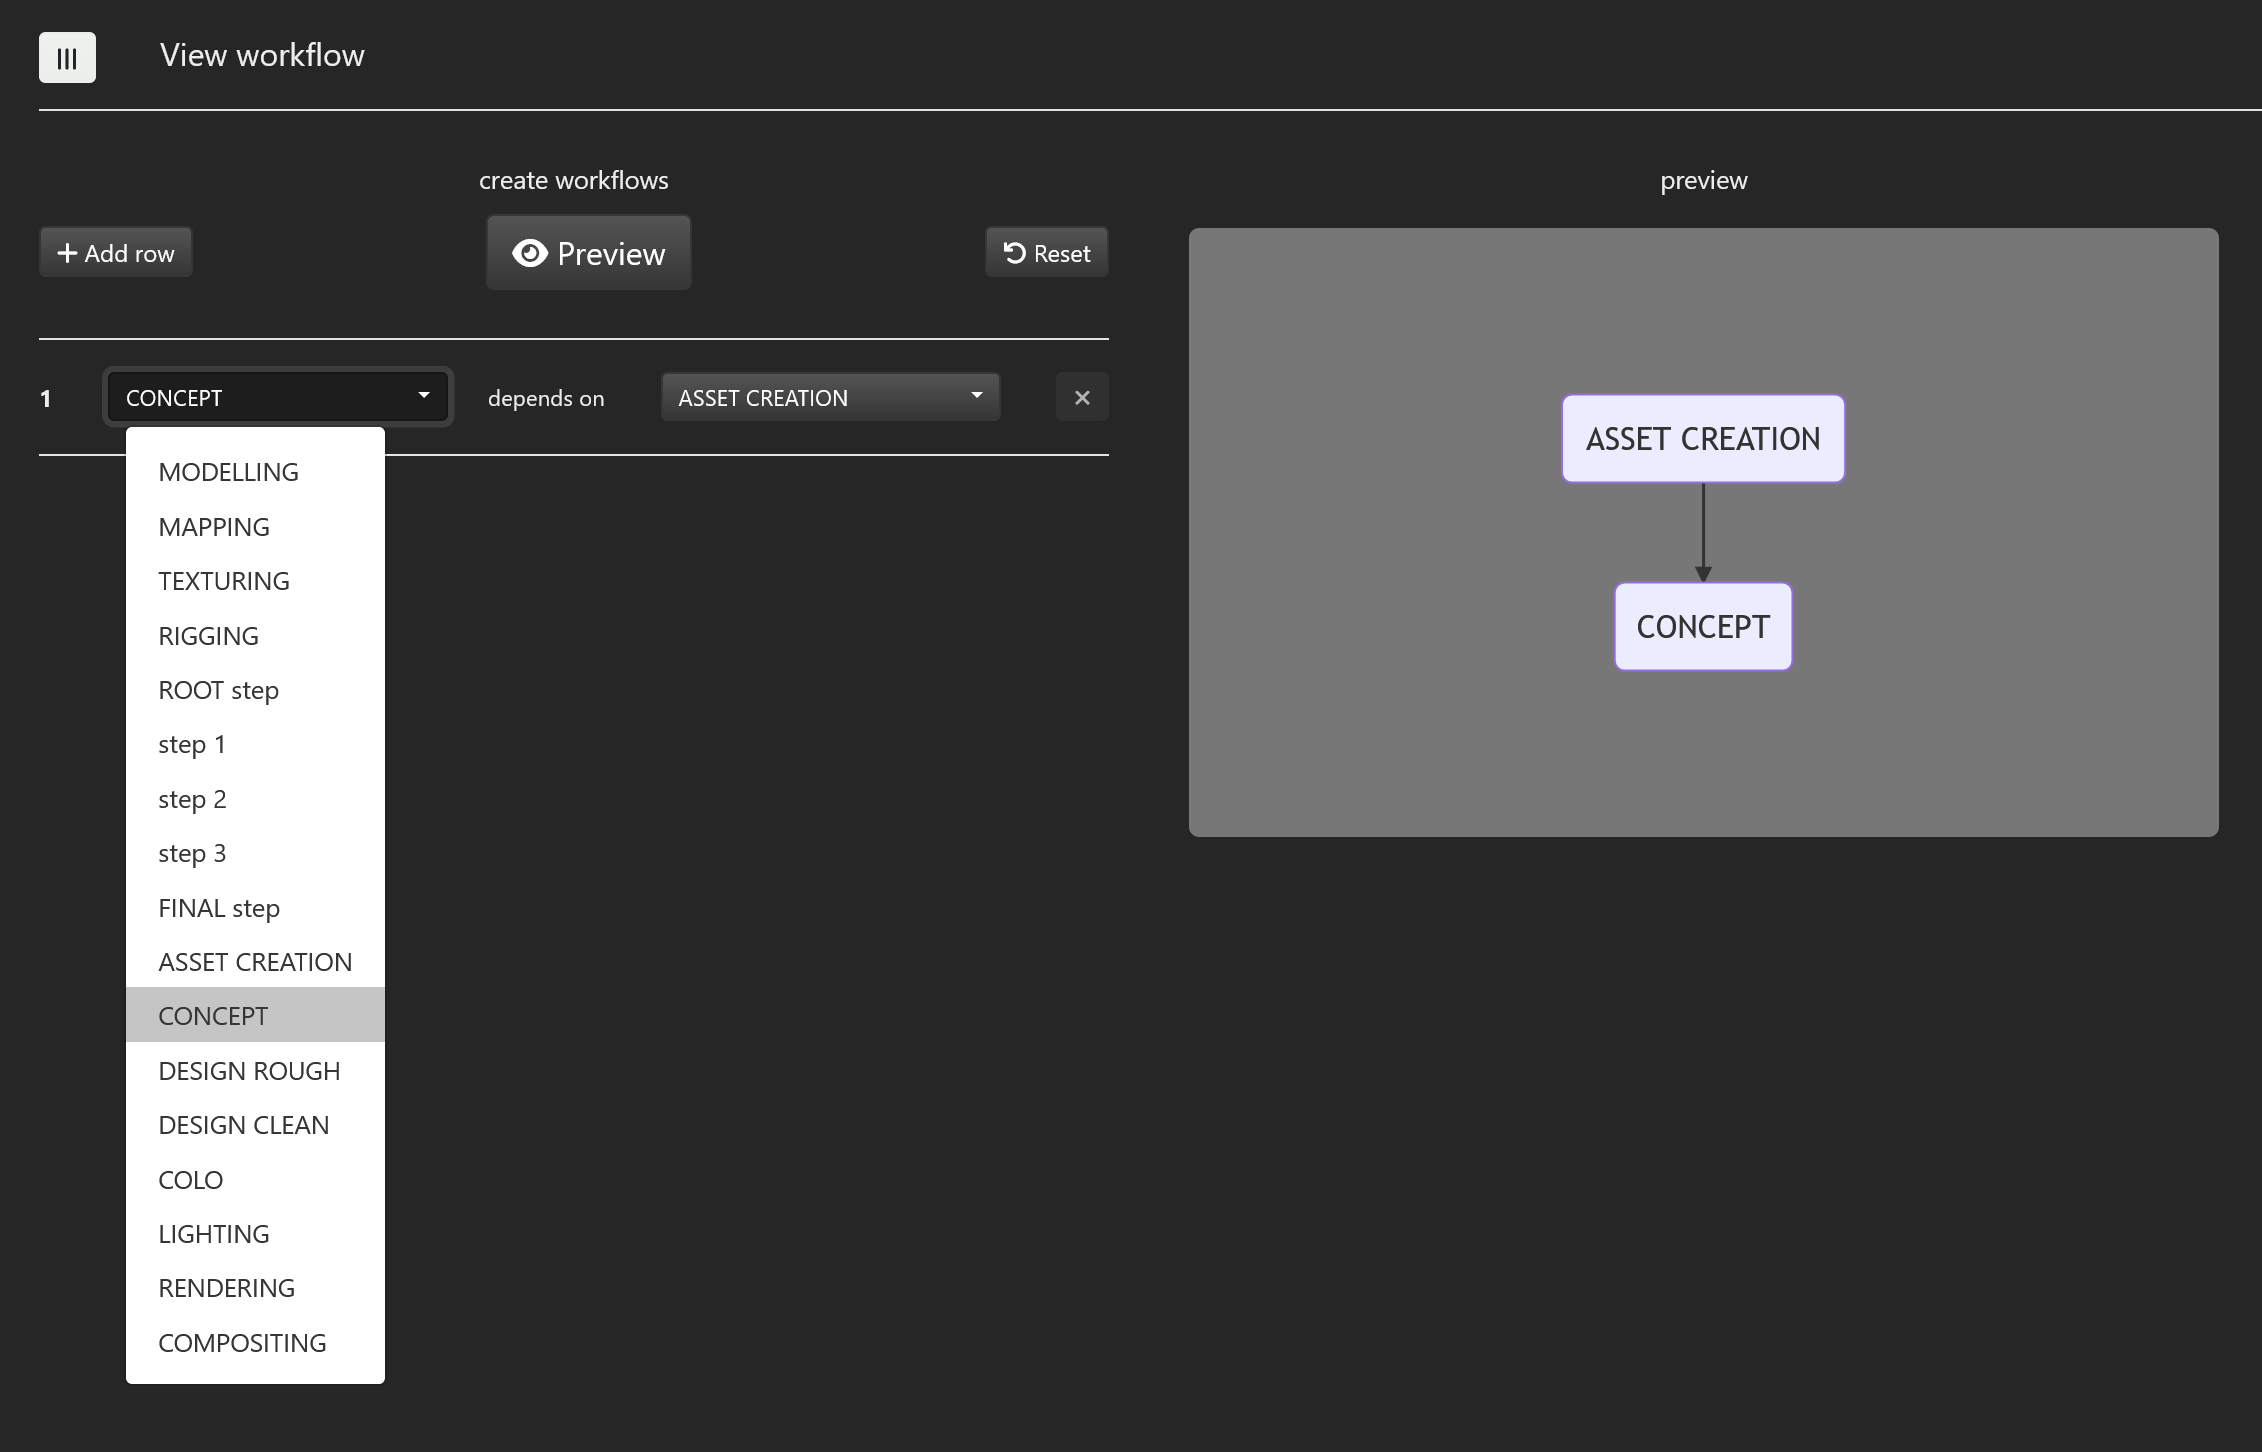
You then click on the +Add row button and fill each new row according to what you want. You will just specify that:
- MODELLING depends on CONCEPT
- RIGGING depends on MODELLING
- etc.
- COMPOSITING depends on RENDERING
You can hit the Preview button at any time to view your workflow. For each row but the first one, the X button allows you to delete the row.
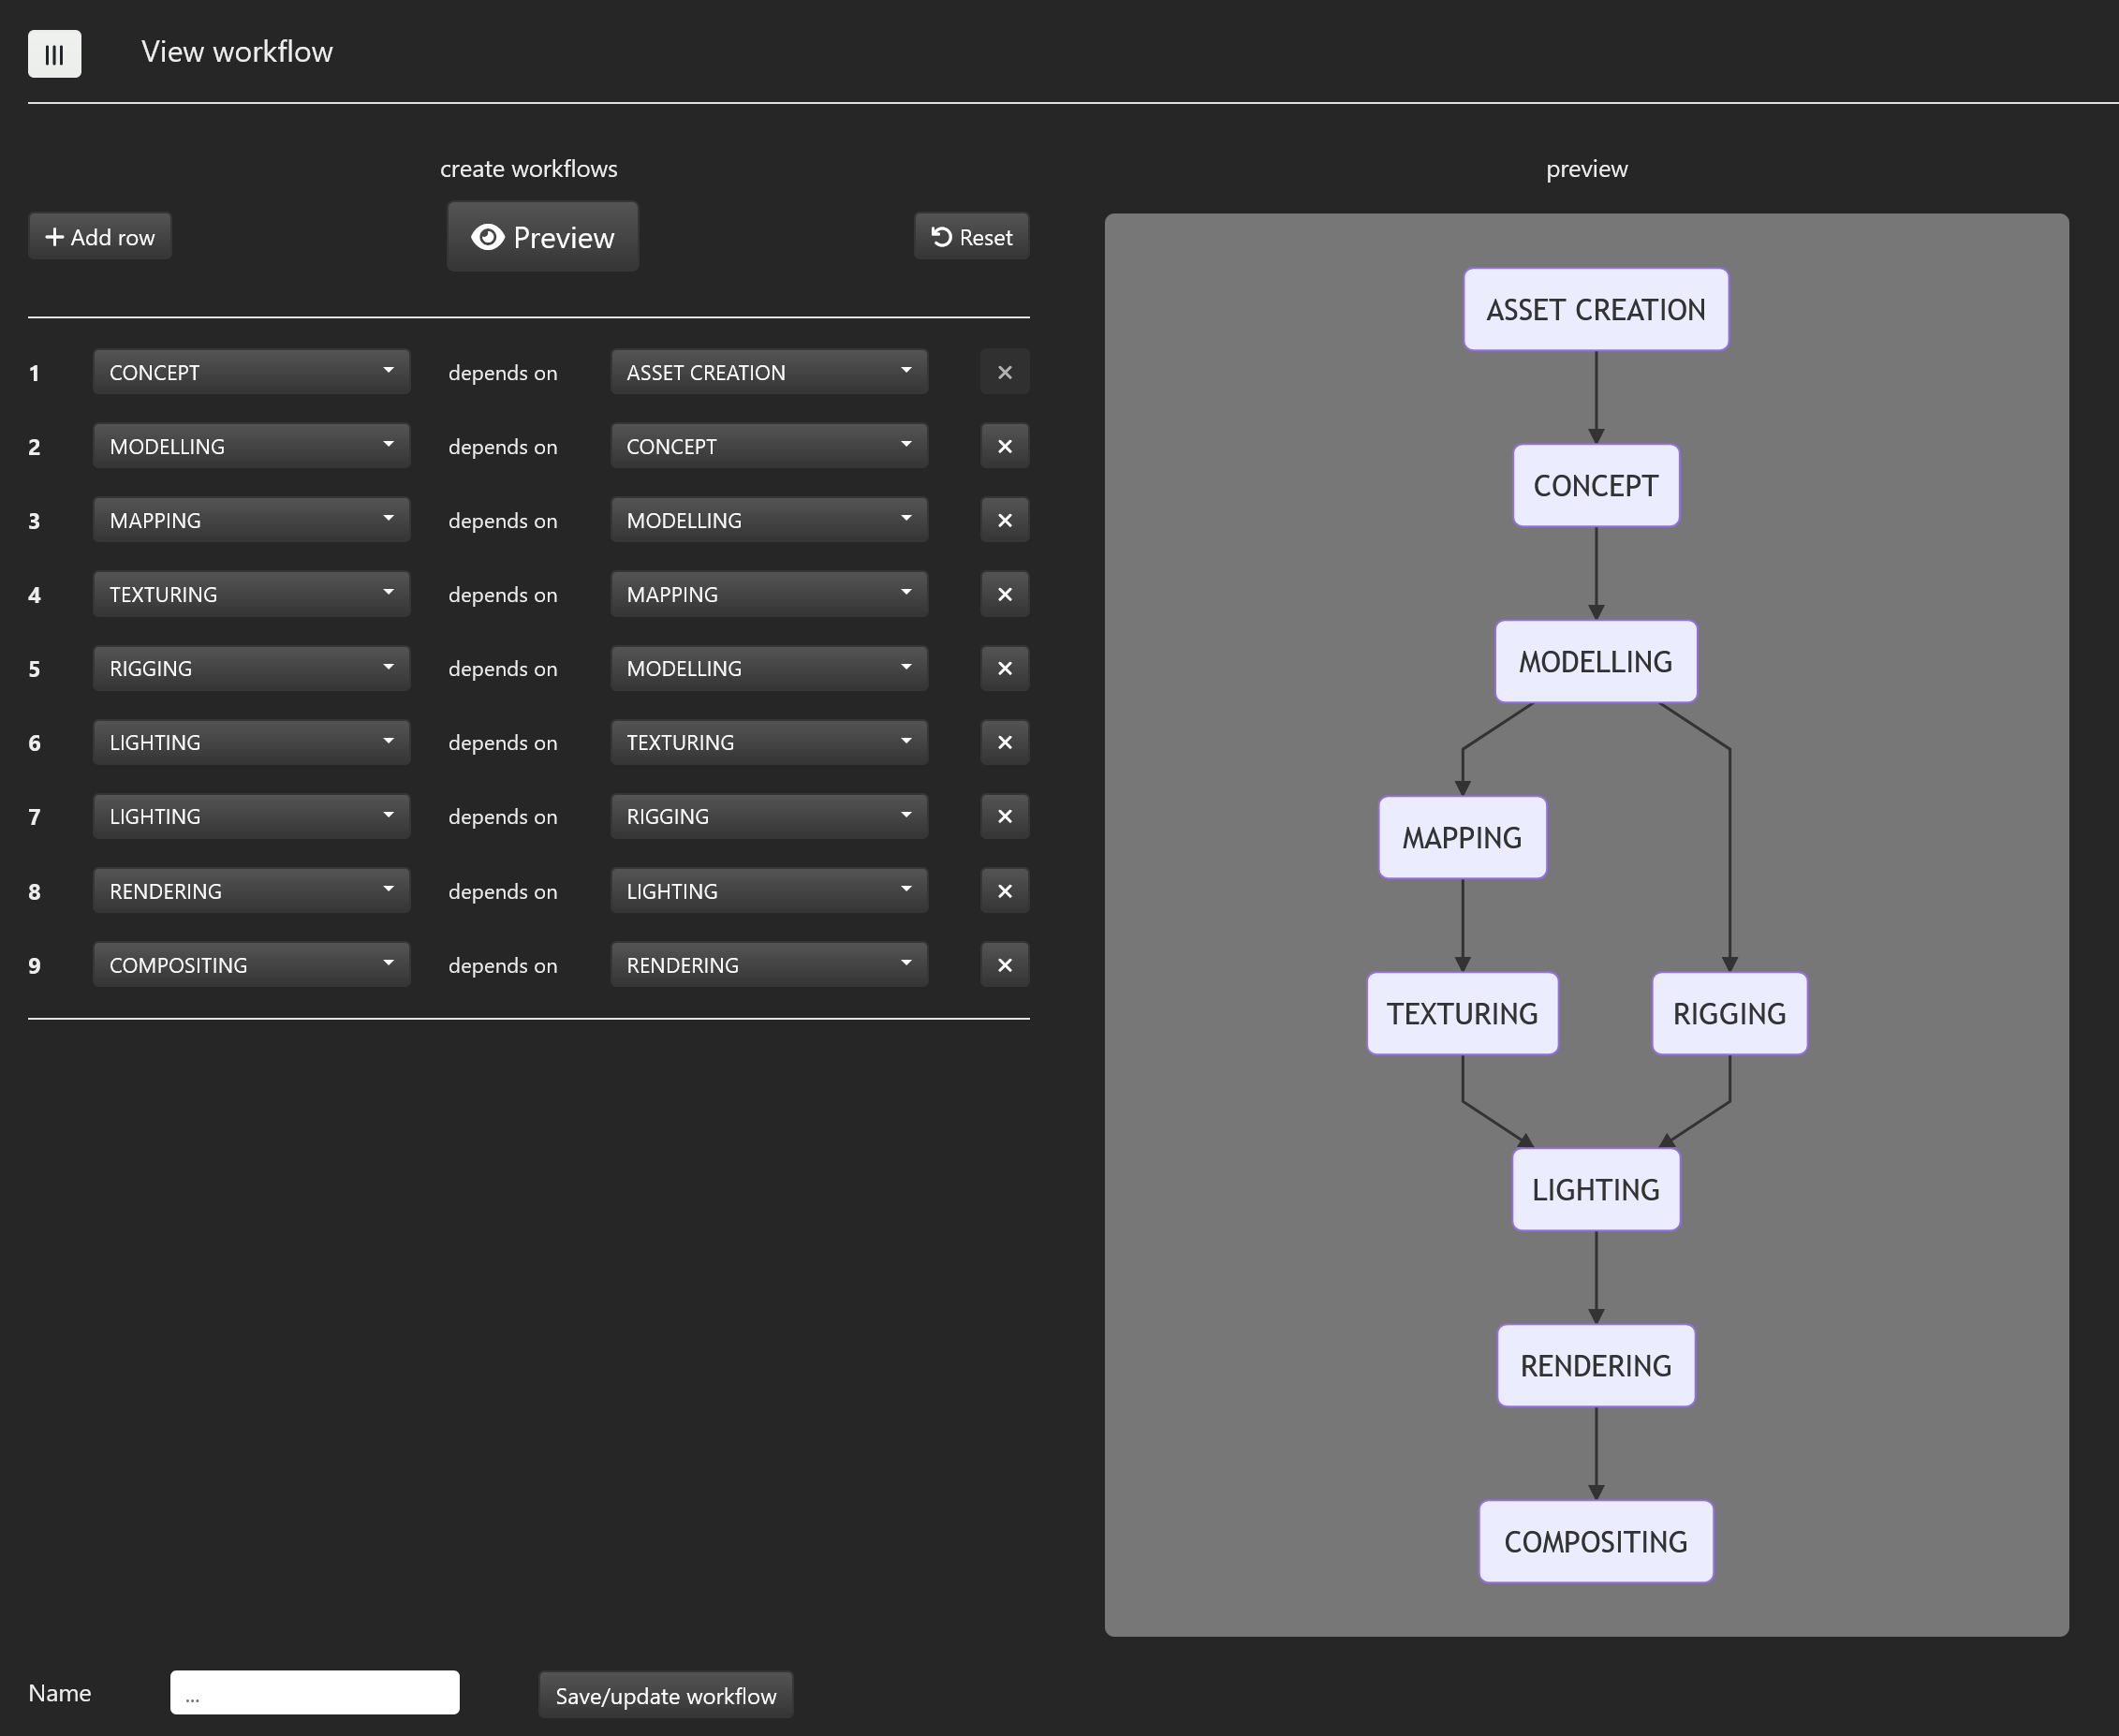
Once you obtained your desired workflow, you can fill the workflow name field then enter and it will create a workflow with the name you just entered. Let's enter 3D CHARACTER WF in the workflow field name then enter:
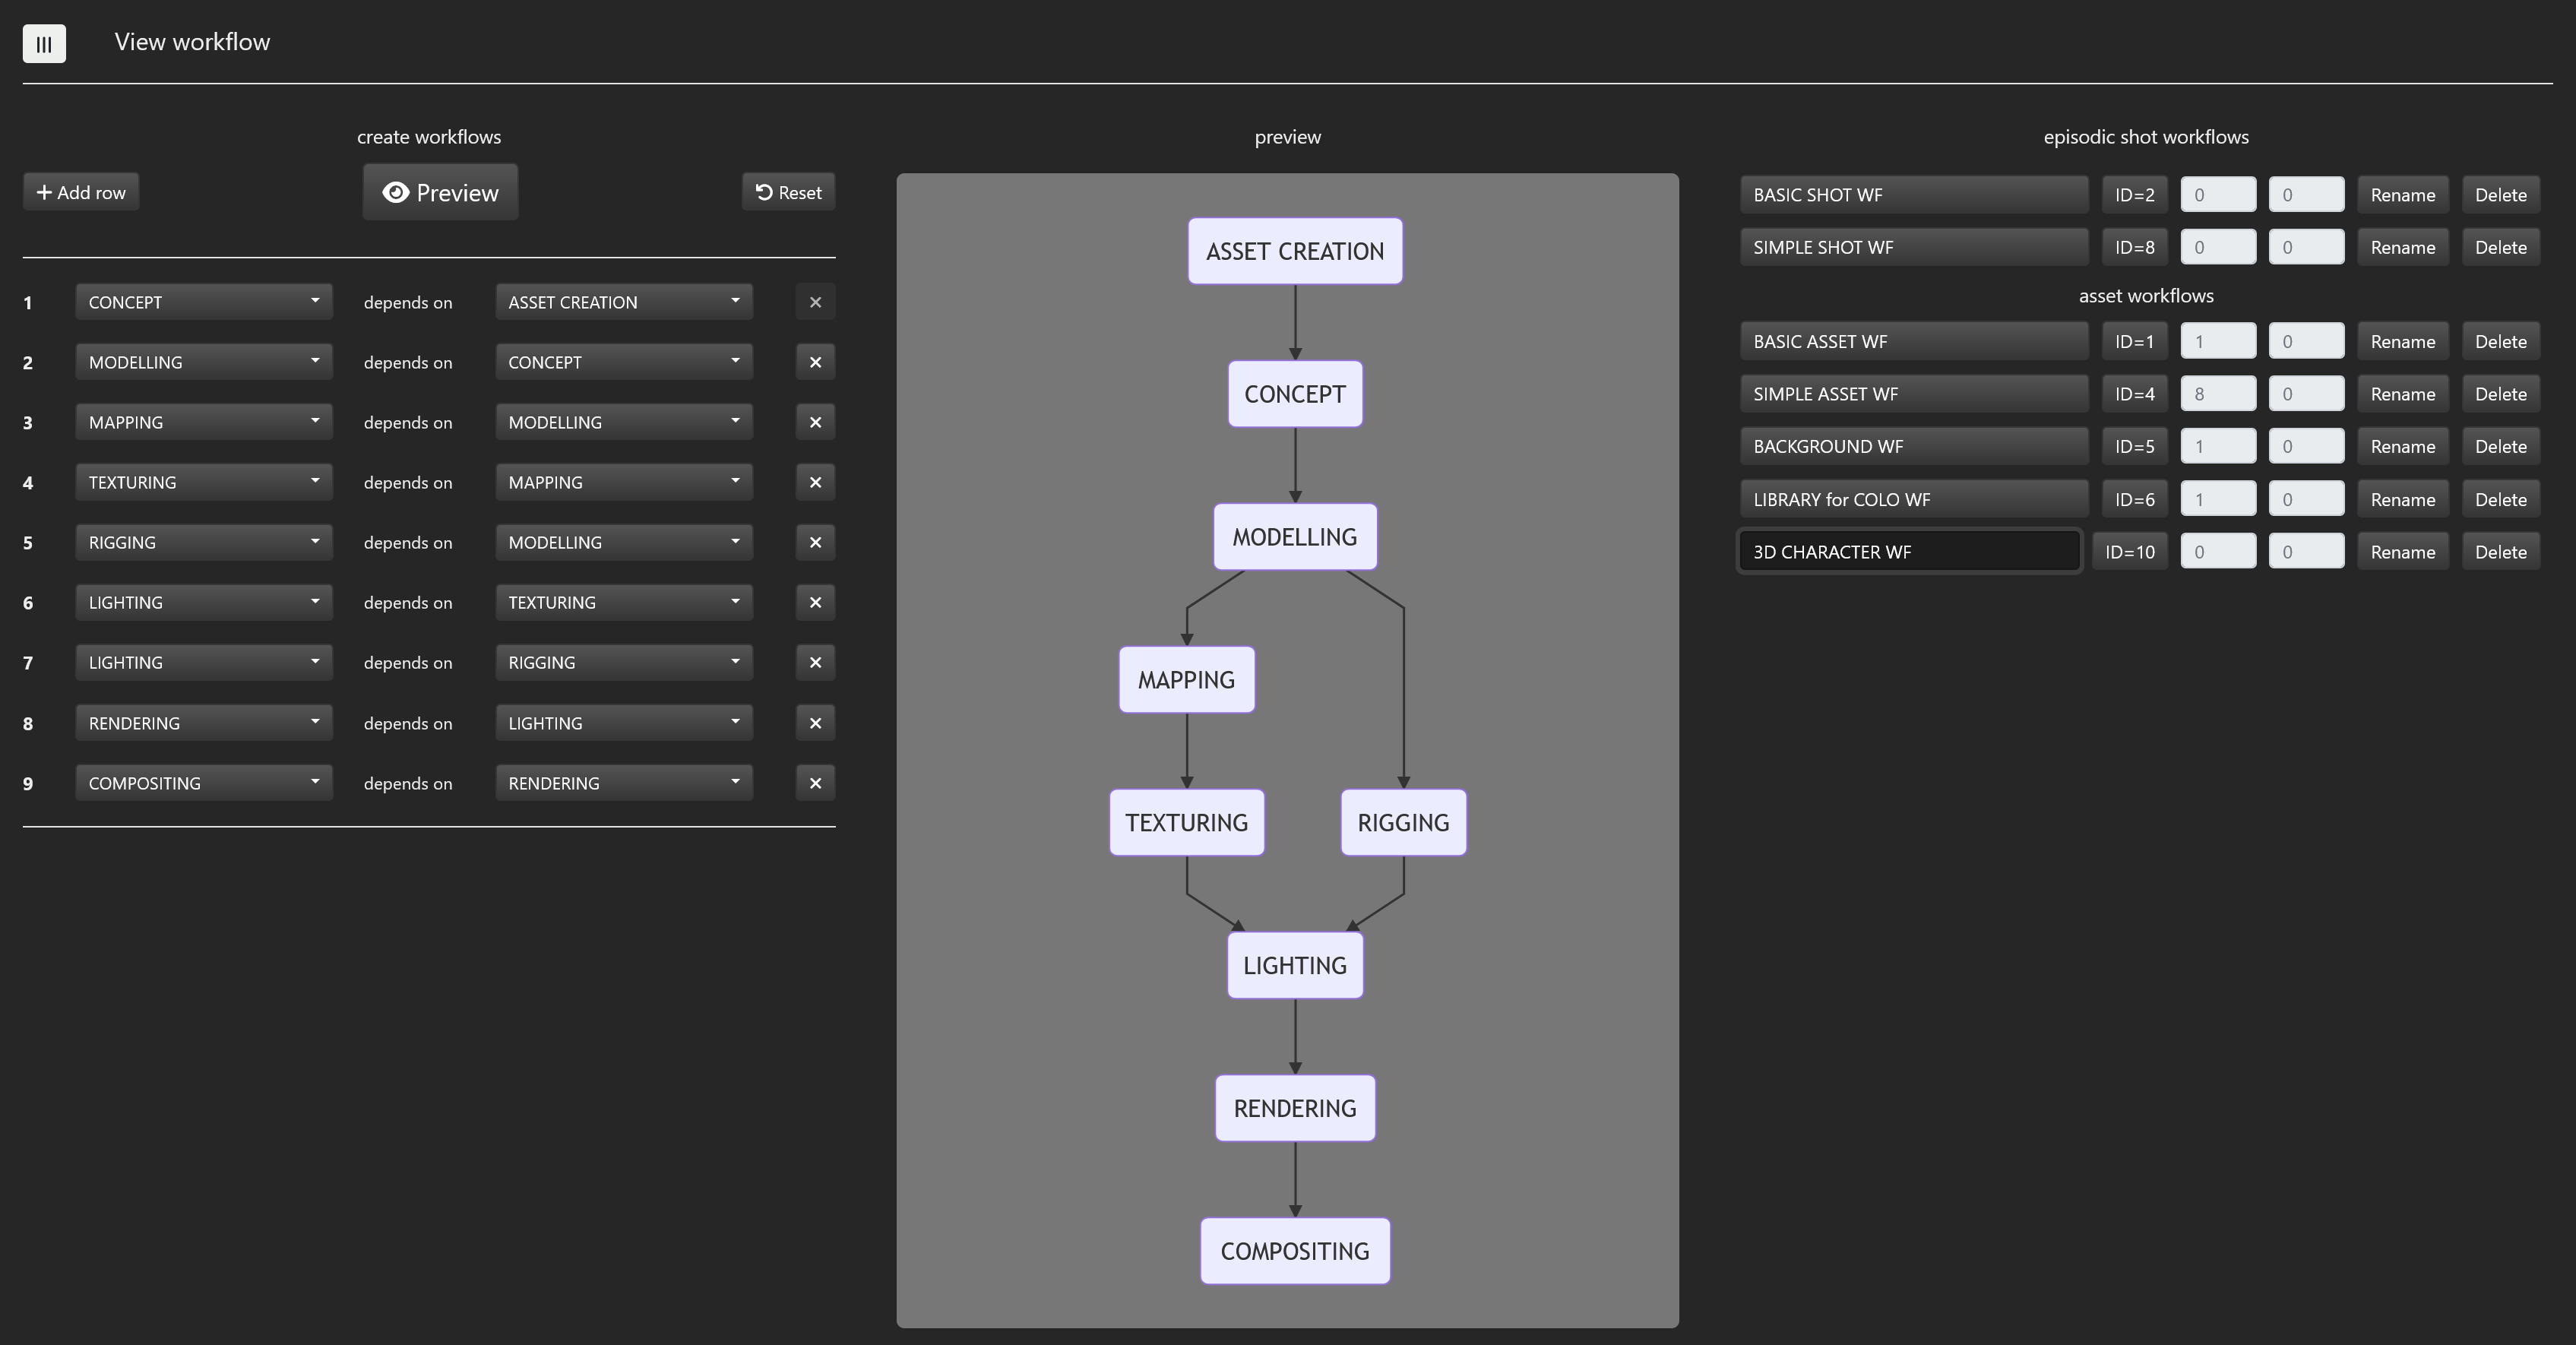
You have just created a new workflow named 3D CHARACTER WF.
# Workflow assignment
This is where you can assign workflow to several episodic shots and assets from a single episode at once. The very first thing to do is to select the episode for which you want to assign workflows. The list of all assets and episodic shots from the selected episode will be displayed. In the following example, WH099 was selected:
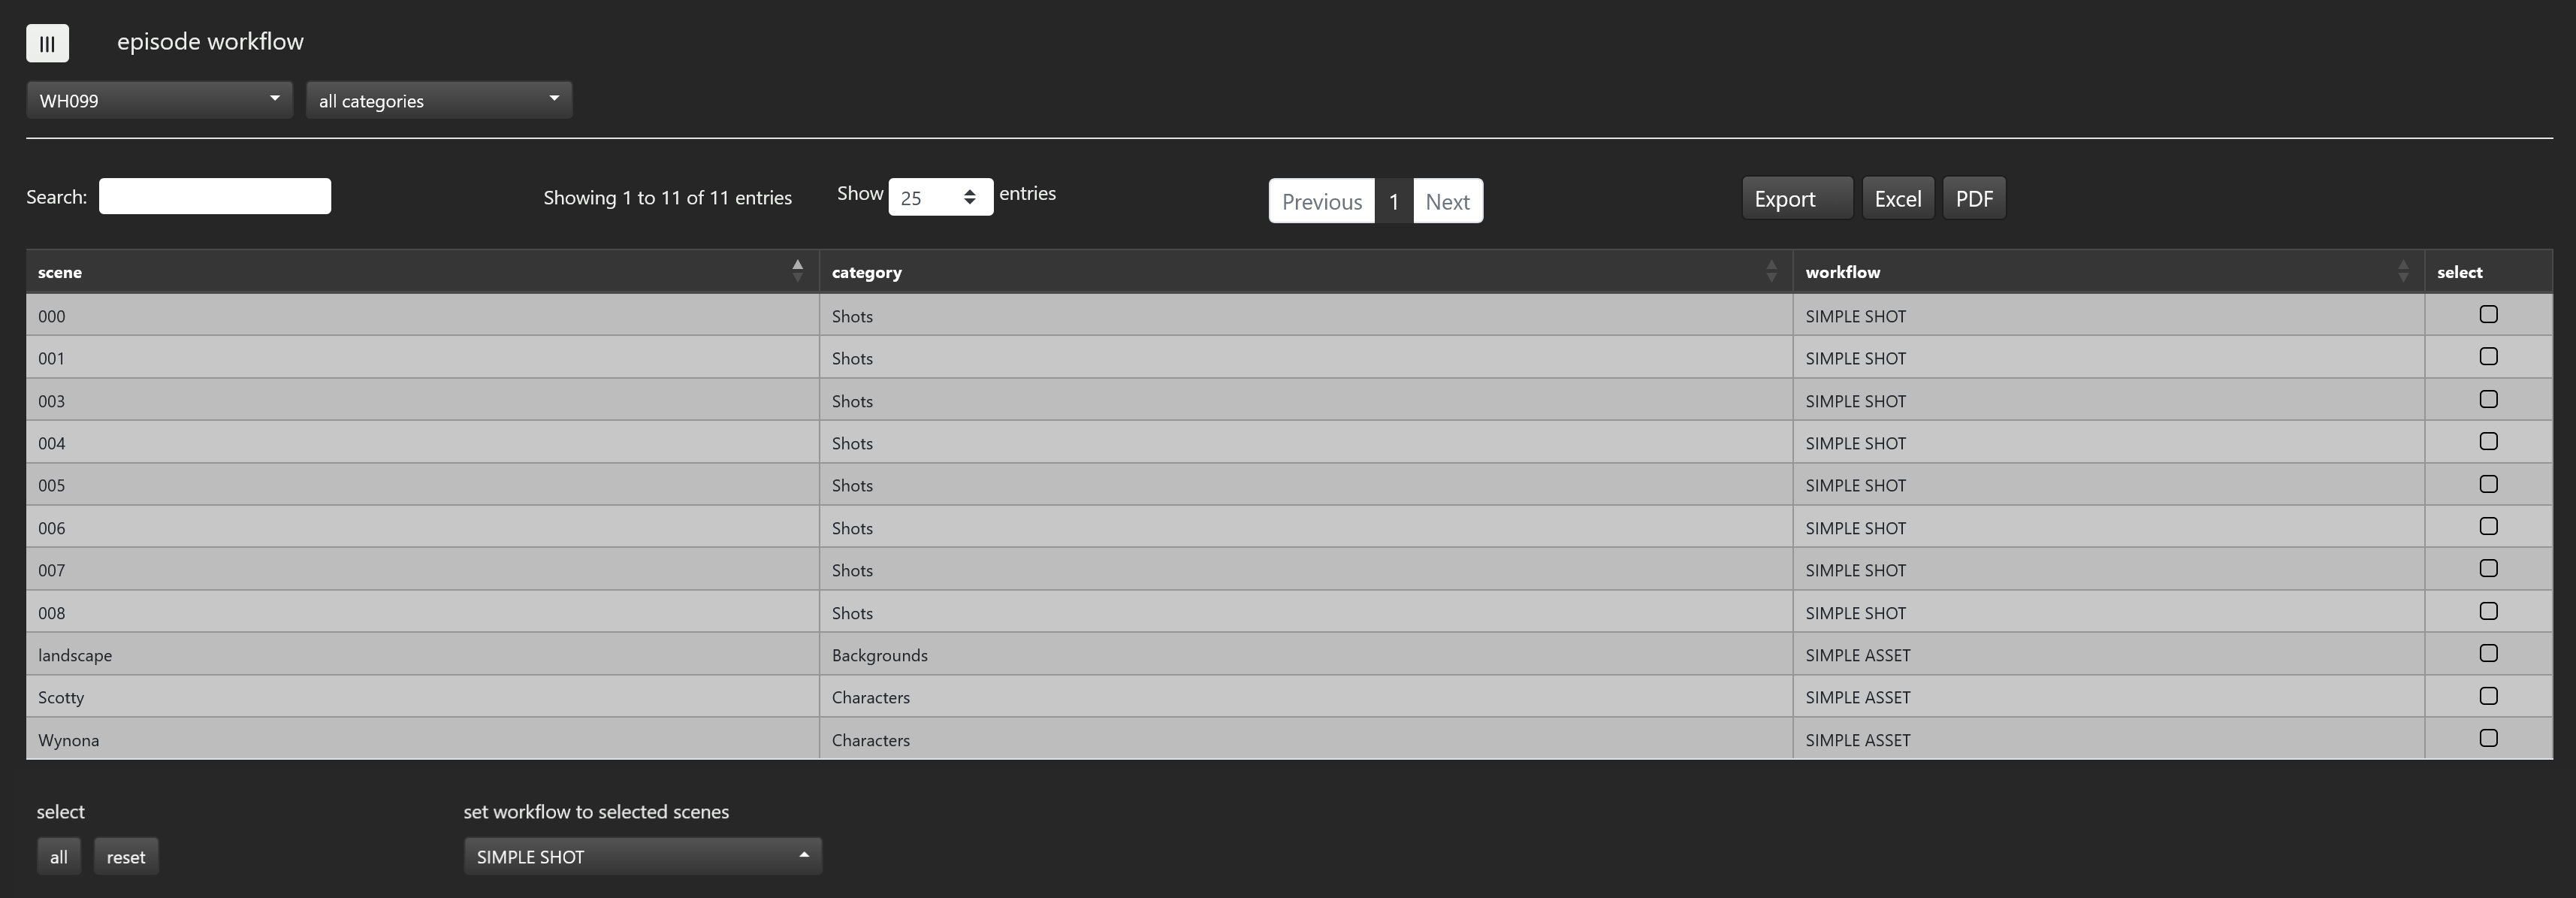
You then can select from this list the elements for which you want to assign a workflow. The workflow you selected from the workflow download menu will be applied to the selected elements upon confirmation. We did the following operations in the previous example:
- select all the episodic shots
- select the workflow called SCENE WF
- confirm
- select all the assets
- select the workflow called ASSET WF
- confirm
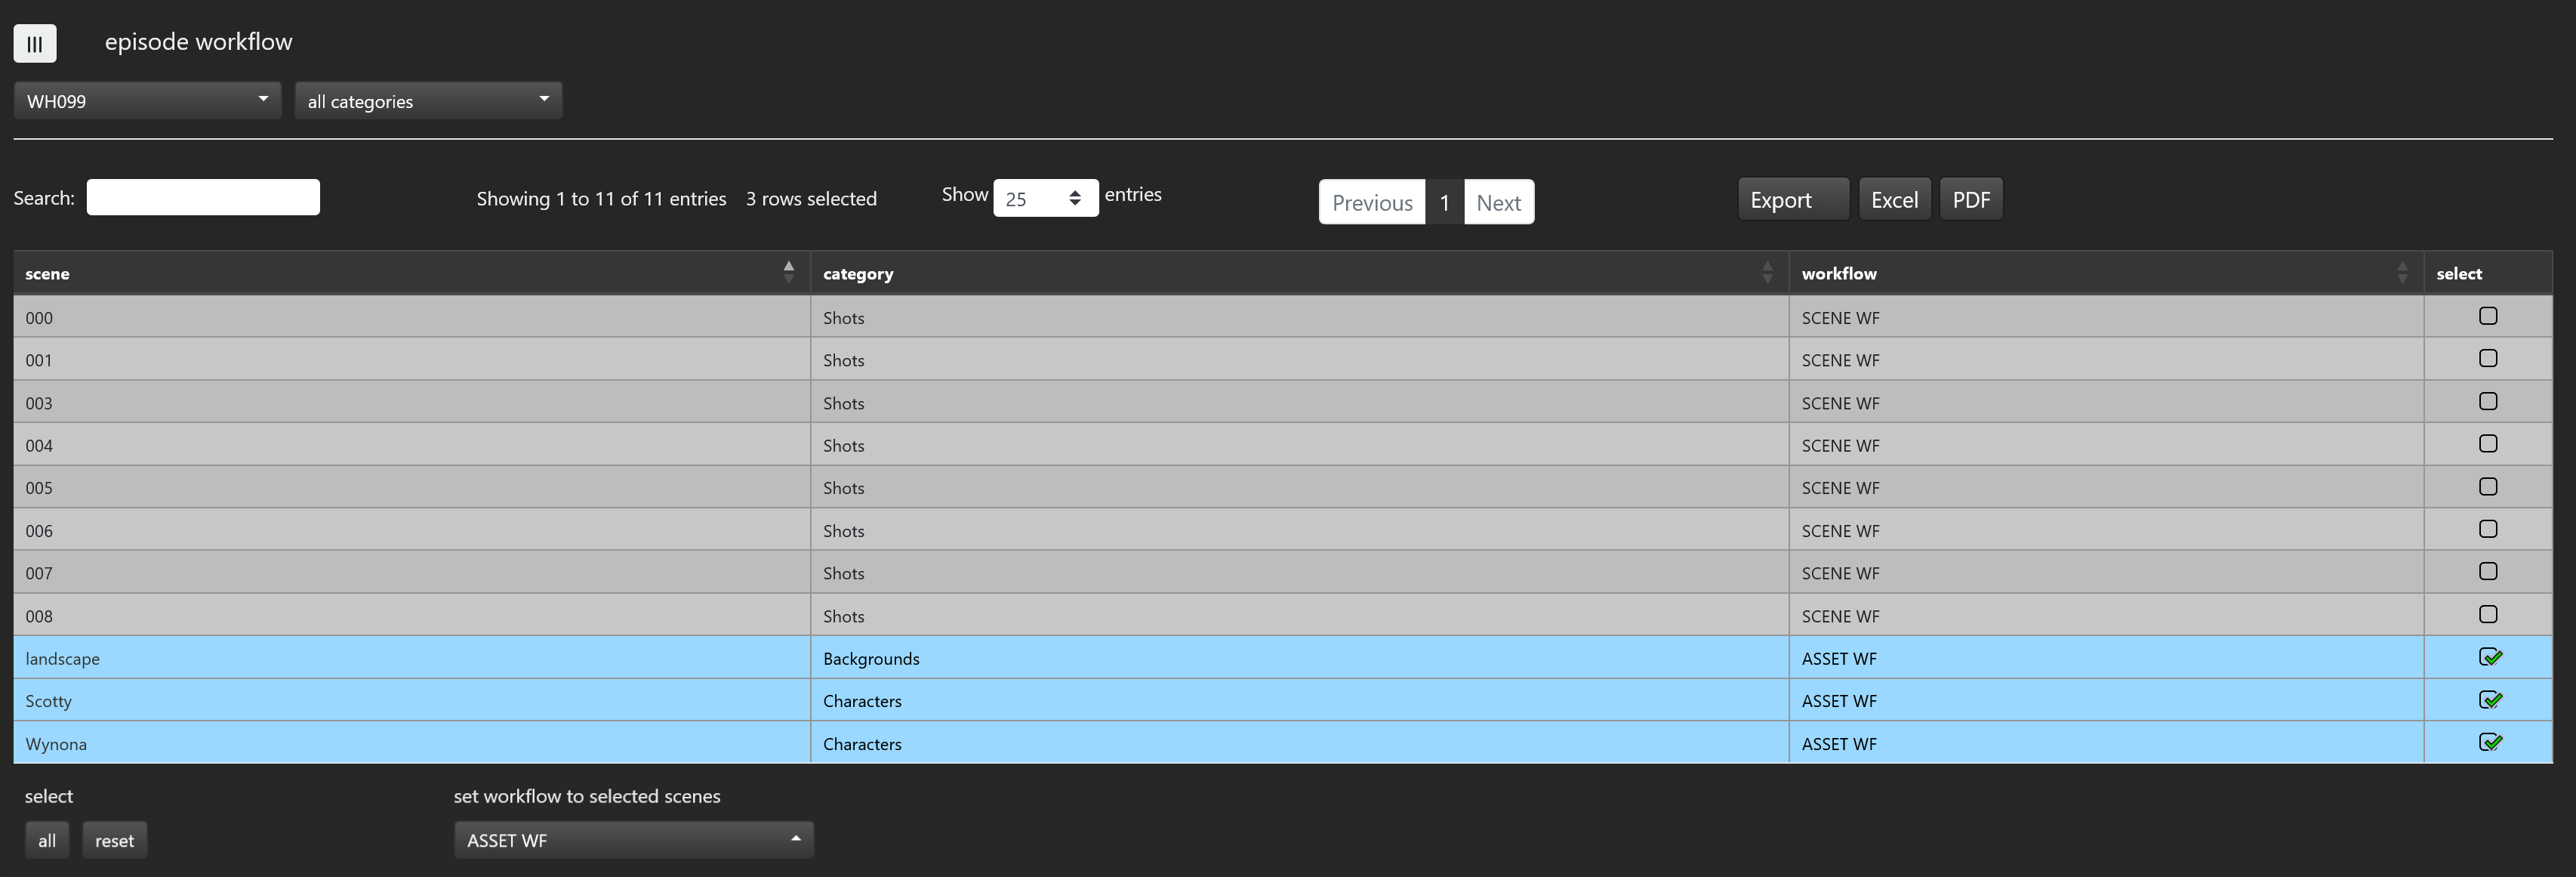
We just assigned worklflow SCENE WF to all WH099 episodic shots and worklflow ASSET WF to all WH099 assets.
You also can assign a workflow to a single asset or episodic shot in the scene workflow page.
← Tasks Scene explorer →
